One of the most-used features of the Divi Theme Builder is adding a global header to your website, and then being able to override it with custom headers wherever you need. You can customize each and every page, post type, and visible area of your site to your needs. Sometimes, however, you might not need a header on specific pages, whether it’s global or custom. In this article, we’re going to walk you through some of the ways that you can hide your header on those specific pages by using the Divi Theme Builder so that your site can be exactly what you need at all times and in all places. Let’s dig in.
How to Hide Your Header on Specific Pages
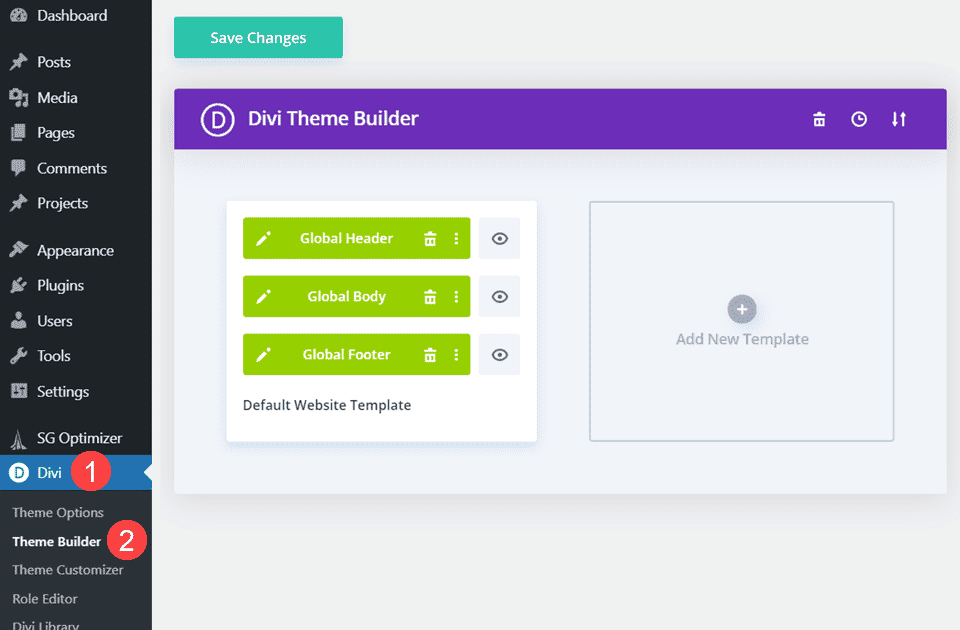
First thing, you’re going to need to head to the Divi Theme Builder. In your WordPress admin dashboard, find the Divi entry and enter the Theme Builder subsection.
Create a Global Header
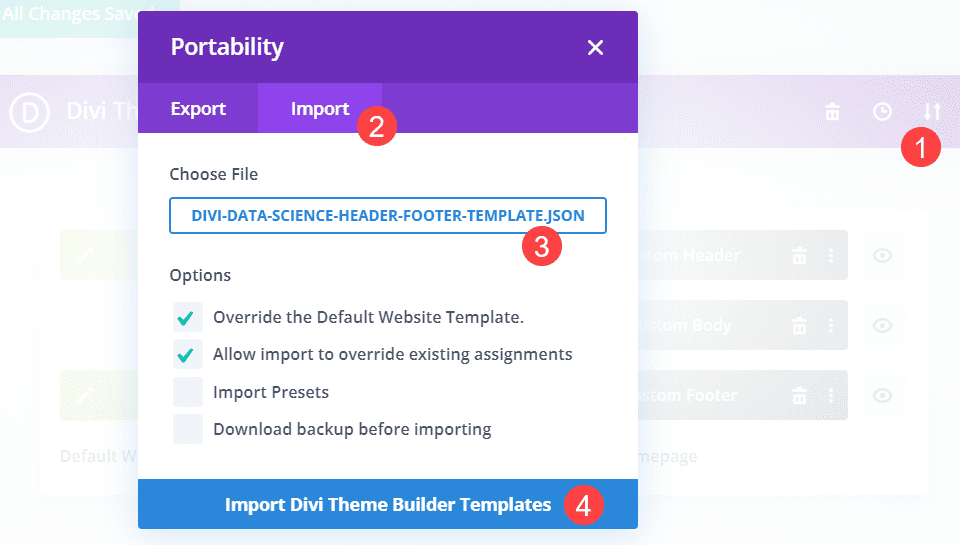
If this is your first time using the Theme Builder, you need to set a global header. The easiest way to do this is to use a freebie download that we provide by grabbing a header/footer JSON file from a blog post. Then use the Portability options in the builder to import it.
Your Global templates should now be set.
Assign Custom or Global Header
The Divi Theme Builder has a number of context menus that you can take advantage of. The first method of to hide your header on a specific page in Divi is done through one of these menus.
First, you need to have the a template set that uses a Custom or Global Header that is not part of the Default Global Template.
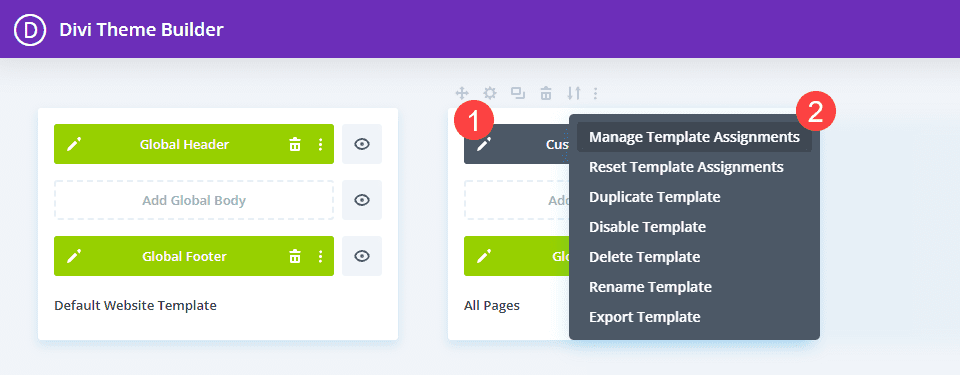
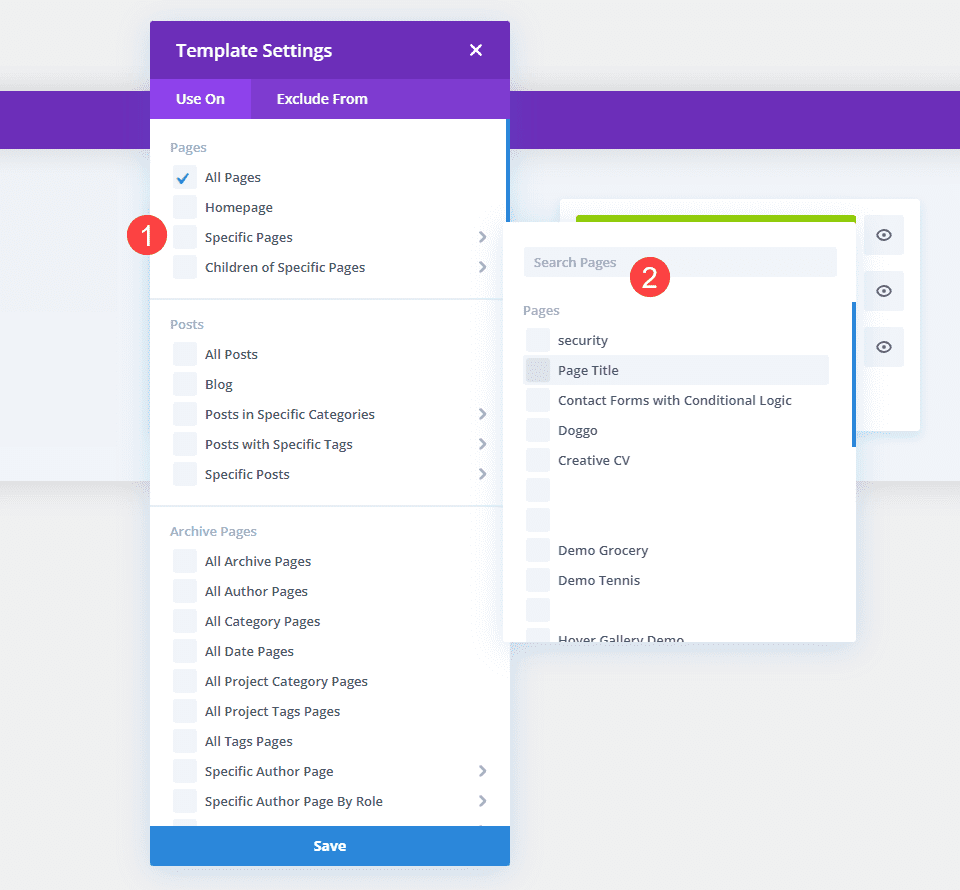
Next, you need to add the specific pages on which you want the header hidden. Do so my hovering over the template, clicking the Gear icon (or right-clicking and selecting Manage Template Assignments). You will need to right-click in the template area, not the actual header layout to get these options. Right-clicking the header layout gives different context commands, as you will see below.
Find the page (or pages) that you want sans header, and check the boxes near them. Anything that you assign to this template will no longer show the header on the front end of the website.
Use Context Menu Commands
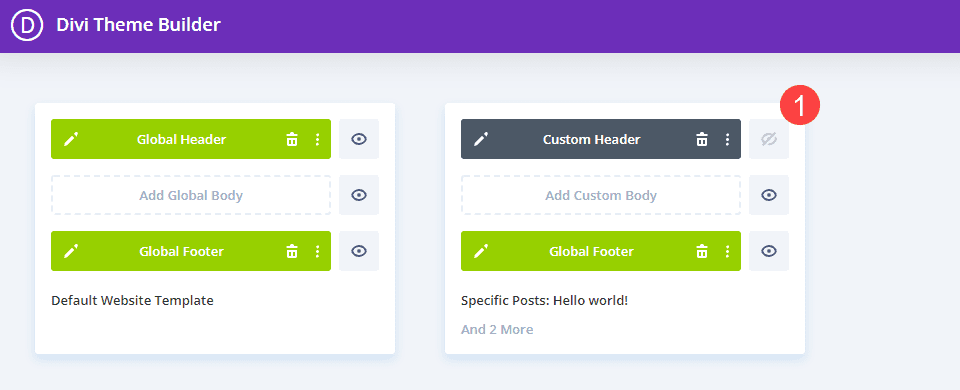
Next, right-click the Custom Header or Global Header. Select the option that reads Hide on Front End.
Now, you should see the eye icon to the right of that layout greyed out with a line through it. This indicates that the header is hidden for any pages or posts that are assigned to this particular template.
You can also simply left-click the eye icon to toggle the visibility of the header (or body or footer, too) on and off. Either way will work, and either way you are able to hide the header on specific pages. Again, just make sure you’ve assigned the specific pages you want to hide this header on.
We would also like to note that unlike excluding posts and pages from templates, using the Hide on Front End option this does not default a Custom Header back to the Global. No header will show up at all on the assigned pages and posts.
Alternate Method
This method will only work if you do not use a Global Header as part of your site’s design. If you intend to use Custom Headers for different templates, you can use this method to hide the header in Divi.
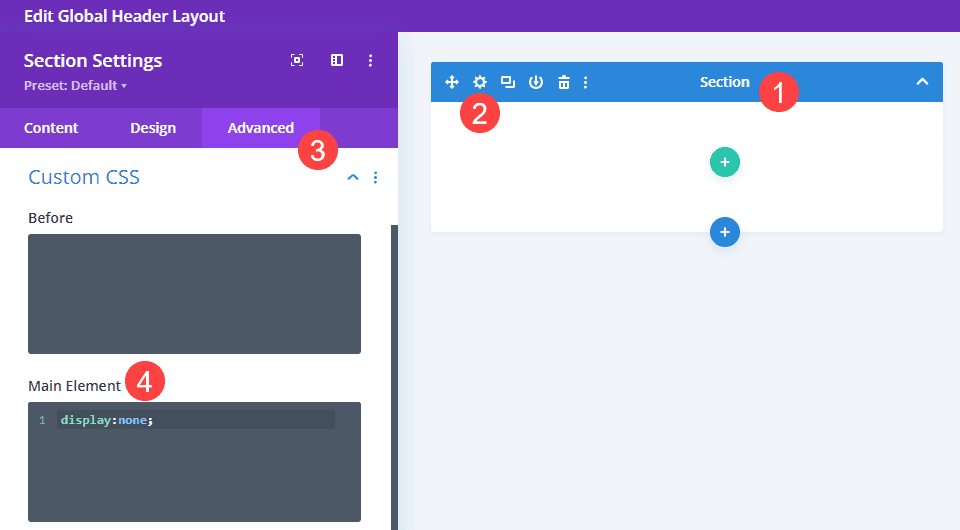
With that said, you do need to start out by creating a Global Header layout. Inside the Divi Builder, create an empty Section (meaning no rows or modules contained within). Then, go into the Section Settings and into the Advanced Tab.
Next, go into the Custom CSS options and find the Main Element field. Click inside and add display:none; to the text box. What this CSS snippet does is remove this section from the layout, preventing the browser from rendering it and saving its space in the template. There are two reasons we are applying display:none; to the section instead of just leaving it empty without a row or module.
- Because the browser would still render the section space if it were blank. It would be empty on the front end of your website, too. By using display:none; we are removing it entirely.
- If we were to simply have no Global Header assigned at all, the default Divi theme header would show on pages that were not assigned or excluded from layouts with a Custom Header. Which won’t work for this method.
So once you’ve applied the Custom CSS to your Global Header’s single section, save your changes and go back to the main page of the theme builder.
Exclude Pages from Custom Templates
As we mentioned above, if you exclude a post or page from a Divi Theme Builder template, it reverts back to the Default Website Template. If there are Global layouts there, those will display on the front-end. If there are empty spaces, the default Divi layouts will display.
By telling the Global Header to use display:none; in the previous step, you can hide the header on any specific pages or posts that you exclude from a template.
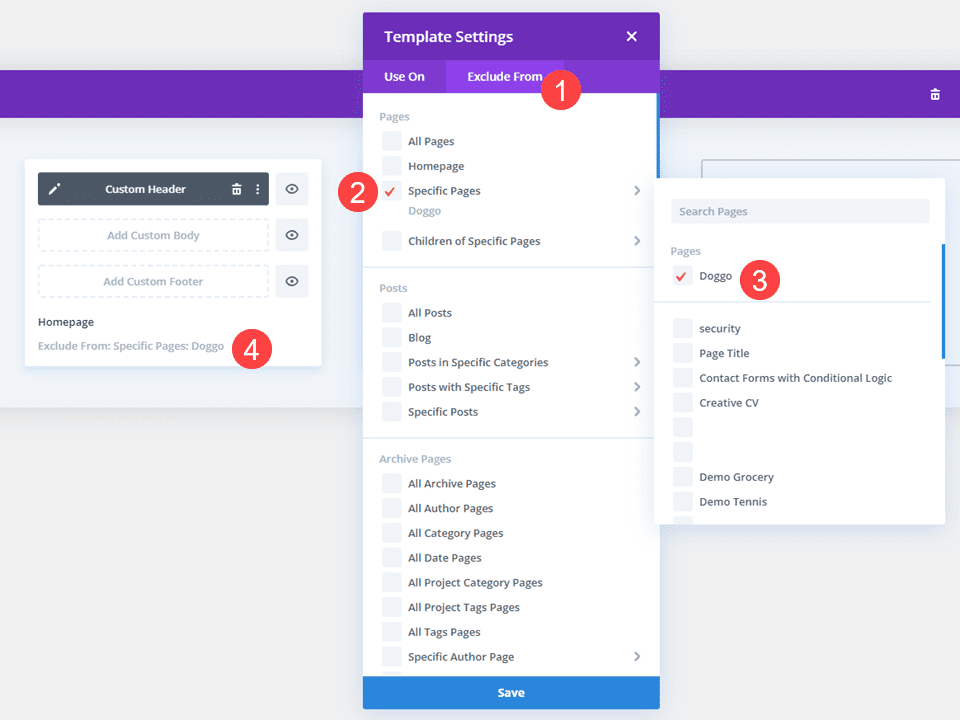
Just as in the method above, you want to either click the Gear Icon or right-click the template and select Manage Template Assignments. Then, navigate to the Exclude From tab, choose the specific pages or posts you want to exclude, and mark the checkboxes for them. This time, the checkmark will be red. When saved, the template will show an Exclude From line at the bottom.
Excluding a post or page from the template that uses a Custom Header will revert it back to the Global Header in the Default Website Template. However, since you have used display:none; CSS on the only element in the Global Header, you have effectively hidden the header on those specific pages and posts.
Again, this method only works if you’re using Custom Headers for the theme builder templates and not an overall Global Header.
Wrapping Up
There are a lot of reasons to hide the header in the Divi Theme Builder, and it’s incredibly easy to accomplish the task. Whether you use a full site of custom headers and need to exclude a few from having one through custom CSS trickery, or if you need to use the built-in Hide on Front End command to remove all traces of any header, it just takes a few clicks.
Why do you need to hide your header on specific Divi pages?
Article featured image by Nicoleta Ionescu/ shutterstock.com

