Do you want to create a custom landing page on your WordPress site?
If you’re running a marketing or adverting campaign, then a landing page can help you achieve your goals and get more conversions.
In this article, we’ll show you how to easily create a landing page in WordPress.
What is a Landing Page?
A landing page is a standalone page created for a specific advertising, email, social media, or marketing campaign. Users coming from these sources will land on this page first, which is why it’s called a landing page.
Landing pages are designed to get conversions, which just means that a visitor takes an action you want on your site. That might be buying a particular product from your online store, subscribing to your email list, filling in a form, or any other action that benefits your website.
What is the difference between a homepage and a landing page?
A homepage is the page that visitors see when they type your domain name into their browser. You can think of it as your website’s front page or store window.
On the other hand, a landing page is where most visitors will land when they come from paid or third-party traffic sources.
A good homepage will encourage visitors to engage with your WordPress website, explore other pages, browse products, or sign up for your email newsletter. With that in mind, a homepage typically has lots of links and gives visitors many different choices.
On the other hand, a landing page is built to get conversions. It has fewer links and typically has a single goal, which is called the call to action, or CTA. You can use any CTA you like, but a lot of landing pages encourage visitors to make a purchasing decision or share information as part of a lead generation strategy.
Your website will only ever have one homepage, but you can create as many landing pages as you want.
That being said, let’s take a look at how to create a beautiful custom landing page in WordPress.
Simply use the quick links below to jump straight to the method you want to use.
Note: To help our readers avoid choice paralysis, we haven’t included all landing page builders like Elementor, Leadpages, Instapage, Unbounce, or ClickFunnels. Instead, we’ve picked the best solutions for small businesses.
Method 1. How to Create a Landing Page in WordPress Using the Block Editor (No Plugin Required)
If you’re using a block theme, then you can design a custom landing page using the full site editor. This allows you to create a landing page using the tools you’re already familiar with.
Unfortunately, this method doesn’t work with every WordPress theme. If you’re not using a block-based theme, then we recommend using a page builder plugin instead.
To start, simply create a new WordPress page, which we’ll turn into our landing page.
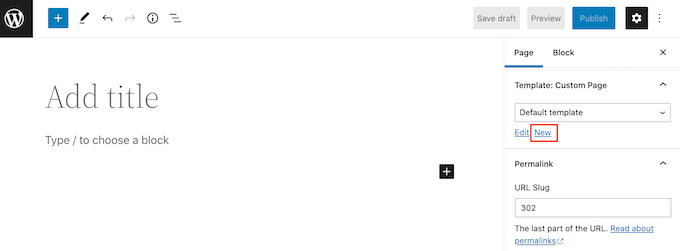
In the right-hand menu, click on the ‘Page’ tab. Then, simply find the ‘Template’ section and click on ‘New.’
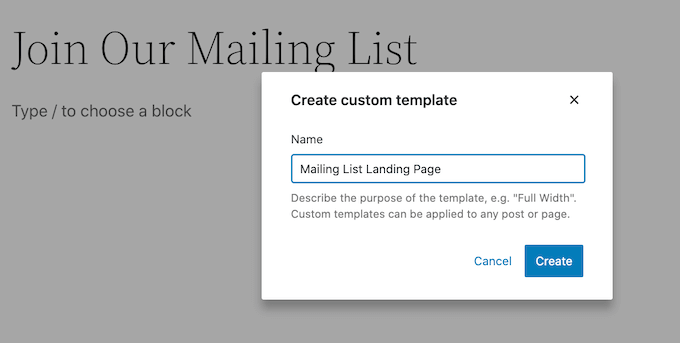
In the popup that appears, give your landing page template a name and then click ‘Create.’
The name is just for your reference so you can use anything you like.
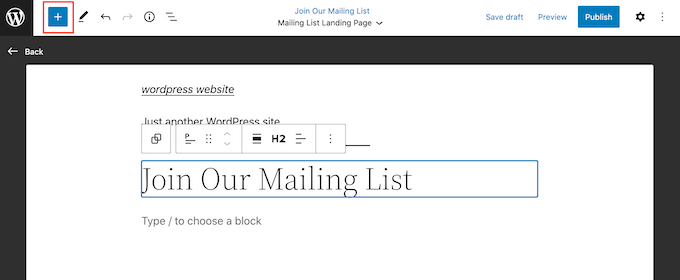
This launches the template editor. You can now design your landing page in exactly the same way you build a page in the standard block editor.
To add blocks to the landing page, just click on the blue ‘+’ button. You can now drag different blocks onto your design.
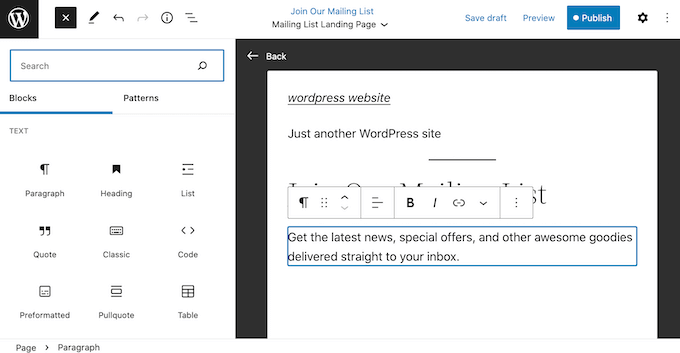
You can add content to a block or change its formatting using the familiar WordPress tools.
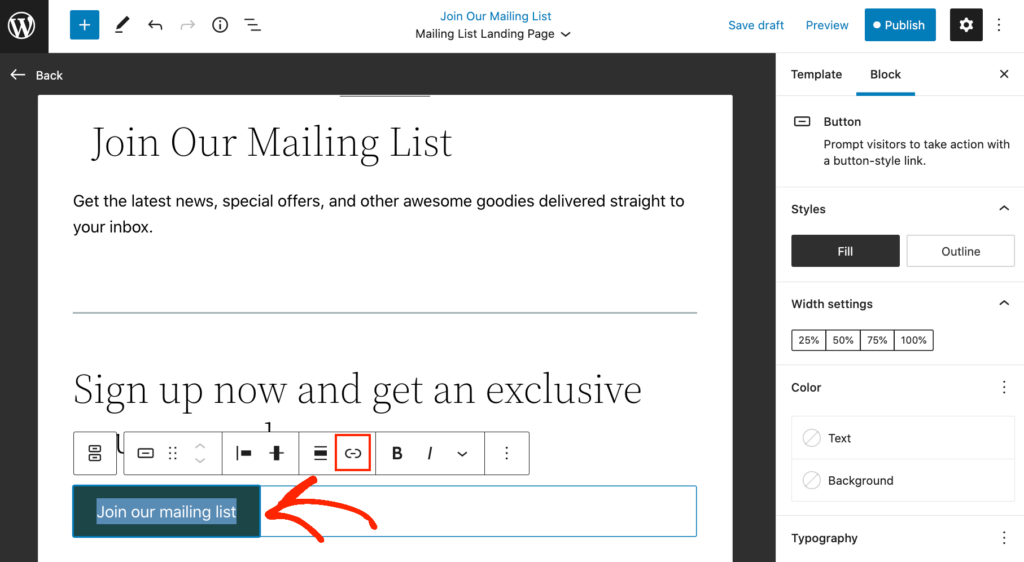
For example, you can type text into a ‘Paragraph’ block, add links, change the text alignment, and apply bold or italic effects.
You can also create a landing page using patterns, which are collections of blocks that are often used together. Patterns can help you create a landing page with a nice layout, fast.
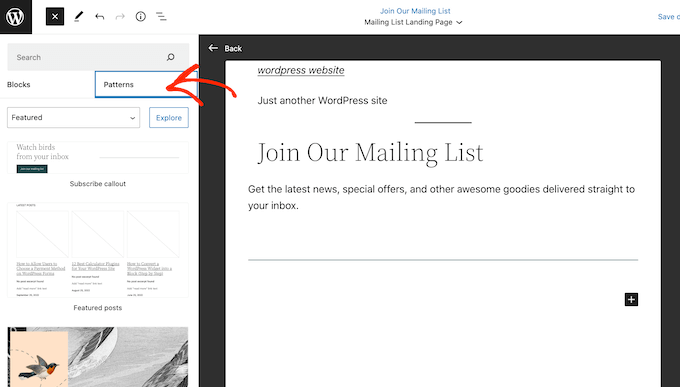
To see the patterns that are included in your WordPress theme, go ahead and click on the blue ‘+’ button and then select the ‘Patterns’ tab.
You can either drag and drop a block pattern onto your layout or click on the pattern, which will add it to the bottom of your template.
After adding a pattern, you can click to select any block within that pattern and then make your changes. For example, you can replace any placeholder text or add links so the call to action points to different areas of your WordPress blog.
When you’re happy with how the custom landing page looks, click on the ‘Publish’ button and then select ‘Save.’
Now, your page will be using this new template. You can simply update or publish the page to make your landing page live.
Method 2. Creating a WordPress Landing Page using SeedProd (Recommended)
The easiest way to make a landing page is by using SeedProd. It is the best page builder on the market and allows you to create any type of landing page without writing code.
First, you need to install and activate the SeedProd plugin. For more details, see our step-by-step guide on how to install a WordPress plugin.
Note: There is a free version of SeedProd available on WordPress.org, but we will be using the Pro version since it has more templates and blocks, including eCommerce blocks.
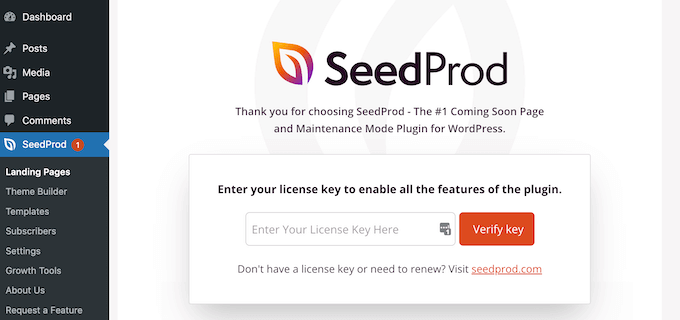
Upon activation, head over to SeedProd » Settings and enter your license key.
You can find this information under your account on the SeedProd website. After entering the license key, click on the ‘Verify Key’ button.
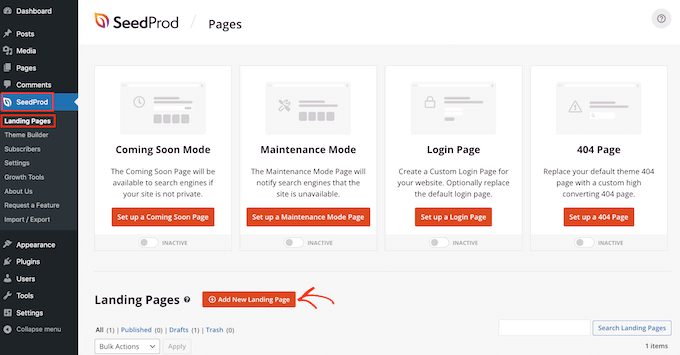
Next, simply go to SeedProd » Landing Pages and click on ‘Add New Landing Page.’
You can now choose a template for your landing page.
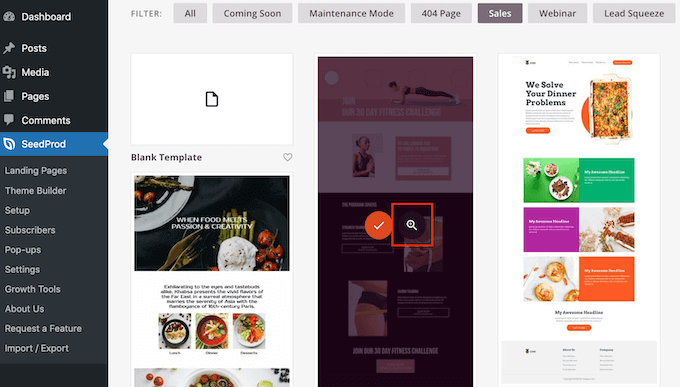
SeedProd has lots of designs that are organized into different campaign types such as coming soon and 404 pages. You can click on the tabs at the top of the screen to filter templates based on campaign type.
Since we’re creating a landing page, you may want to take a look at the Sales, Webinar, or Lead Squeeze tabs.
To preview a design, simply hover your mouse over it and then click on the magnifying glass.
Choosing a design that matches the type of landing page you want to create will help you build the page faster. However, every template is fully customizable so you can change every part of the template and create any landing page you like.
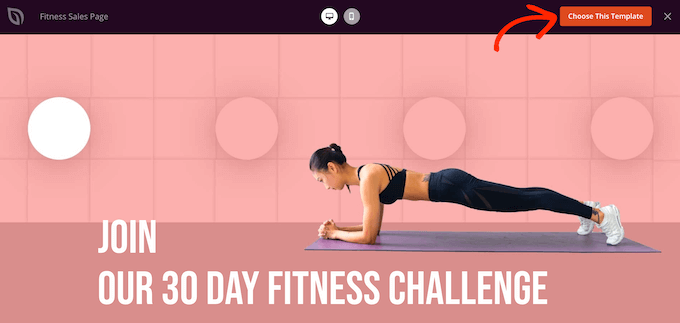
When you find a template that you want to use, simply click on ‘Choose This Template.’
We’re using the Fitness Sales Page template in all our images, but you can use any design.
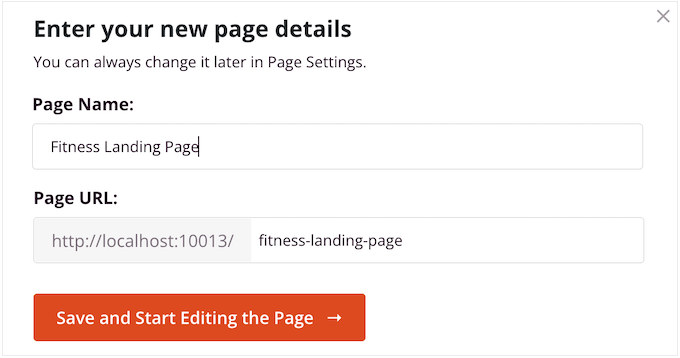
Next, go ahead and type in a name for your landing page. SeedProd will automatically create a URL based on the page’s title, but you can change this URL to anything you like.
For example, you may want to add some extra keywords to improve your WordPress SEO.
When you’re happy with the information you’ve entered, click on the ‘Save and Start Editing the Page’ button.
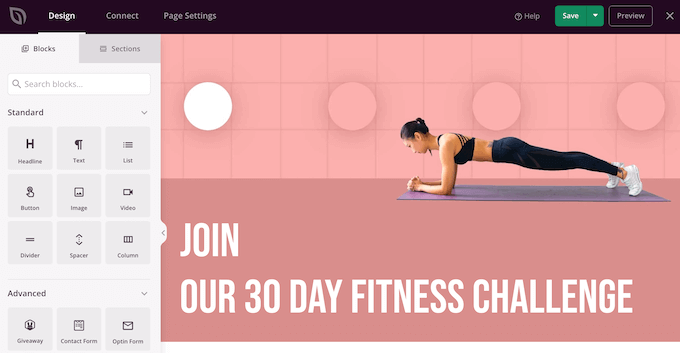
This will take you to the drag and drop editor, where you can build your landing page. The SeedProd editor shows a live preview of your template to the right, and some block settings on the left.
Blocks are a core part of SeedProd, and you can use them to create any kind of landing page.
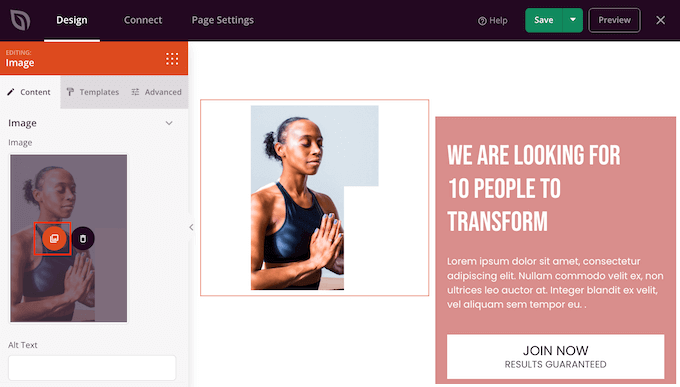
Most templates already come with built-in blocks. To customize a block, simply click to select it in the page preview and then make any changes in the left-hand menu.
For example, if you want to replace a placeholder image then start by selecting the Image block. Then, click on the ‘Select Image’ icon in the left-hand menu.
You can now either choose an image from the WordPress media library or upload a new file from your computer.
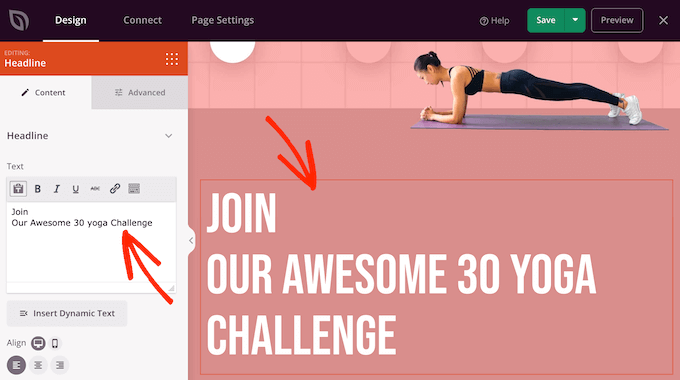
Similarly, you can replace any placeholder text with your own words. Simply select any Text or Headline block and then type into the small text editor.
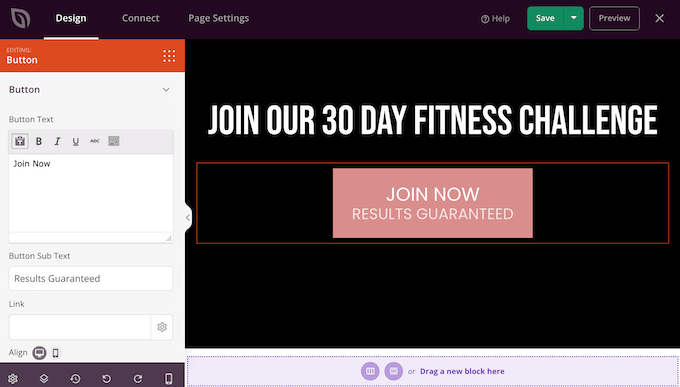
You can also completely change how the landing page looks using the settings in the left-hand menu, including changing the color scheme, font choice, link color, buttons, and more.
Most of these settings are fairly self-explanatory, so it’s worth selecting different blocks in your layout and then looking through the settings.
You can also drag and drop blocks to move them up or down in your layout.
To add more blocks to your landing page, simply drag and drop them onto your design.
Even better, SeedProd has lots of blocks that are perfect for creating a high-converting landing page.
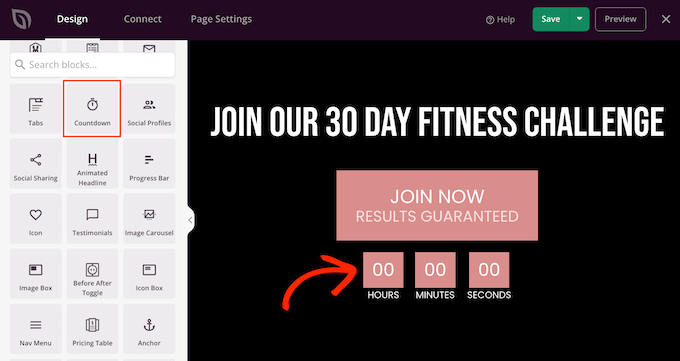
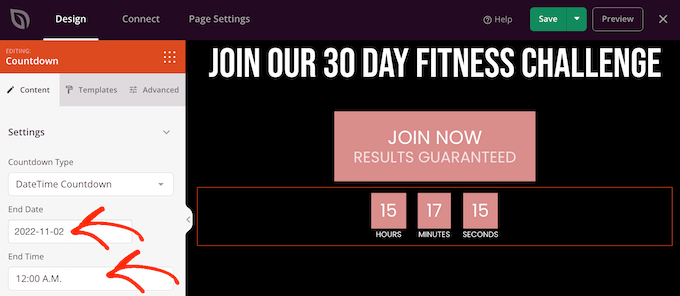
For example, you may want to add a countdown timer that will count down the minutes until the visitor can no longer convert. This can add a sense of urgency to sales, free gift coupons, pre-orders, and other campaigns.
Simply find the ‘Countdown’ block and drag it onto your landing page.
You can then set a time and date when the timer will expire.
In this way, you can use FOMO on your WordPress site to increase conversions.
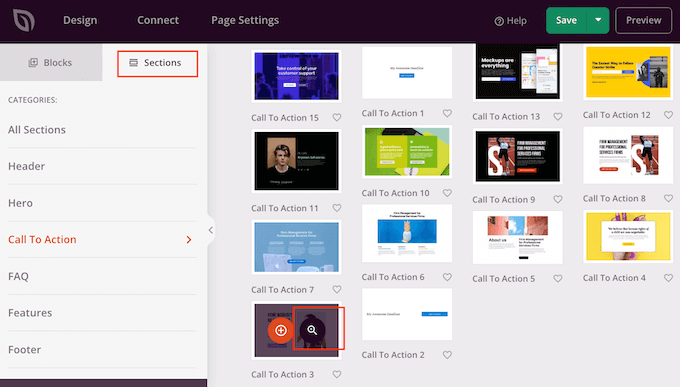
SeedProd also comes with ‘Sections,’ which are blocks that are often used together. This includes lots of sections that can help you build a landing page including a header, hero image, call to action, testimonials, contact form, FAQs, features, footer sections, and more.
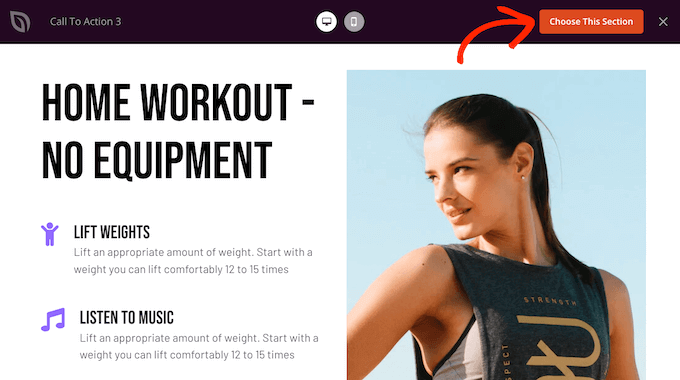
To take a look at the different sections, simply click on the ‘Sections’ tab. To preview any section, hover your mouse over it and then click on the magnifying glass.
If you want to use the section, then just click on ‘Choose This Section.’
SeedProd will add the section to the bottom of your landing page, but you can move it around using drag and drop.
SeedProd is also fully compatible with WooCommerce so you can easily create new landing pages to promote your products, services, sales, and other events.
Even better, SeedProd comes with special WooCommerce blocks including add to cart, checkout, recent products, and more. This allows you to create custom WooCommerce checkout pages, custom cart pages, and more, so you can build a high-converting online store without being limited by your WooCommerce theme.
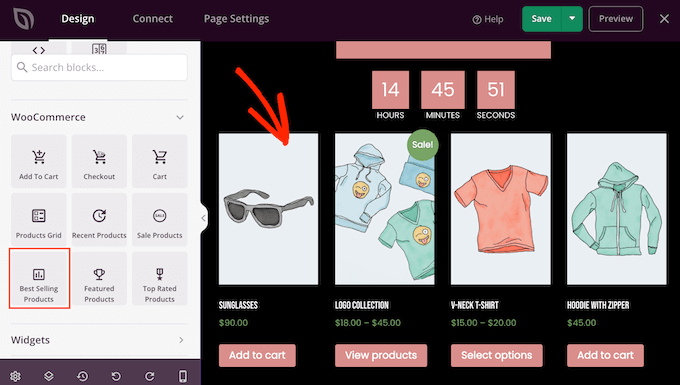
If you’re building a landing page to get more sales on your online store, then we recommend creating popular products or recommended products sections.
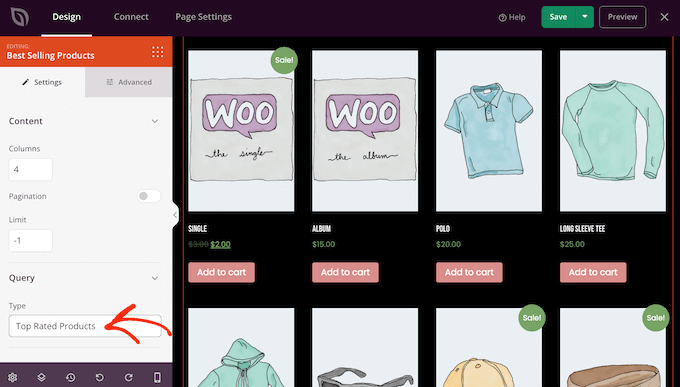
To create this section, simply drag a ‘Best Selling Products’ block onto your page.
The block will show your most popular products by default, but you can also show products that are on sale, your newest products, and more.
Simply open the ‘Type’ dropdown and choose any option from the list.
For more details, please see our guide on how to display popular products in WooCommerce.
Connecting Your Landing Pages to Third-Party Tools
If you’re creating a landing page to capture leads, then you may want to add a sign-up form.
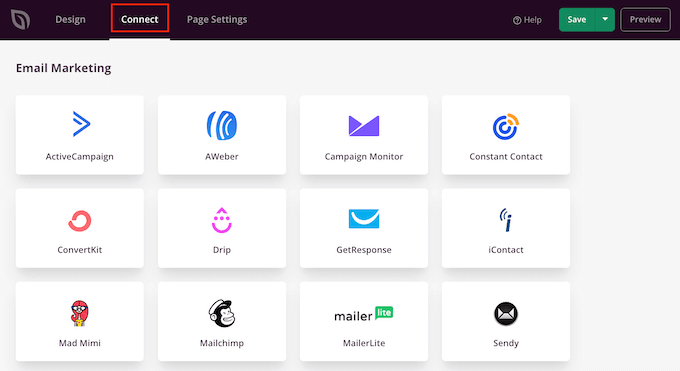
SeedProd makes it super easy to connect your landing pages to popular email marketing services like Constant Contact or ActiveCampaign.
Simply click on the ‘Connect’ tab and then select your email service provider.
SeedProd will then show you exactly how to integrate this landing page with your email marketing services.
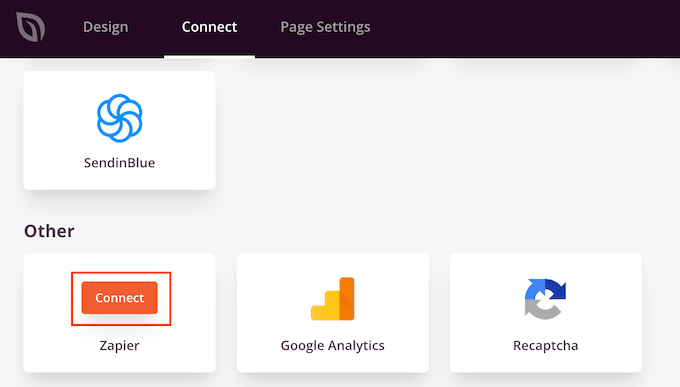
If you don’t see your email provider listed, don’t worry. SeedProd works with Zapier which acts as a bridge between SeedProd and more than 3000+ other apps.
Just scroll to the ‘Other’ section and hover over ‘Zapier.’ When the ‘Connect’ button appears, give it a click and then follow the onscreen instructions to connect SeedProd and Zapier.
Using a Custom Domain for Your Landing Page
By default, SeedProd will publish the landing page under your website’s domain. However, sometimes you may want to use a custom domain instead.
This will give your campaign its own distinct identity, separate from the rest of your website. It’s also much easier to track each page’s performance in Google Analytics to see if you’re getting good results.
Instead of creating a WordPress multisite network or installing multiple websites, you can easily map a custom domain to any landing page you create in SeedProd.
Before you get started, make sure your WordPress hosting provider allows you to use multiple domains, and add the domain name to your hosting dashboard, if you haven’t already.
For more details, please see our article on how to add a custom domain alias for your WordPress landing page.
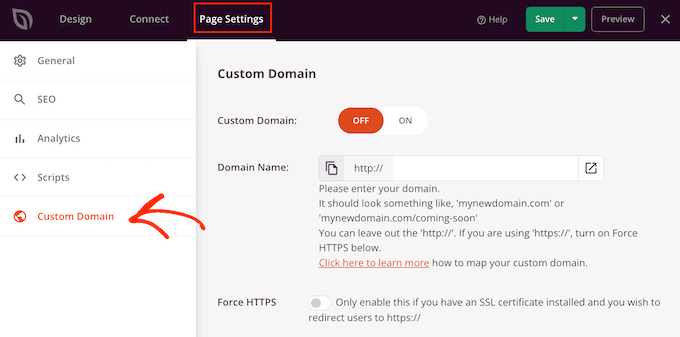
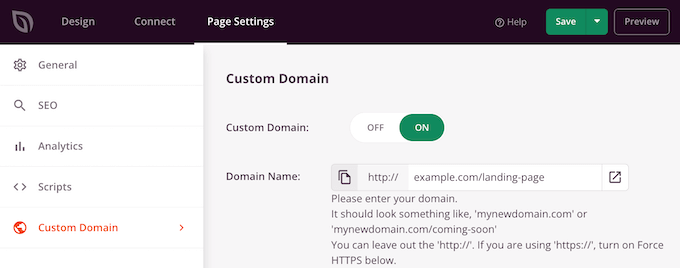
In the SeedProd editor, simply click on ‘Page Settings’ and then select ‘Custom Domain.’
In the ‘Domain Name’ field, type in your custom domain.
After that, click on the ‘Custom Domain’ switch so it goes from ‘Off’ to ‘On.’
Don’t forget to click on ‘Save’ to store your changes.
Saving and Publishing Your Landing Page
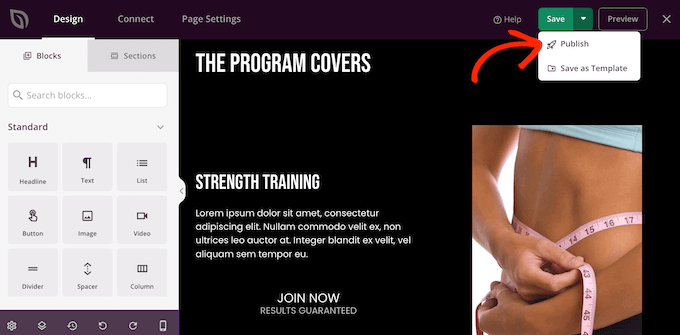
When you’re happy with how the landing page looks, it’s time to publish it by clicking on the ‘Save’ button.
Then, choose ‘Publish.’
The landing page is now live on your website.
Method 3. Creating a Landing Page in WordPress using Beaver Builder
Beaver Builder is another popular drag-and-drop WordPress page builder. It allows you to easily create a landing page using ready-made templates.
First, you need to install and activate the plugin. For more details, see our step-by-step guide on how to install a WordPress plugin.
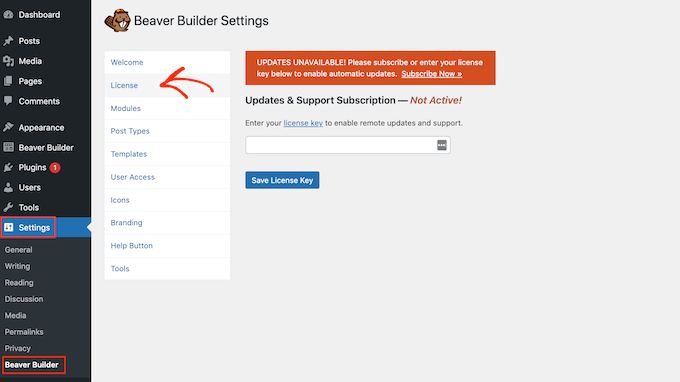
Upon activation, go to Settings » Beaver Builder. Then, click on the ‘License’ tab.
Here, simply enter the license key, which you’ll find in your account on the Beaver Builder website. You can then click on ‘Save License Key.’
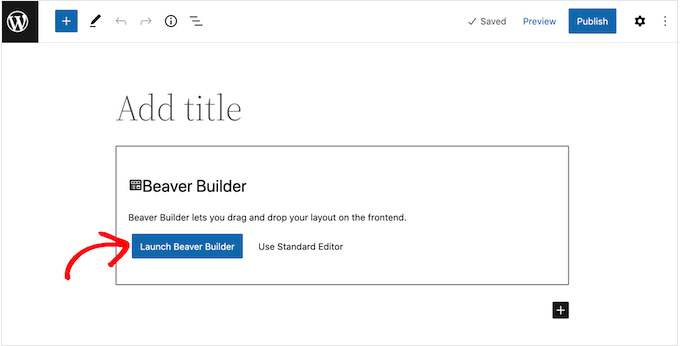
To create a custom landing page, head over to Pages » Add New in your WordPress admin dashboard. You’re now ready to build your landing page, by clicking the ‘Launch Beaver Builder’ button.
This will open the Beaver Builder editor.
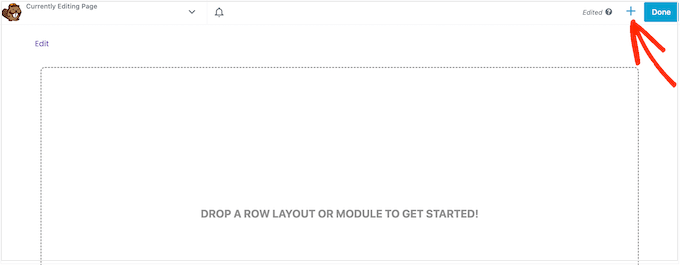
In the right-hand menu, you’ll see all the modules and rows that you can add to your landing page. If this menu doesn’t open automatically, then click on the ‘+’ in the top-right corner to open it.
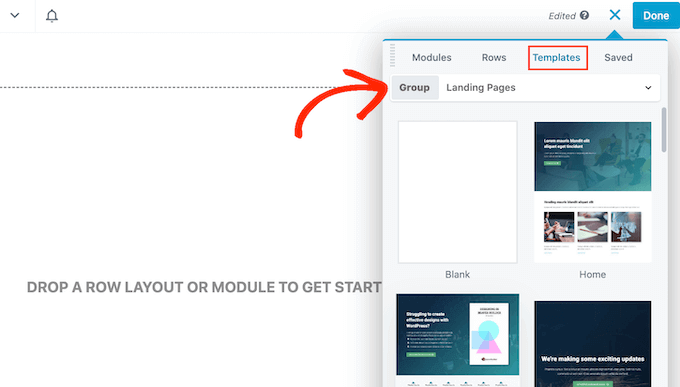
Since we want to create a landing page, choose ‘Templates’ and then open the ‘Group’ dropdown menu.
After that, select ‘Landing Pages’ to see all the templates you can use.
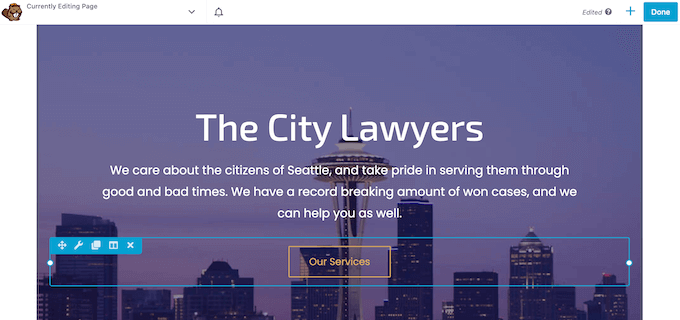
When you find a template that you like, simply click on it.
Beaver Builder will now apply this design to your landing page.
To edit any part of a template, give it a click.
This opens a popup containing all the settings for this particular block. For example, in the following image, we’re editing a Text Editor module.
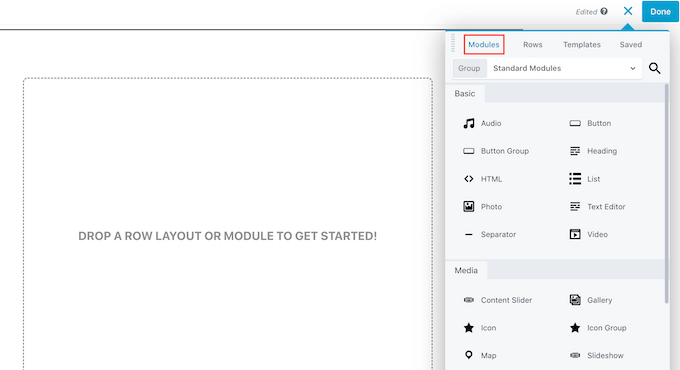
You can add more modules to your landing page by clicking on the ‘Modules’ tab.
When you find a module that you want to use, just drag and drop it onto your landing page.
You can also add rows to your landing page, which are layouts that help organize your modules and other content.
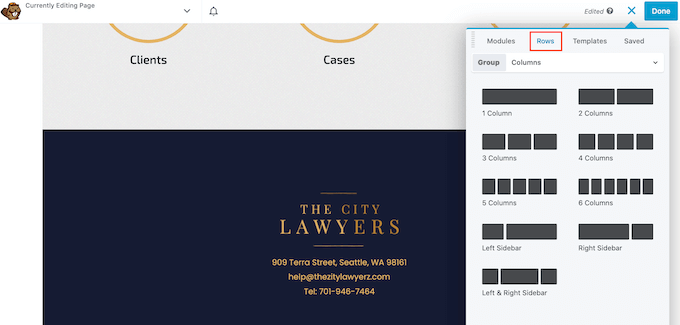
To do this, simply select the ‘Rows’ tab and then drag and drop any layout onto your page.
You’re now ready to drag and drop modules onto this row, which will arrange them in an organized layout.
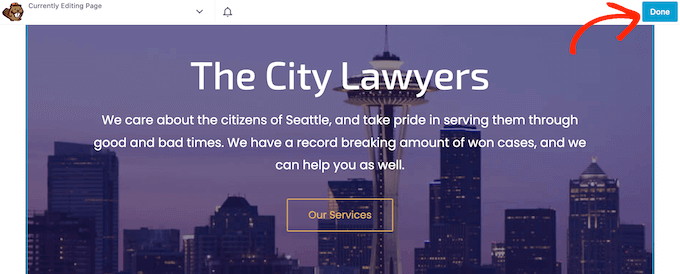
When you’re happy with how the landing page looks, simply click on the ‘Done’ button at the top of the page.
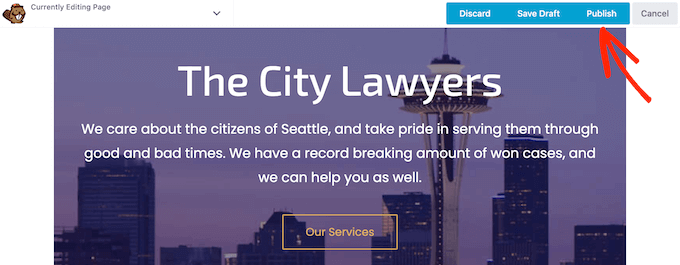
If you’re ready to make the page live, then select ‘Publish.’
You can now visit your website to see the landing page in action.
We hope this article helped you learn how to create a landing page with WordPress. You may also want to see our proven tips on driving more traffic to your WordPress site, or our comparison of the best business phone services.
If you liked this article, then please subscribe to our YouTube Channel for WordPress video tutorials. You can also find us on Twitter and Facebook.


