
Building unique frame designs for your rows with Divi can be a useful (and fun) way to creatively stage your page content. By combining Divi’s section dividers with a compact row structure, you can explore countless design possibilities for framing your content. You may have already seen this technique featured in previous tutorials or in some of our premade layouts. But, today, I thought I would show you an easy way to explore this design technique for yourself. In this tutorial, I’m going to show you how to quickly build a reusable section layout that can be saved to your library. Then you can use that layout to explore new frame designs and color schemes. The layout works by framing your row with a unique design, so all column structures and modules can be used inside the row.
Let’s get started.
Creating the Reusable Frame Design Layout
To get things started, let’s create a new section with a one column layout. We don’t need to add any modules at this point. Instead, we are going to design our row and section first, so that we can fill our row with any content we want later.
Design the Row
Update the row settings as follows:
Background Color: #333333
Row Alignment: Center
Custom Width: 775px
Gutter Width: 2
Custom Padding: 130px Top, 130px Bottom, 50px Left, 50px Right
Custom Margin: 0px Top, 0px Bottom

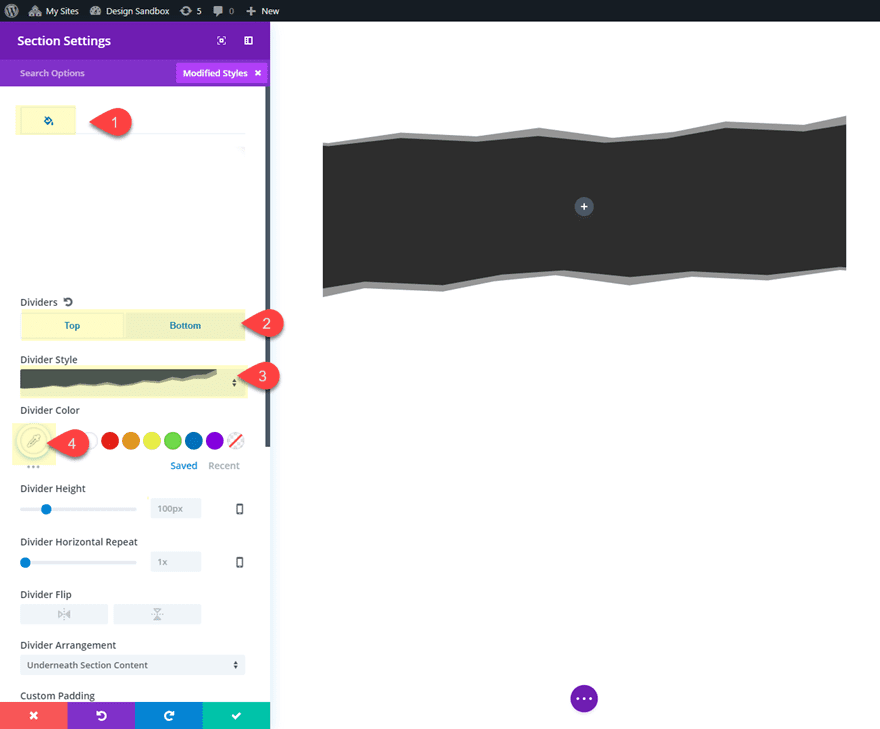
Design the Section
Update the section settings as follows:
Background Color: #ffffff
Top Divider Style: see screenshot
Top Divider Color: #ffffff
Bottom Divider Style: see screenshot
Bottom Divider Color: #ffffff
Next, you are going to set the top and bottom padding to 0px and create some top and bottom space using a border as follows:
Custom Padding: 0px Top, 0px Bottom
Top Border Width: 5vw
Top border Color: #ffffff
Bottom Border Width: 5vw
Bottom Border color: #ffffff
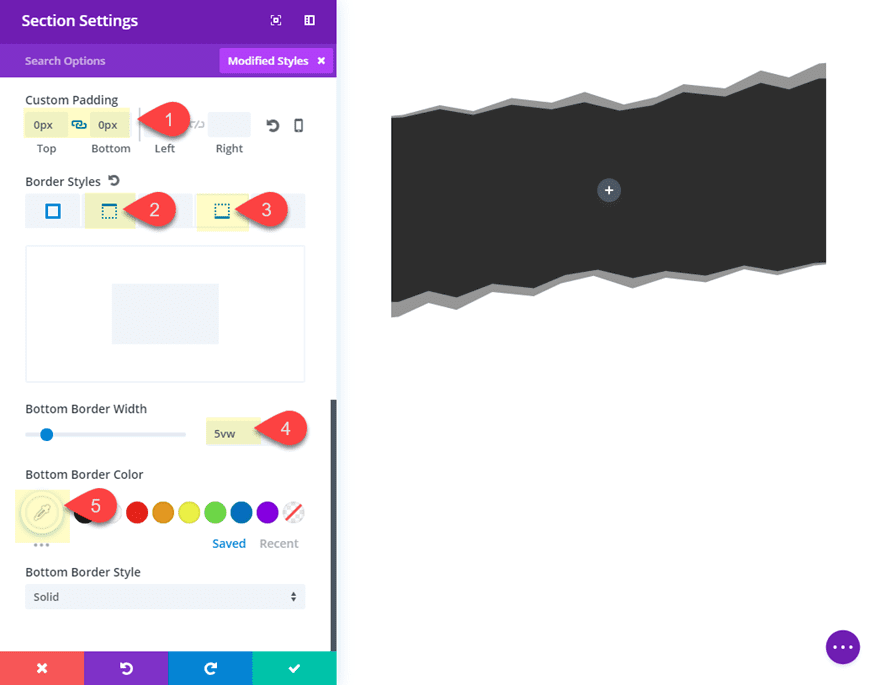
Creating the spacing for the section using a top and bottom border will maximize the space available for the section divider that will overlap the row. This way you can choose any divider height for your design.
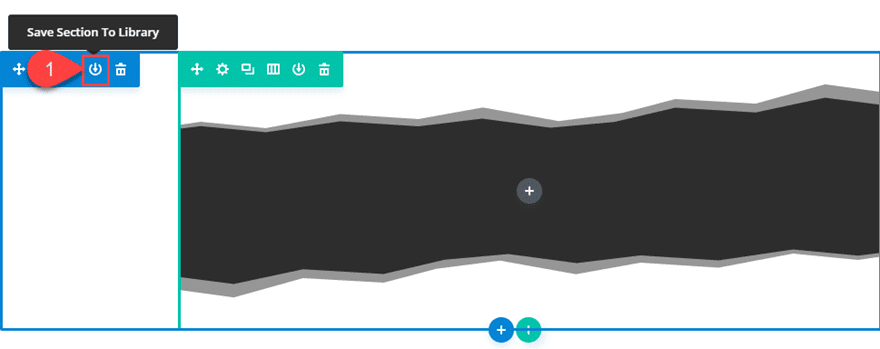
Save the Layout to Your Library
That’s it for the basic layout structure of your framed row design. At this point we want to save this section to the Divi library in order to use the section layout for future designs.
Click the Save to Library icon in the section menu.
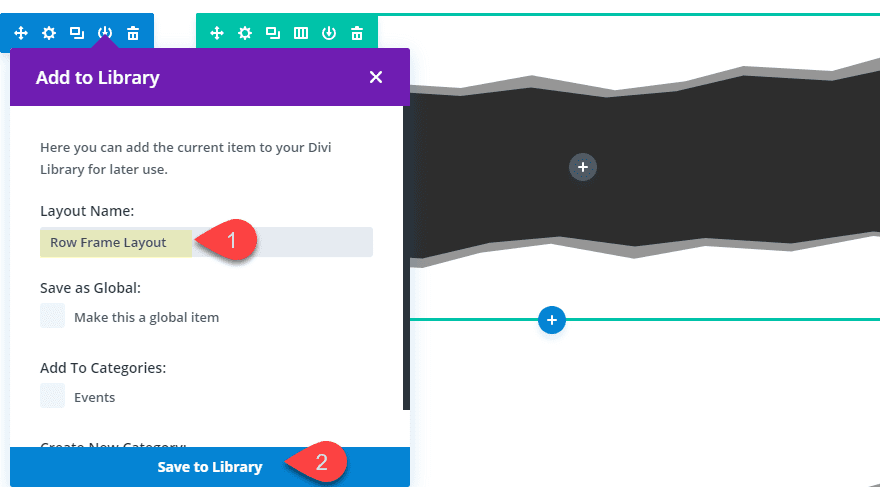
Then Enter a name for the layout (something like “Row Frame Layout”) and click the Save to Library button.
Completing Frame Design #1
Now that we have our section layout saved for future endeavors, let’s add some content to our row to complete the first design example.
Changing the Column Structure
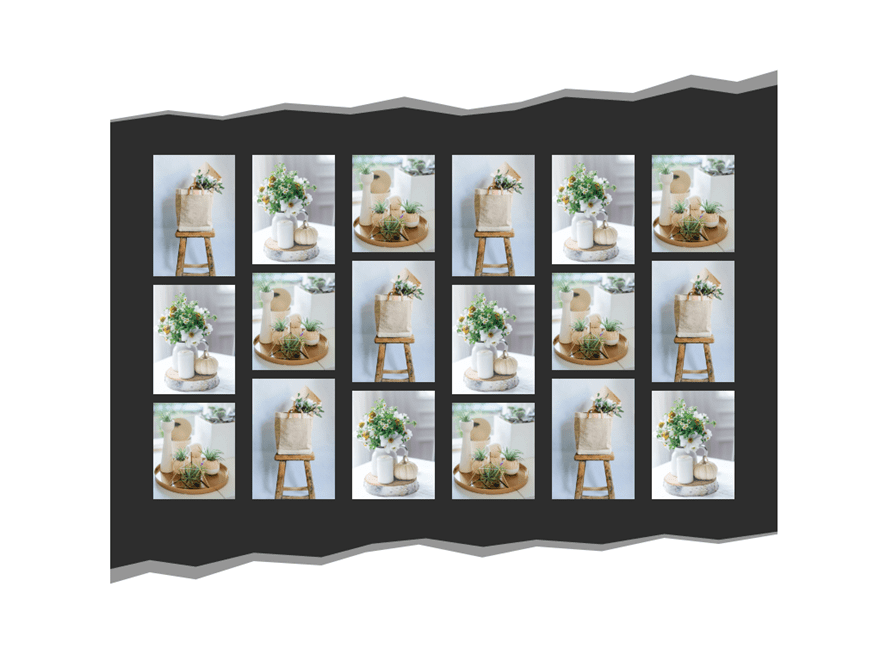
For this design, I think adding a six column image gallery will be nice. The small column structure will allow us to create a small cluster of images that are framed nicely inside of the narrow row.
To do this, first change the row structure to a six column layout.

Adding Content to the Row
Then add three image modules (with images) to each column. I’m using images with more of a portrait orientation (rather than landscape) with different sizes/dimensions.
Here is the final design.
Bonus Design Tip
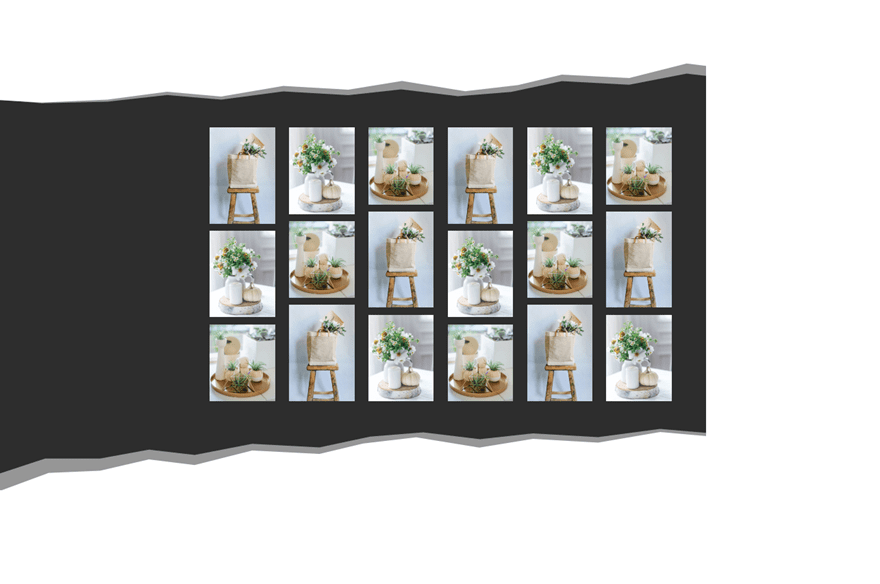
Before we continue to explore more framing design possibilities, I wanted to point out an easy trick for extending your frame to one side of the page. To do this, go to the section settings and add a background gradient as follows:
Background Gradient Left color: #333333
Background Gradient Right Color: #ffffff
Gradient Direction: 90deg
Start Position: 50%
End Position: 0%
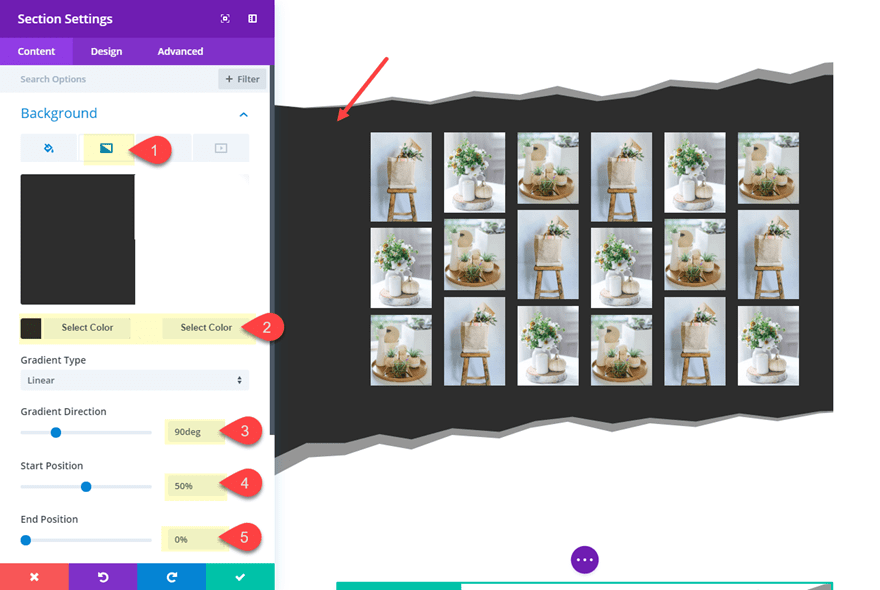
Check out this design.
Customizing the Layout for Different Frame Designs and Content
The exciting possibilities of this simple layout are numerous to say the least. By customizing the color scheme, divider style, column layout, and module content, you can create all sorts of different layout designs. Plus, you can use those cool Divi features like “Find and Replace” to make widespread color scheme changes in a few clicks.
Here is the basic process for updating the layout:
- Load Saved Section Layout to the page
- Update the color scheme of the section using “Find and Replace”.
- Change the Divider Style
- Customize the Row with a new background and column structure.
- Add Modules to your columns
With this process, exploring new designs should be pretty fun! Let’s continue.
Frame Design #2
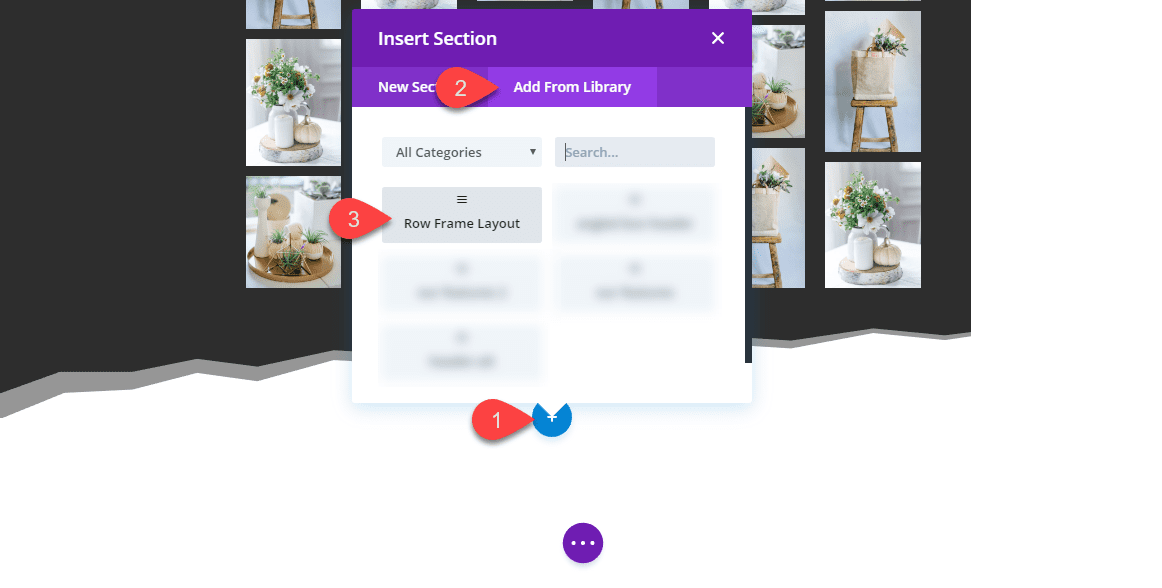
For this next design, we are going to use saved section layout we created earlier. To do this, click to add a new section in the visual builder. Then select the Add From Library tab and click the section layout from the list.
Now we are ready to customize the section for a new design.
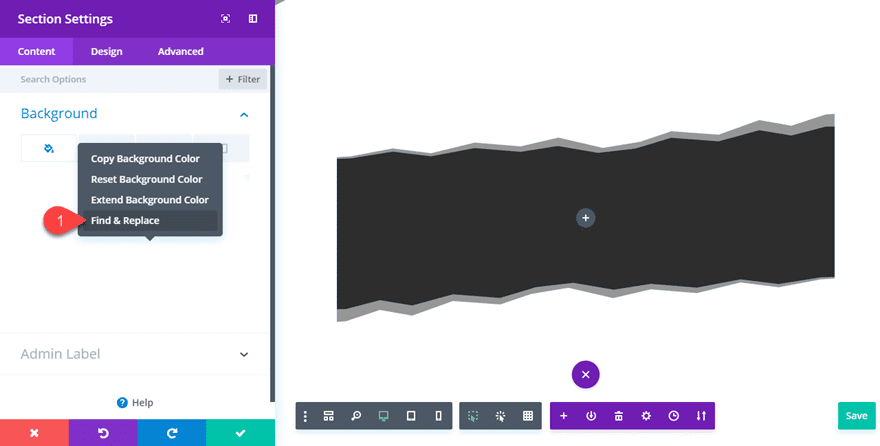
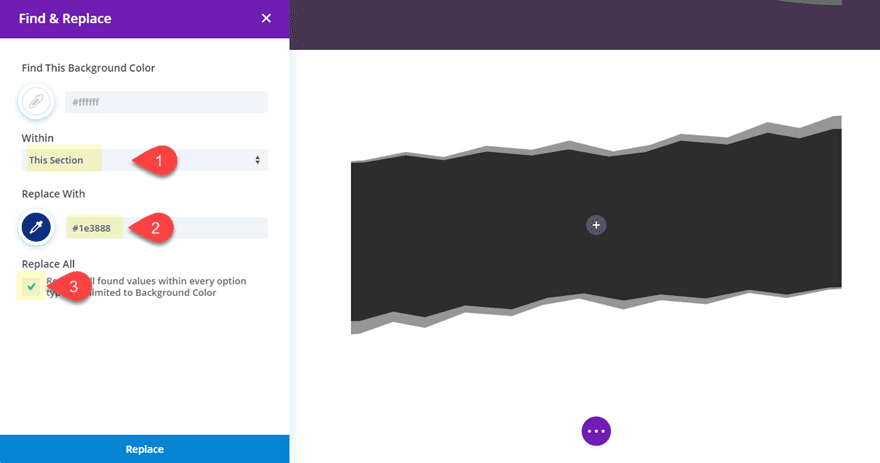
In order to change the color scheme used for this layout, we can summon some Divi design powers by using the Find and Replace feature. Go the section settings of the duplicated section and right click on the background color and select “Find and Replace”.
In the Find & Replace modal, update the following:
Within: This Section
Replace With: #443850
Select Replace All
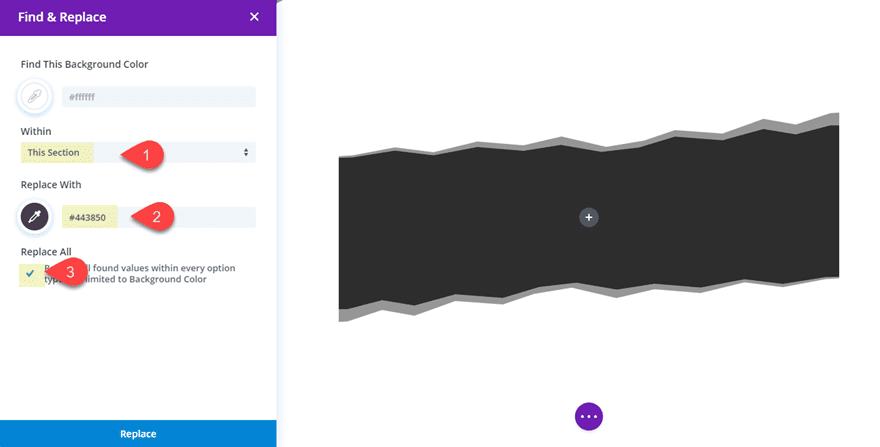
This will replace the white color used for the section background, border, and dividers with a new color.
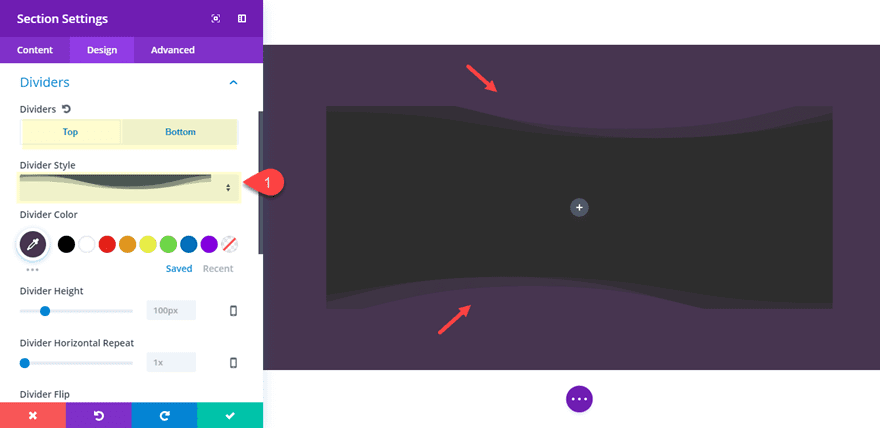
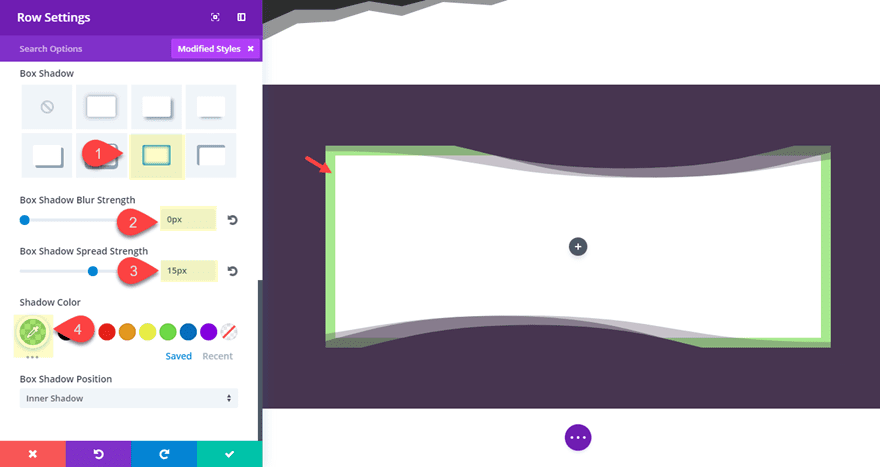
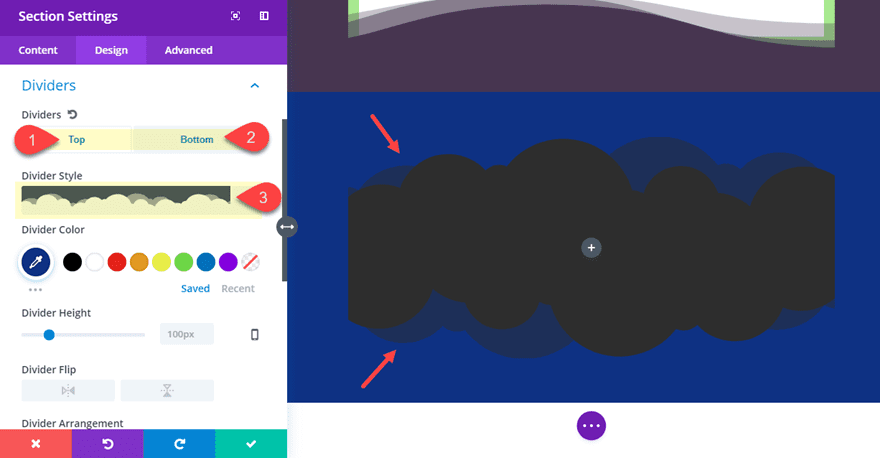
Now update the section settings with a new divider style:
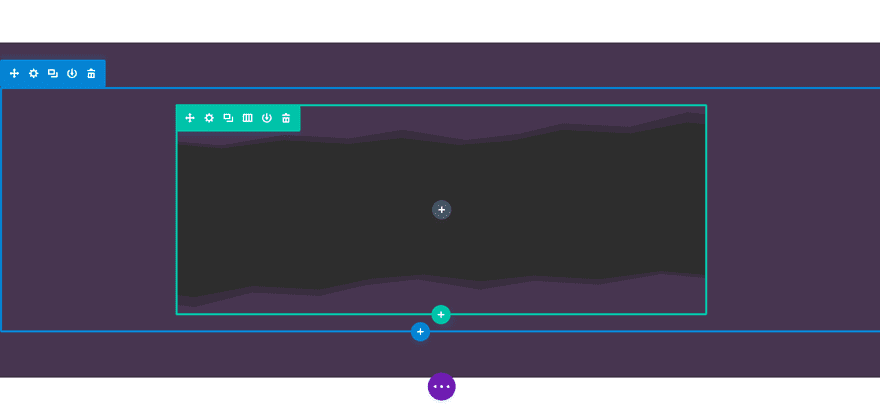
Then update the row settings with a white background color, and a box shadow to complete the new frame design for the row.
For the content, let’s try a five column layout with some blurbs. Go ahead and update the column layout for your row to a five column layout.

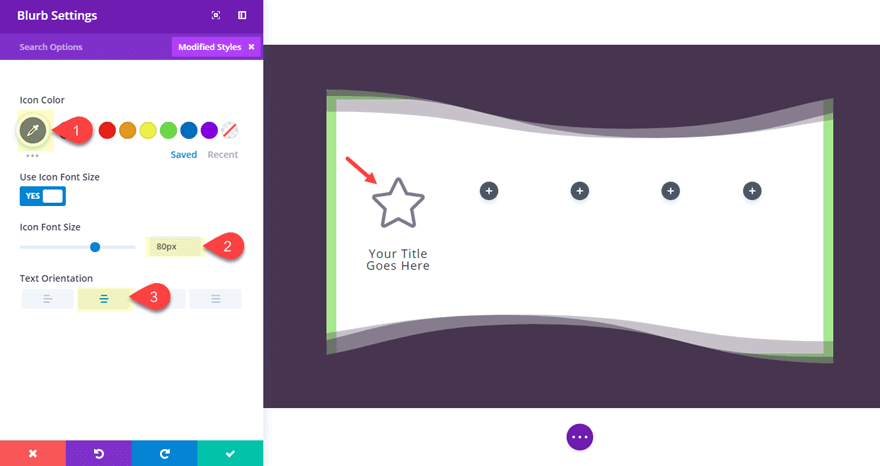
Then add a blurb to the first column. Take out the default content text and leave only the Title text. Then replace the blurb image with a star icon. Update the design settings as follows:
Icon Color: #7d8491
Icon Font size: 80px
Text Orientation: Center
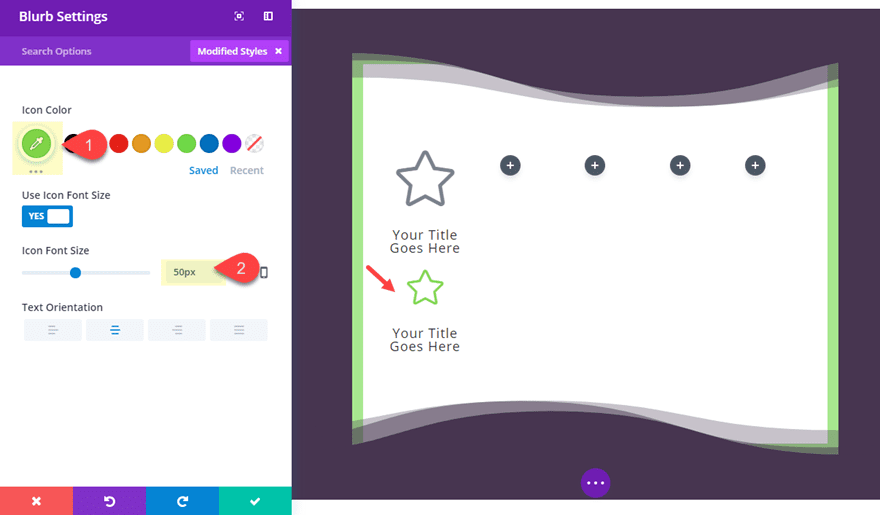
Duplicate the blurb module and update the settings as follows:
Icon Color: #8cd845
Icon Font Size: 50px
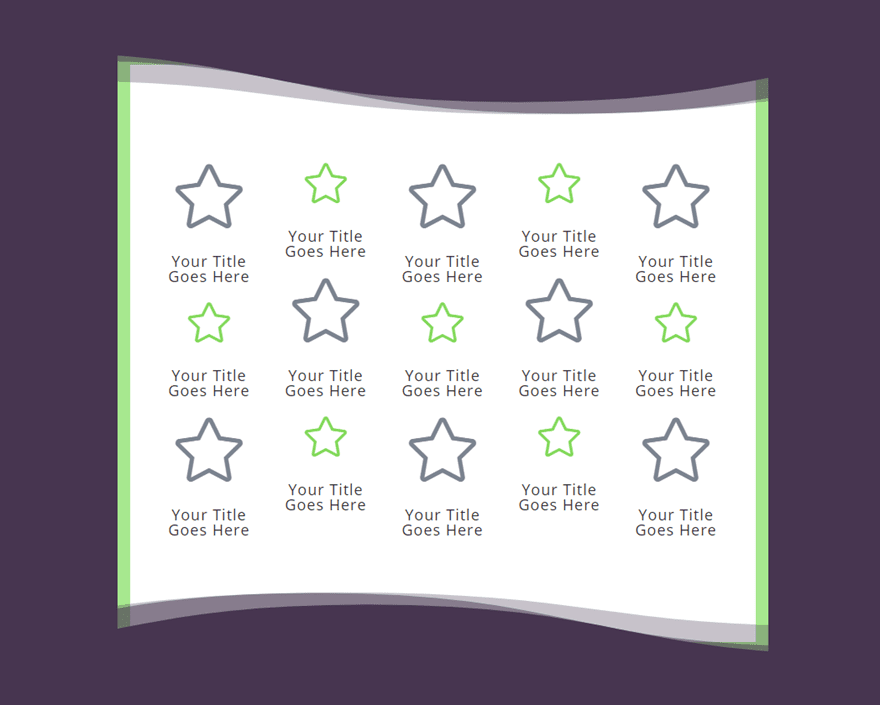
Now make duplicate or copy and paste those two modules into a pattern throughout your five columns with three modules in each column.
Here is the final design.
Frame Design #3
For the third frame design, we first need to load our saved section layout as we did previously for the second design.
After that, we can use find and replace on the section background color (like we did in the previous design) to replace the white color used for the section background, divider, and border with a nice blue color. To do this, go to the section settings, right click on the background color, and select find and replace. Then update the following:
Within: This Section
Replace With: #1e3888
Select Replace All
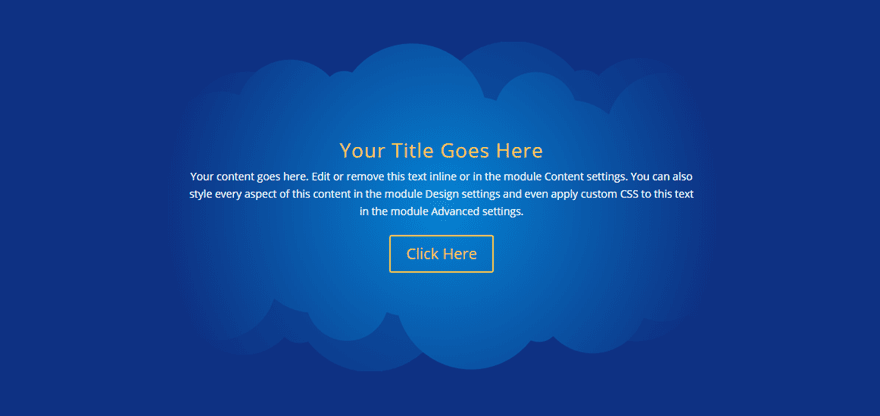
Then update the section divider with a new top and bottom divider style (the clouds):
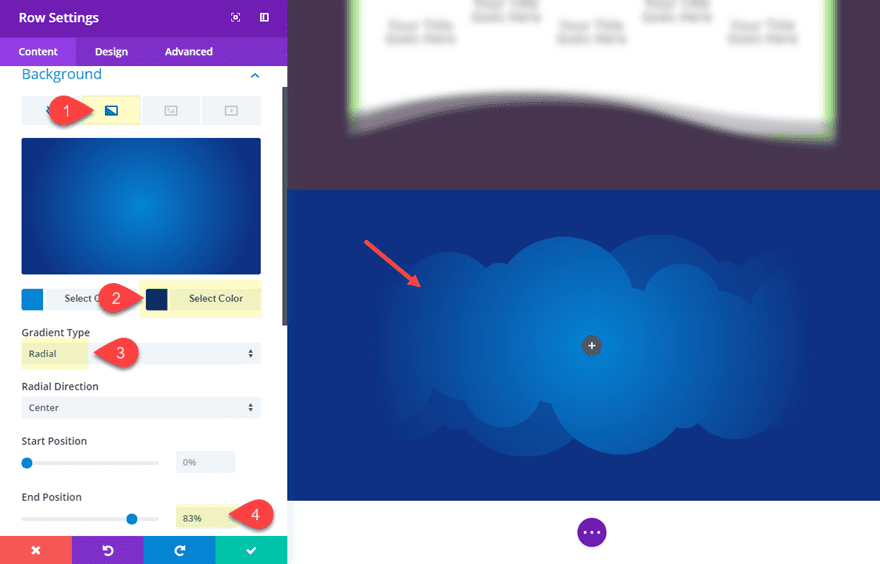
Next, go to the row settings. Give the row a gradient background as follows:
Background Gradient Left Color: default (#2b87da)
Background Gradient Right Color: #1E3888 (same color as section background)
Gradient Type: Radial (to give the row rounded “cloud-like” feel)
End Position: 83% (to hide the row edges a bit)
Now, all we need to do is add some content to our framed row. Let’s add a Call To Action Module to the row and update the settings as follows:
Add “#” to the link input box to show the button
Use Background Color: NO
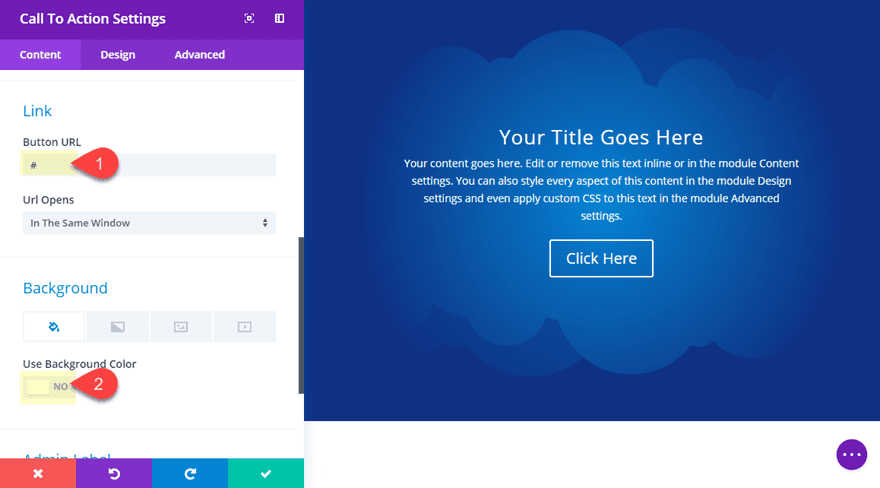
Title Text Color: #ffc338
Button Text Color: #ffc338
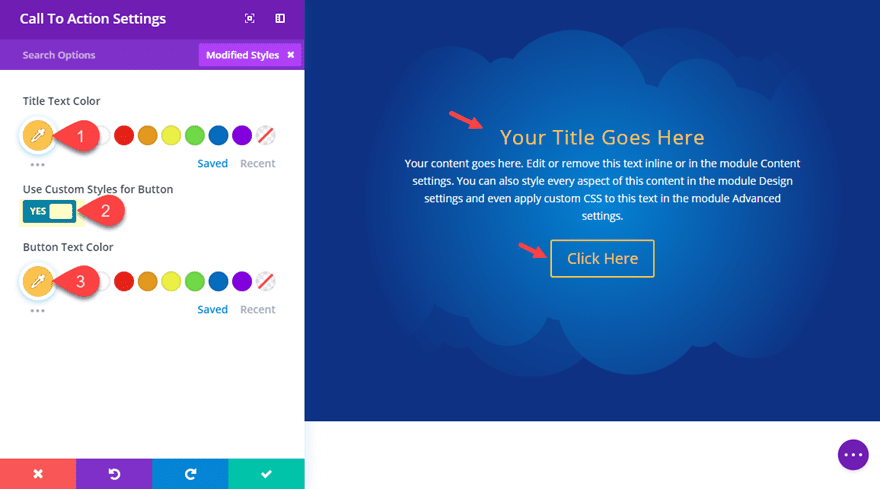
Here is the final design.
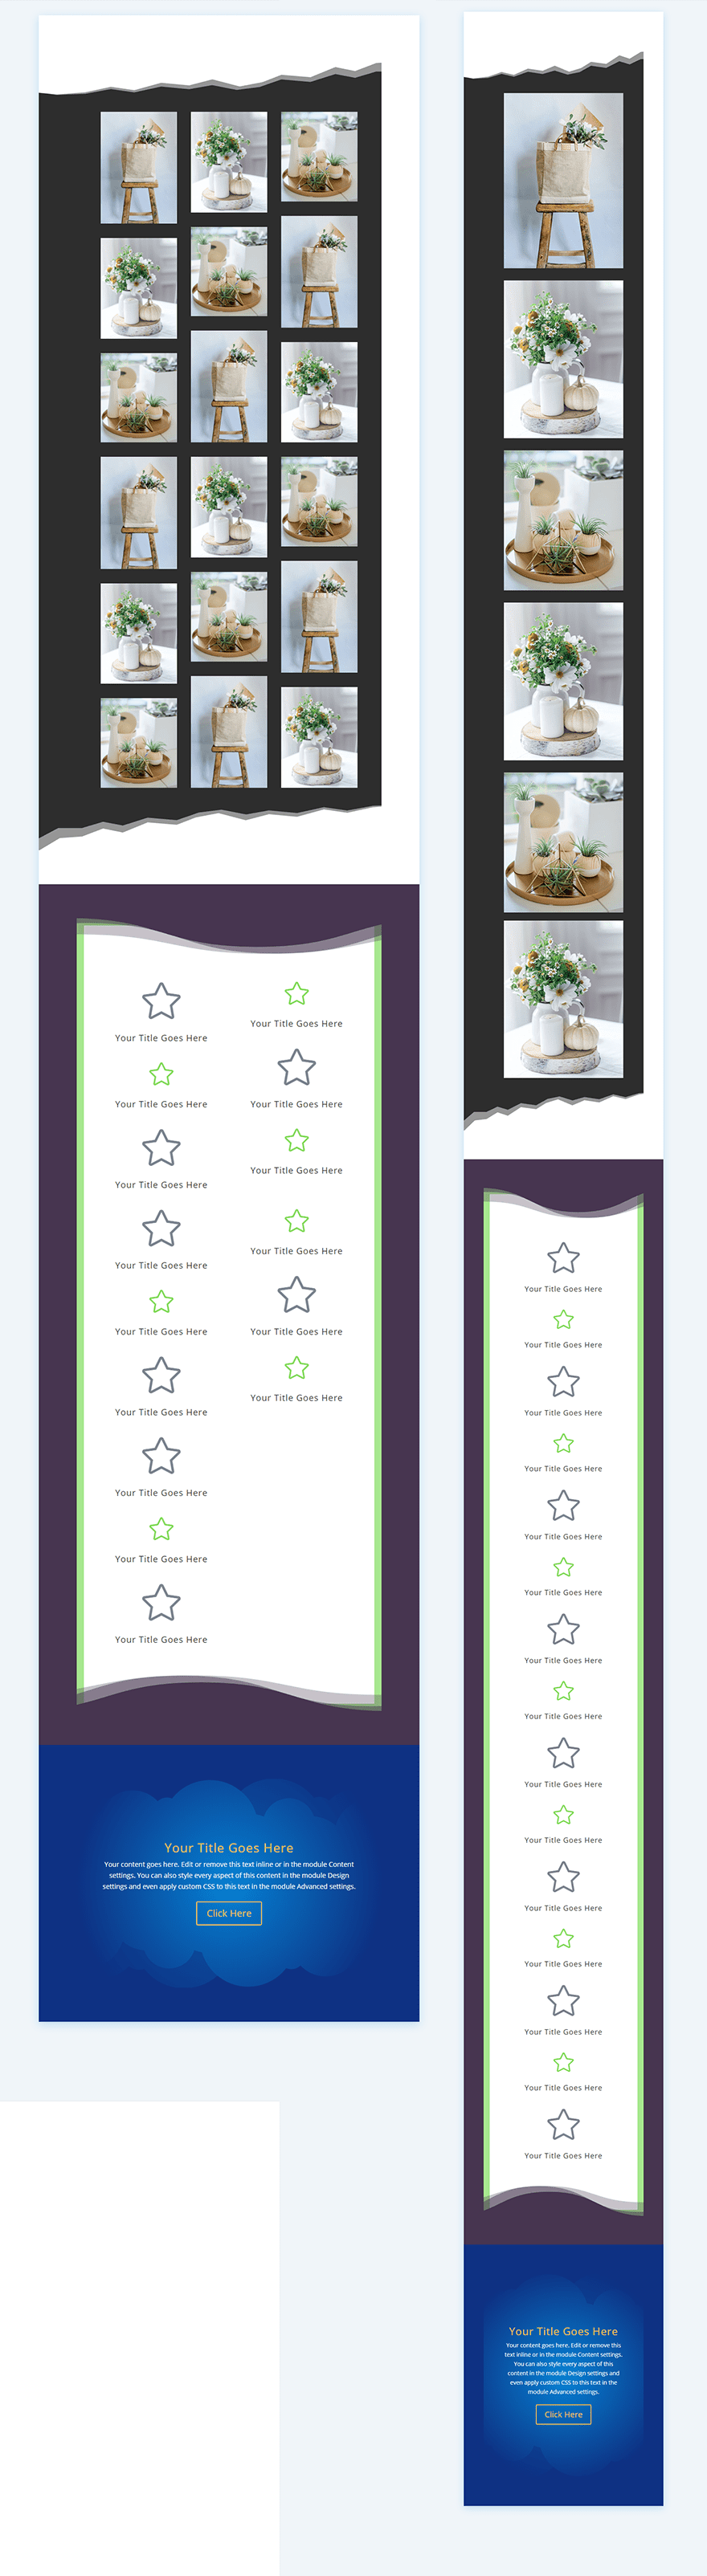
What About Mobile?
In case you were wondering. Here is what the designs will look like on mobile devices.
Final Thoughts
The frame designs created in this tutorial are meant to highlight design possibilities rather than showcase completely polished design pieces. For this reason, I concentrated on the frame designs and used basic examples of content. Hopefully, they will at least inspire you to explore new designs by playing with different section dividers, color schemes, and content.
i look forward to hearing from you in the comments.
Cheers!