[ad_1]
Post types are of the main reasons that developers can extend WordPress in so many wonderful ways. The core version of WordPress comes packaged with five post types: Post, page, attachment, revision, and navigation menu.
Posts and pages are the main post types that we refer to as they are used to store your website’s content. There are a few differences between these post types.
Posts are generally displayed in reverse chronological order on a blog index page, while pages do not have any publication date assigned to them. Categories and tags can also be assigned to posts, while they cannot be assigned to pages (though it is possible to do this through customization).
Pages can be placed in a hierarchical structure. This is useful for organising content for website owners and for visitors.
The design of pages can also be changed easily by assigning them to different page templates. This is a practical way of changing the style of certain parts of your website. It also allows you display information that you would not normally display on a page.
Let us take a closer look at what page templates are and how you can use them on your website.
Why Would You Use a Different Page Template?
WordPress themes usually have a template entitled page.php that controls how your pages are styled. Most theme developers structure the default page template in the same way. The template displays the content for your page and defines what design elements surround that content (i.e. header, sidebar, footer etc).
The default page template (page.php) is set up in this way as that is all that is needed for content to be displayed on a page.
Creating a unique page template allows you to extend WordPress and change what is displayed. For example, you could change the design of your page by removing the sidebar for pages. You could also change the font that is used and display a different header than your home page.
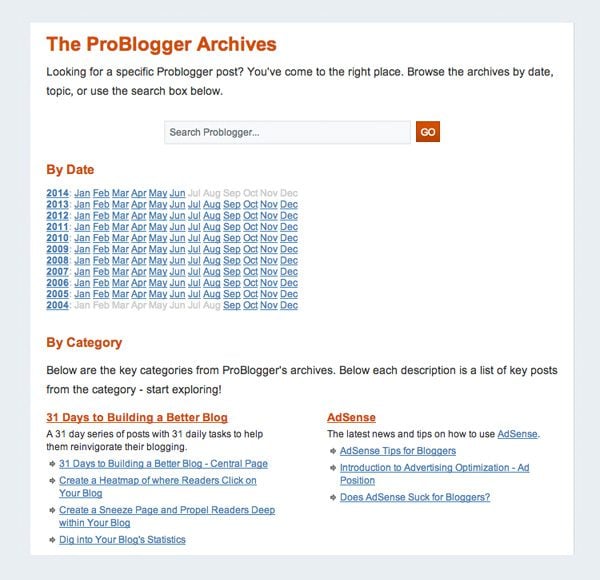
The most well known custom page template is the archives template; which is included with most WordPress themes. The archives lists all the content from your website. Content is normally categorised by pages, categories, tags, date archives, and author archives.
Many archive templates also display a complete list of your blog posts and a search bar for searching your whole website. Essentially, the archive template is a site map to help readers find what they are looking for.
Darren Rowse’s archive page helps ProBlogger readers find articles quickly.
It is also common to find other types of page templates in themes, such as:
- Contact form
- Page with no sidebar (full width)
- Landing page
- Blog index
The possibilities with page templates are endless. You could use page templates to display a unique staff page for your company or something more complex such as a link directory. It just depends on how much you want to customize your website.
How to Select a Page Template for Your Page
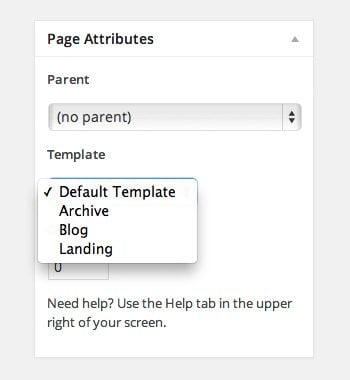
Assigning a page template for your page is simple. When you are in the page editor, you will see a box named Page Attributes displayed on the right sidebar. It is displayed underneath the Publish box.
The page attributes box allows you to choose a parent page for the page and assign its order in the page hierarchy. The middle option allows you to change the template. All you have to do is select the template you want your page to use and then update the page.
Choose your page template from the Page Attributes box.
You can also change the template of a page through the main page list page. All you have to do is click on the Quick Edit link.
The Quick Edit link
Then simply change the template that you want the page to use through the template option at the right hand side of the menu.
Templates can be assigned using the quick edit menu too.
The template option will not display if your theme only has the default page template.
Creating a Basic Page Template for Your Website
Creating a new page template for your WordPress theme is easier than you might think. You do not have to have experience developing themes or plugins.
All you have to do is use the code from your existing theme’s page.php template as the basis of your new page template. For example, lets say you are using the older default WordPress theme Twenty Twelve on your website (which is still my favorite default WordPress theme).
The theme page.php has the following code:
<?php
/**
 * The template for displaying all pages
 *
 * This is the template that displays all pages by default.
 * Please note that this is the WordPress construct of pages
 * and that other 'pages' on your WordPress site will use a
 * different template.
 *
 * @package WordPress
 * @subpackage Twenty_Twelve
 * @since Twenty Twelve 1.0
 */

get_header(); ?>

<div id="primary" class="site-content">
<div id="content" role="main">

<?php while ( have_posts() ) : the_post(); ?>
<?php get_template_part( 'content', 'page' ); ?>
<?php comments_template( '', true ); ?>
<?php endwhile; // end of the loop. ?>

</div><!-- #content -->
</div><!-- #primary -->

<?php get_sidebar(); ?>
<?php get_footer(); ?>
We can use this code to create a new page template. To create a page template, all we need to do is ensure that a comment is placed at the top of a new file. This defines the file as a page template.
/*
Template Name: My Custom Page Template
*/
Your page templates will therefore look something like this:
<?php
/*
Template Name: My Custom Page Template
*/

Page Template Code Goes Here
Let us walk through the creation process of a basic page template. To be more specific, let us create a full width page template with no sidebar; a template that most website owners will find useful. Twenty Twelve does include a full width page template, but for the purpose of this tutorial, we shall assume it does not 🙂
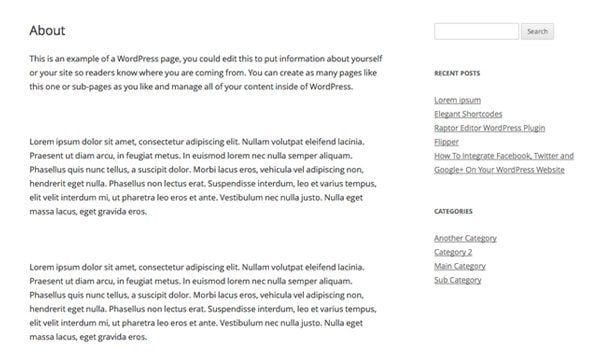
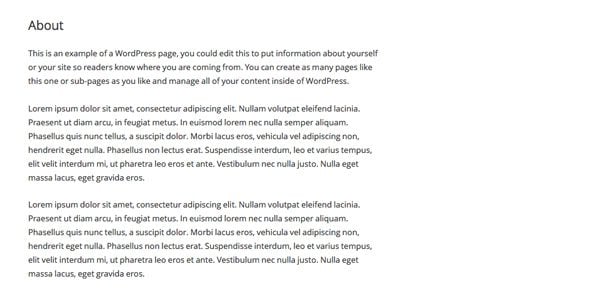
The standard page template displays a sidebar at the right hand side of the page.
The default page template of Twenty Twelve.
Creating a new custom page template with no sidebar is simple. The first thing you need to do is create a new file using an editor such as TextPad (windows) or TextWrangler (MAC). We can call it something simple such as nosidebar-page.php or full-page.php (more on naming your file later). Next, upload the file to your theme folder. For Twenty Twelve, the location of your file would be www.yourdomain.com/wp-content/themes/twentytwelve.
Our template is essentially just the Twenty Twelve page.php template with the code for the sidebar <?php get_sidebar(); ?> removed.
It looks like this:
<?php
/*
Template Name: Full Width Page with No Sidebar
*/

get_header(); ?>

<div id="primary" class="site-content">
<div id="content" role="main">

<?php while ( have_posts() ) : the_post(); ?>
<?php get_template_part( 'content', 'page' ); ?>
<?php comments_template( '', true ); ?>
<?php endwhile; // end of the loop. ?>

</div><!-- #content -->
</div><!-- #primary -->

<?php get_footer(); ?>
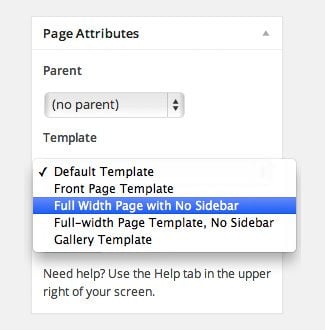
Once the template file has been uploaded to your theme folder, it will be available for selection in all pages. You can then assign a page to this template to remove its sidebar.
The template can be referenced by the name defined at the top of the template.
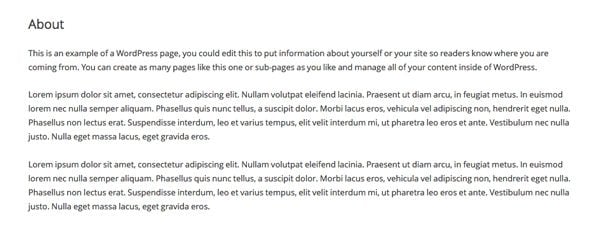
We are not finished yet. We still have to make the content span across the full width of the page. So far, all we have done is remove the sidebar. The main content area still spans two thirds of the page.
Our sidebar has been removed, but the content is not displayed across the full width of the page.
This is an easy issue to address. If you look back to the code in our template, you will see that the main content area has the following CSS division wrapped around it.
<div id="primary" class="site-content">
The CSS ID primary allows us to link directly to the main content area. It works in the same way as the ID attribute in HTML. The part that styles the main content area is class=”site-content”.
If we check the stylesheet (stylesheet.css) of Twenty Twelve, we can see the class site-content located close to the bottom of the file.
.site-content {
float: left;
width: 65.104166667%;
}
To expand our content across the full width of the page, we have to do is change the width of the content area from 65% to 100%. However, we should not modify the class site-content as that class is still used in other templates such as the default page template page.php and the posts template single.php. Changing the percentage of site-content would result in all of our posts and pages spanning the full width of the page.
What we need to do is create a new CSS class that is used specifically for our full width pages:
.site-content-fullwidth {
float: left;
width: 100%;
}
Once the theme stylesheet.css template has been updated with the above class, we need to modify our full width page template to ensure that we link to the CSS class that has a width of 100%:
<div id="primary" class="site-content-fullwidth">
Our final template would therefore look like this:
<?php
/*
Template Name: Full Width Page with No Sidebar
*/

get_header(); ?>

<div id="primary" class="site-content-fullwidth">
<div id="content" role="main">

<?php while ( have_posts() ) : the_post(); ?>
<?php get_template_part( 'content', 'page' ); ?>
<?php comments_template( '', true ); ?>
<?php endwhile; // end of the loop. ?>

</div><!-- #content -->
</div><!-- #primary -->

<?php get_footer(); ?>
This updated template ensures that our content is displayed across the whole page.
Our content now spans across the fill width of the page.
The above steps can be reproduced with any WordPress theme. Simply remove the sidebar from your default page template and ensure that you style the main content area using a class that expands the full width of the page.
A Quick Note About Naming Your Page Templates
The WordPress Template Hierarchy states that WordPress will display a template for a page in the following order:
- Custom Template
- page-{slug}.php
- page-{id}.php
- page.php
- index.php
It is good to have an understanding of this template hierarchy as it will help you understand why a page is styled in a particular way.
The hierarchy means that WordPress will always display a page template for a page if it has been assigned. If no page template has been assigned to a page, it will search for page-{slug}.php. For example, if your about page used the permalink staff, it would search for a template named page-staff.php.
If no page-{slug}.php template is found, WordPress searches for a template with the page ID. For example, if the ID of your page was 15, WordPress would look for a page template named page-15.php.
If no page templates are assigned to a page and no templates match the page slug or ID of the page, then WordPress will use the default page template page.php. And if no page.php template exists, it will use index.php.
A lot of theme developers name their page templates using the format page-name.php. For example, they would name their contact form page template as page-contact.php. There is nothing wrong with this policy; however, as you can see from the WordPress hierarchy for page templates above, there is a slight chance that this will cause the wrong template to be displayed.
For example, consider a website that has a page template named page-green.php for displaying pages with a green style. If a page had the post slug green, it would also use the page-green.php template, even if you had not assigned it to the page.
Thankfully, this type of problem is very rare. Rare enough that you do not have to worry about it. So feel free to use whatever naming configuration you like, whether it be page-name.php, name-page.php, or name.php. It should not matter what you use as long as you avoid key WordPress template names; and you can always change your page slug or template name later if you do see a confliction.
Overview
Page templates are a great way of customising the style and content of your website pages. Most WordPress themes contain at least a few unique page templates; however, as we have seen, it is not too difficult to create basic page templates yourself.
The best way to learn how to create your own page templates is to create a custom page template using your theme’s page.php template. Then look at the code that is used in that theme and in other WordPress themes. This will help give you ideas of how you can modify your template to your liking. Be sure to do any customizations on a test website initially so that your live website will not be affected if you make a mistake with your code. You can then copy the code and templates to your live website.
If you found this article useful, I encourage you to subscribe to the Elegant Themes blog to ensure that you are updated of our future articles.
Be sure to leave a comment below if you are unsure about any part of this tutorial.
Article thumbnail image by Everyday smiles / shutterstock.com
[ad_2]
Source link

