One of the most popular methods for scheduling meetings is through a contact form. This sends the message to you as an email, which starts an email conversation. You’ll then need to respond to the email, and then they’ll respond, creating a back and forth conversation. It works, but it’s not efficient.
A better option is to use a plugin designed for scheduling. Scheduling plugins can manage the schedule and keep you and your clients informed of the appointment. One such plugin, Simply Schedule Appointments, integrates with Divi to create the best scheduling experience possible. In this article, we’ll take a close look at Simply Schedule Appointments and see what it can do.
Installing Simply Schedule Appointments
Download the plugin from the developer’s website or search for it in the WordPress plugins dashboard. To install:
- In the WordPress dashboard, go to Plugins > Add New
- Search for Simply Schedule Appointments
- Click Install Now
- Once the plugin is installed, click Activate
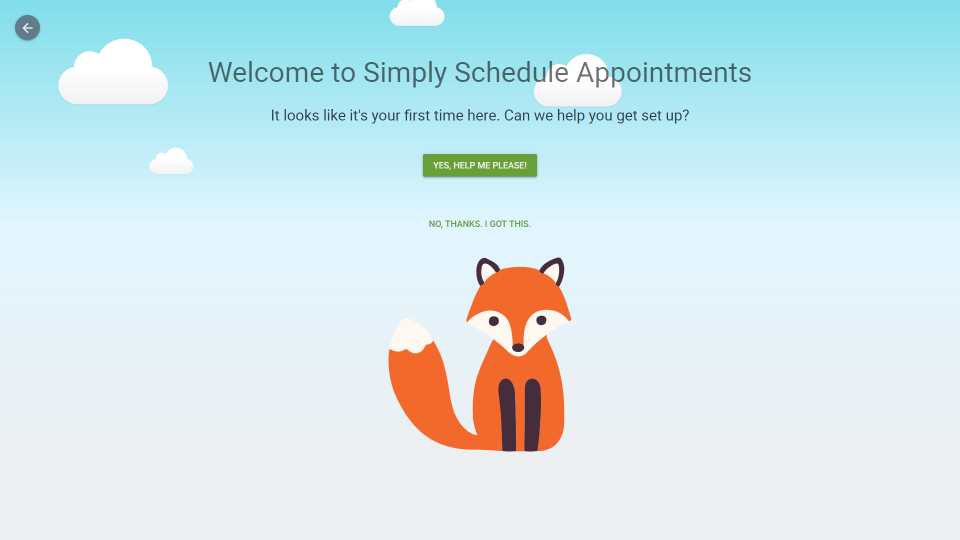
The first time you select Appointments in the WordPress dashboard you’ll set a setup screen where you can use the help or set up the plugin manually. Enter your license key and then set up your preferences.
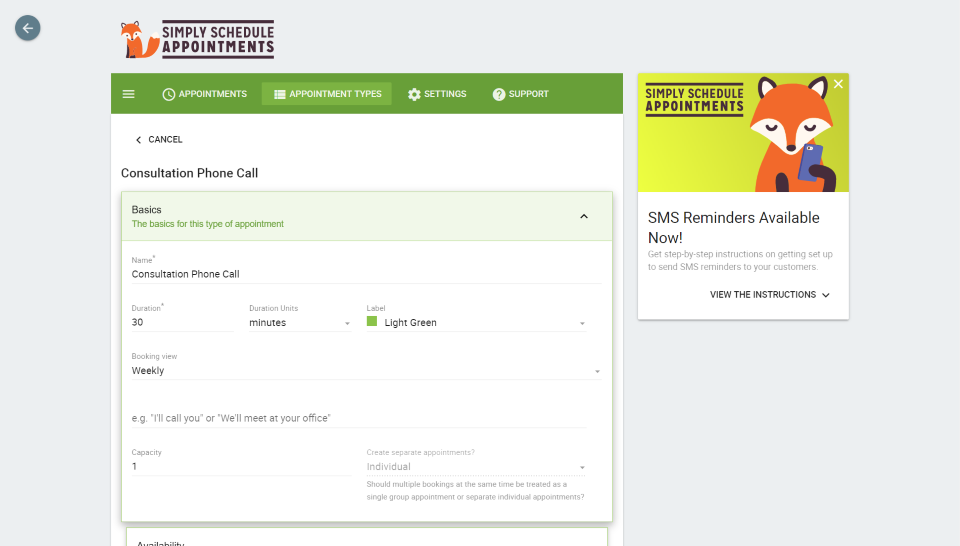
Go through your settings as normal. This includes your appointment types, availability, scheduling options, Google Calendar, customer information, notifications, etc. I’ve set my appointment type as a consultation phone call.
Simply Schedule Appointments lets users schedule an appointment through your website without needing to interact with you. Users make appointments based on their time zone. Reminders are sent to them automatically. You can set up a cancelation policy and the plugin will enforce it. Users can reschedule easily. This makes it an excellent choice to use with Divi.
Using Simply Schedule Appointments with Divi
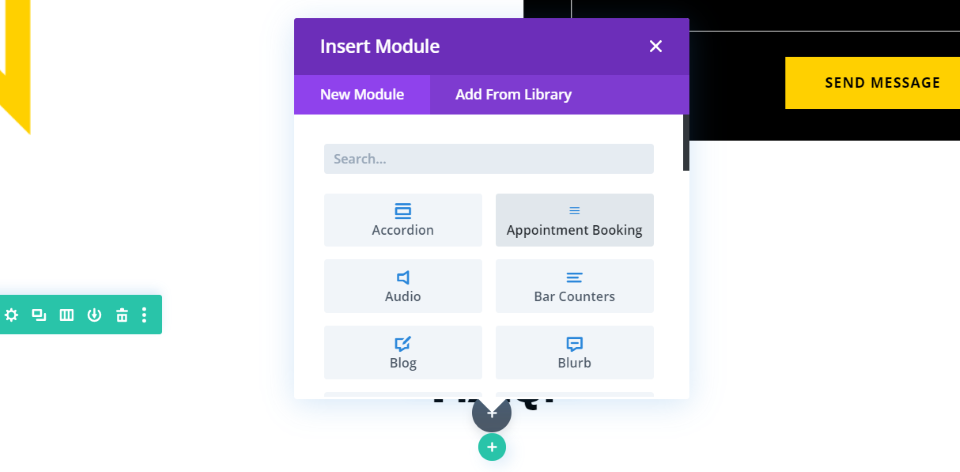
Normally, you’d have to use a shortcode to place the booking form on your website. Simply Schedule Appointments adds a new module to the Divi Builder called Appointment Booking.
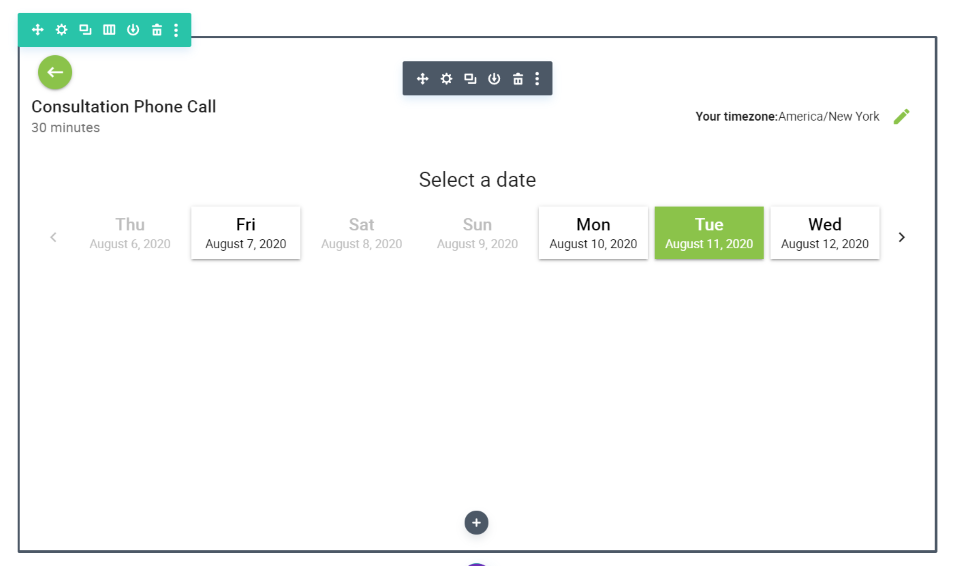
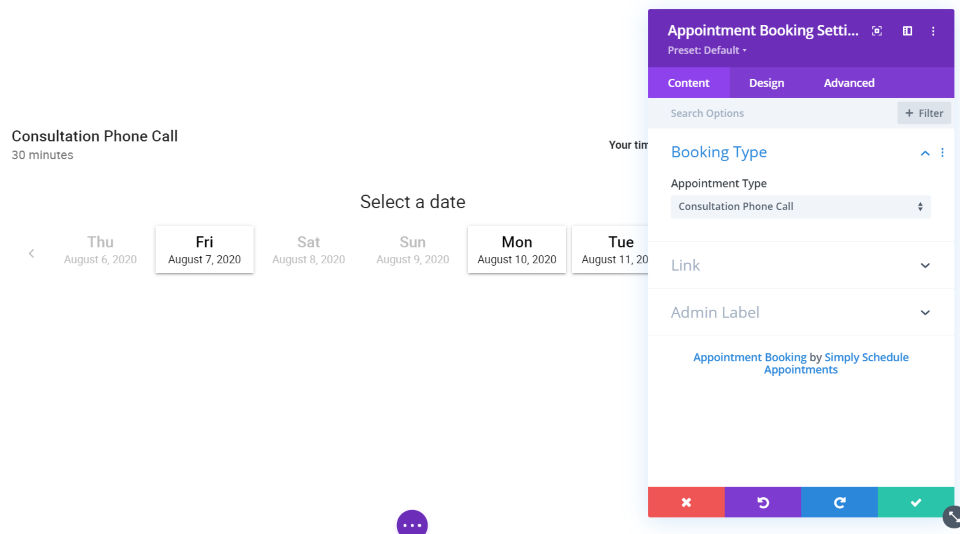
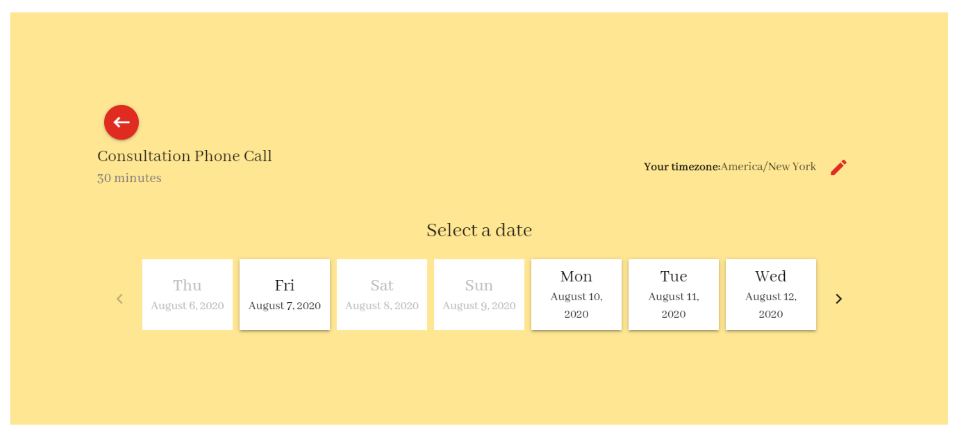
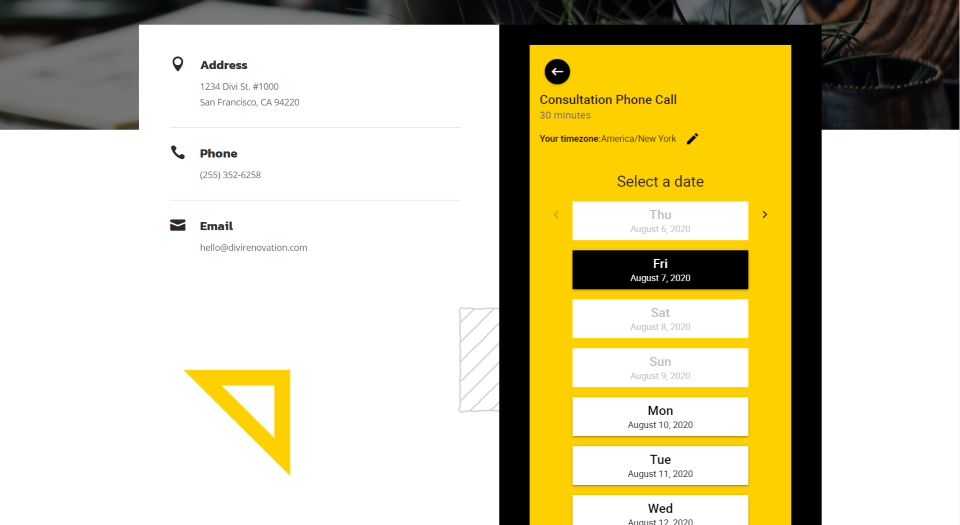
The module embeds the multi-page form into your Divi layout. The first page provides information about what the form is for, the user’s time zone, and a calendar where they can select the date and time. Only the dates that you’re available are clickable.
The calendar displays each day as a button within a slider with navigation to take you to the next set of dates. The back arrow in the upper left corner takes you back to the previous page. Clickable dates have a border and change color on hover. Most of this can be adjusted and styled within the module.
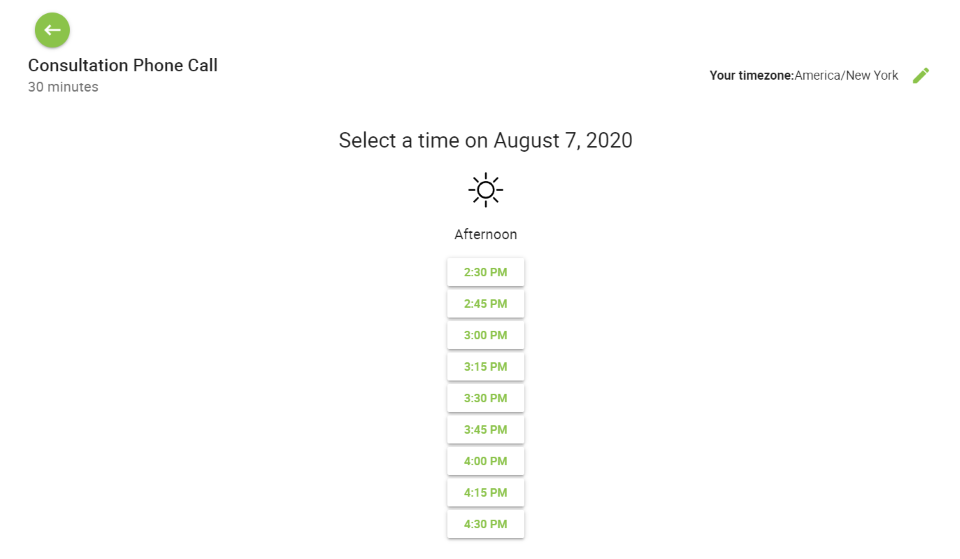
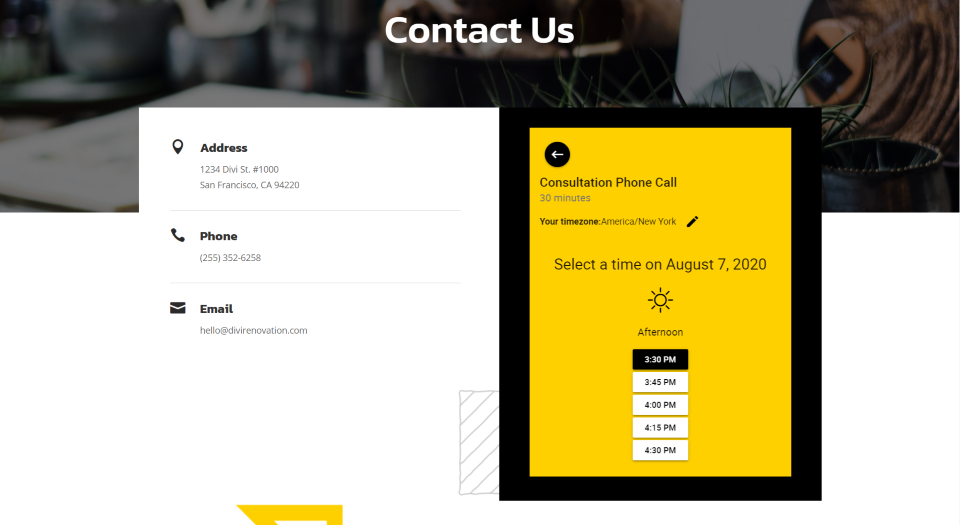
Clicking on a date opens the next page showing the available times.
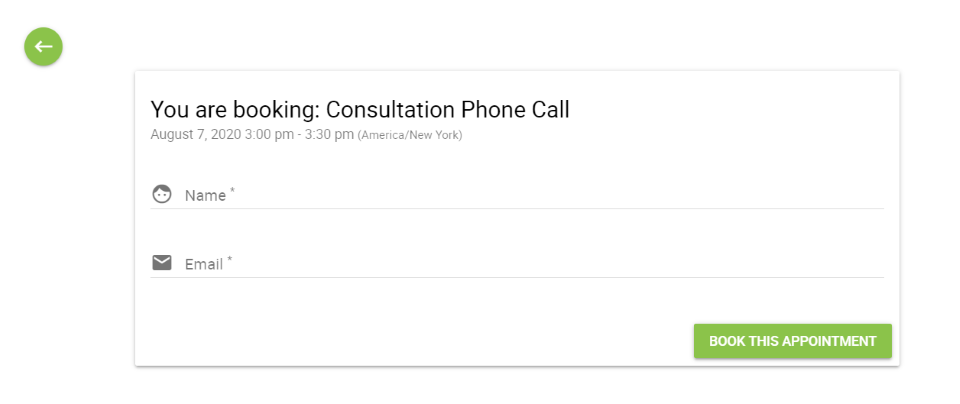
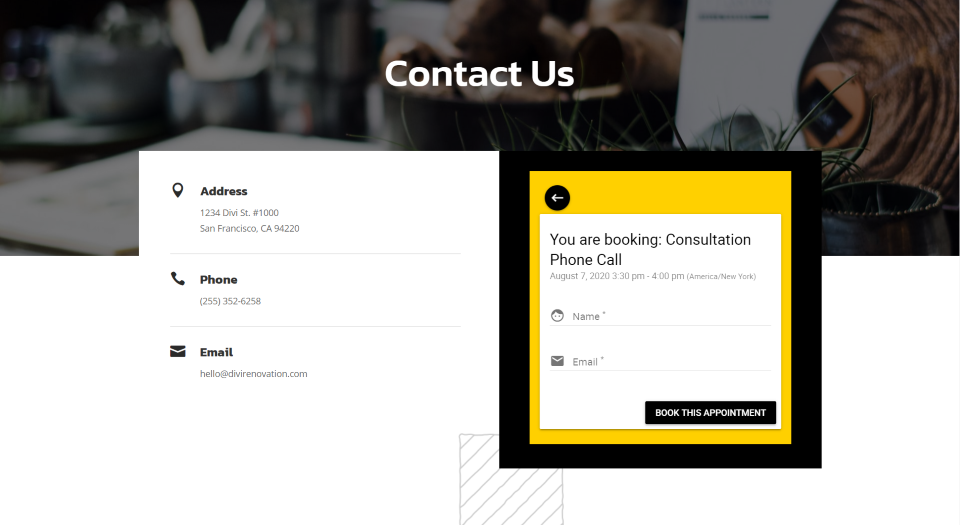
Clicking a time opens the next page where you can enter your name and email to book the appointment.
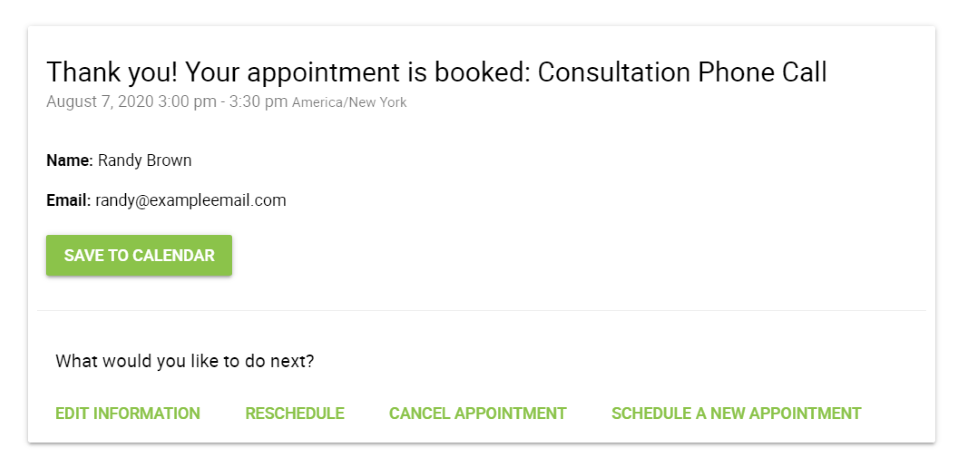
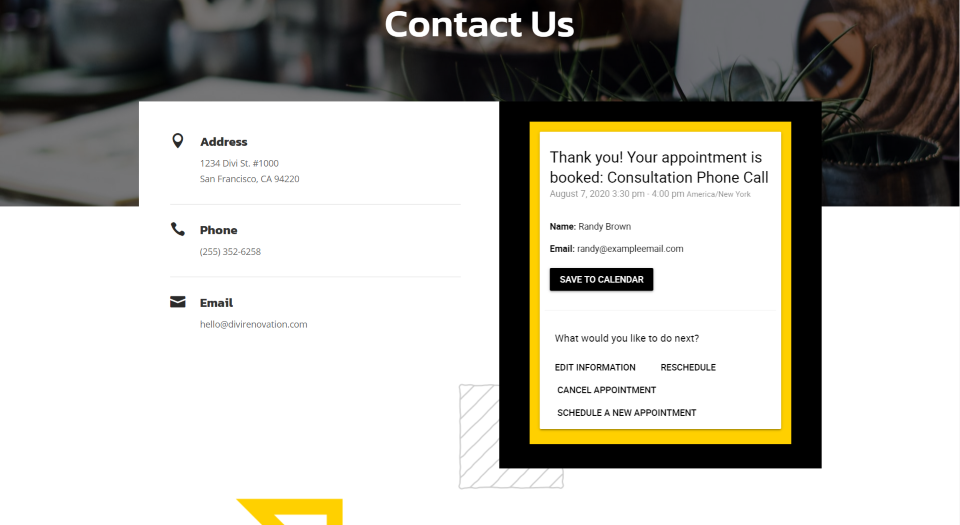
Once the user books the appointment they see a Thank You screen where they can see information about the appointment. Information includes the type of appointment, date and time with the time zone, their name, and email, and a button to save it to their calendar. Clicking the calendar button opens options for Google and Other. They can also edit, reschedule, cancel, and schedule a new appointment at the bottom of the form.
Simply Schedule Appointment Module Settings
The settings are simple. The module doesn’t include the common settings for background, border, animation, etc. The Content tab includes Booking Type, which lets you choose which types of bookings will display. The types of bookings available are those that you’ve set up in the settings screen for the plugin. My options are Choose All and Consultation Phone Call.
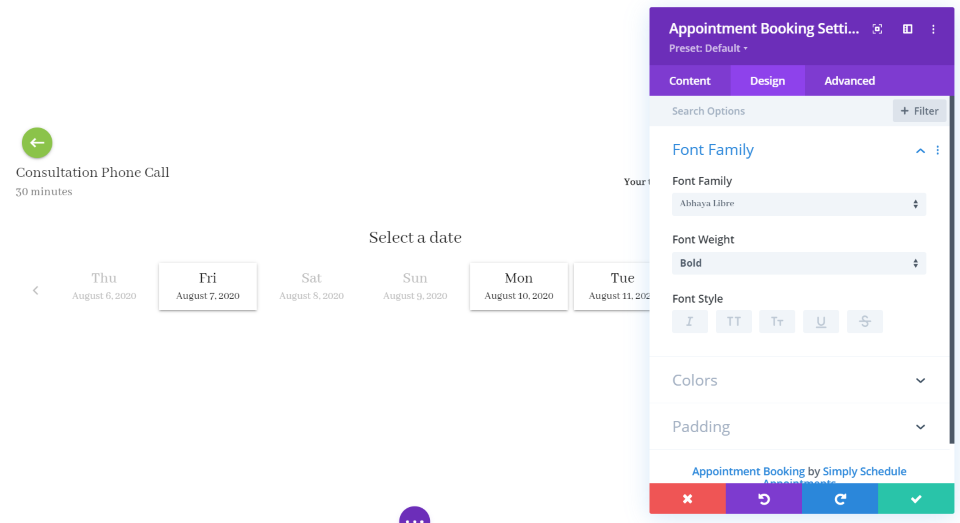
The Design tab includes font family, colors, and padding. Font Family allows you to choose the font, font weight, and style.
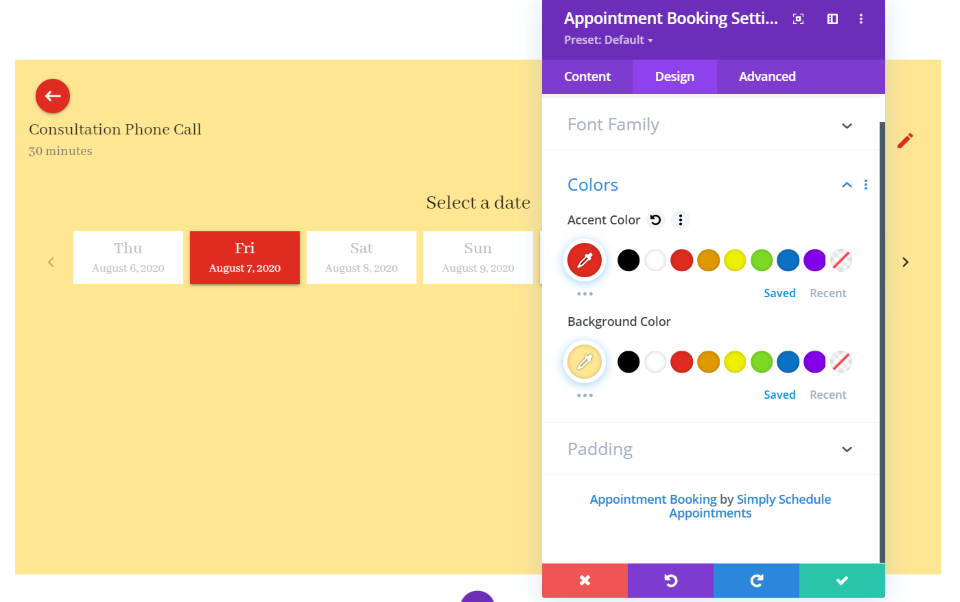
Colors includes the accent color and background color. The accent color applies to the back arrow, pencil icon, and the hover state of the date.
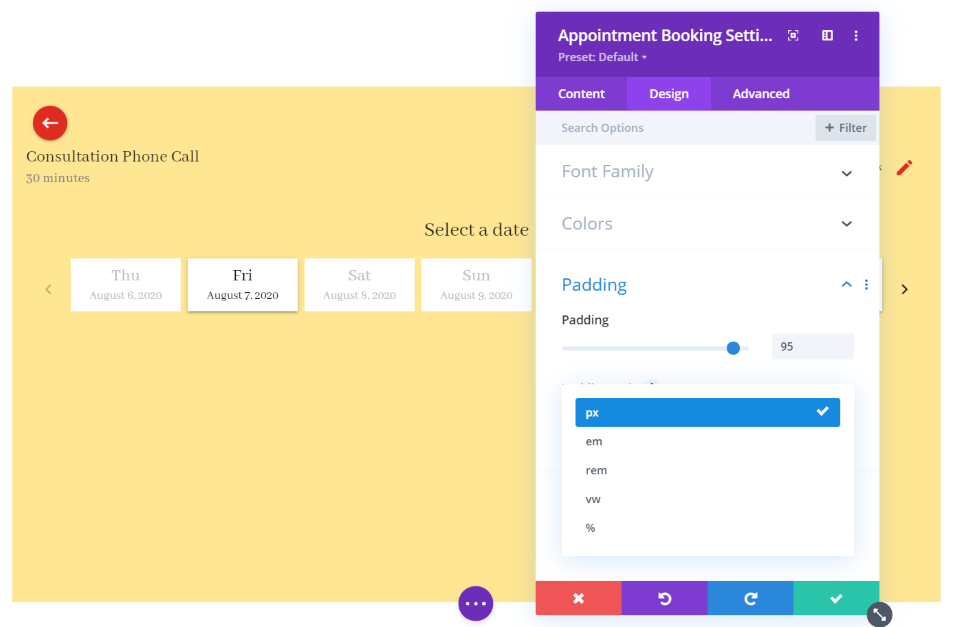
Padding is controlled by a slider and you can choose the padding unit. Choose between 5 options including pixel and percentage.
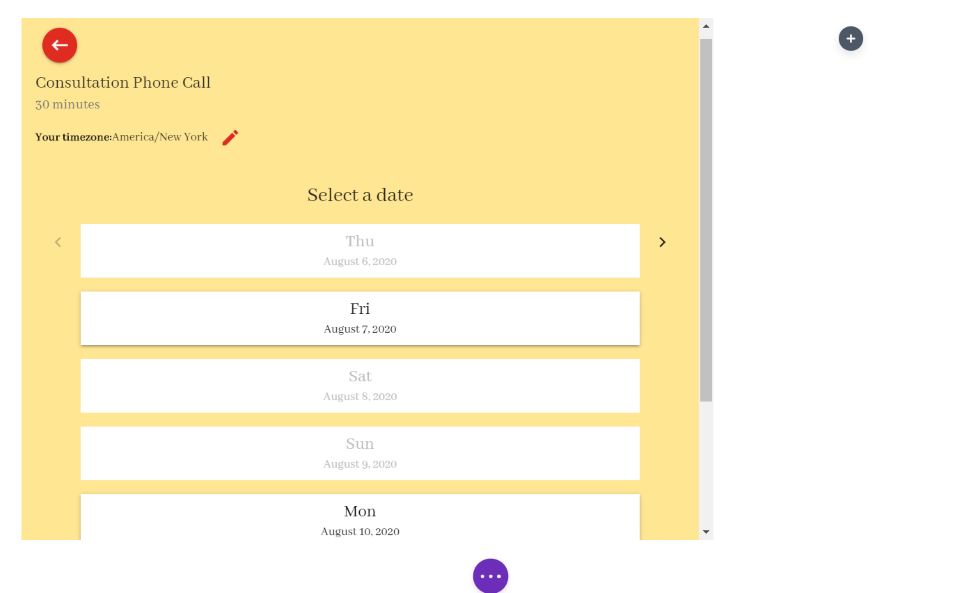
The padding is added to every side. It doesn’t display the padding in the Visual Builder. Here’s how 100px looks on the live page.
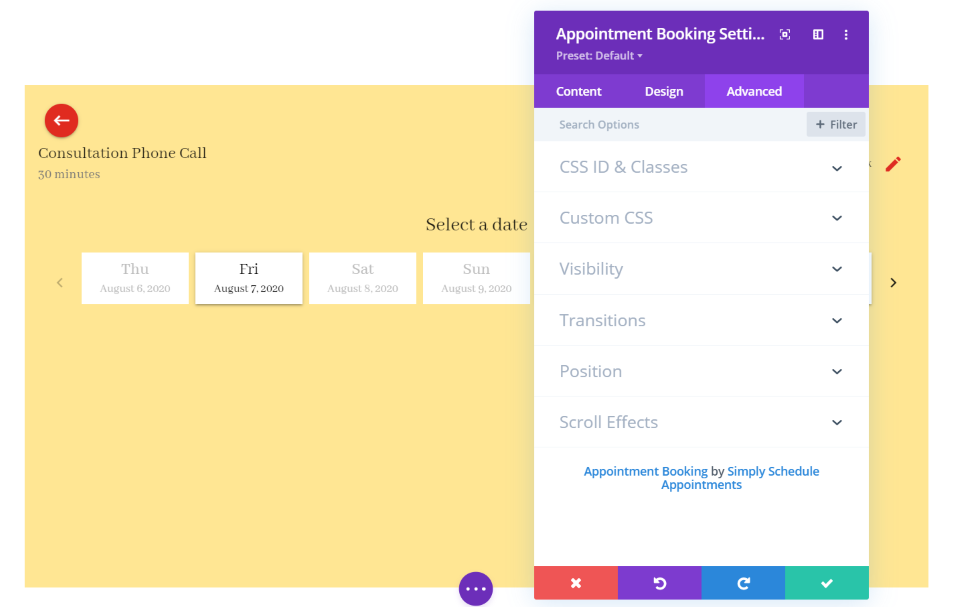
The Advanced tab includes settings for the CSS ID and classes, custom CSS, visibility, transitions, position, and scroll effects.
The module is responsive, so it will stack the dates if the column isn’t wide enough to display full-width.
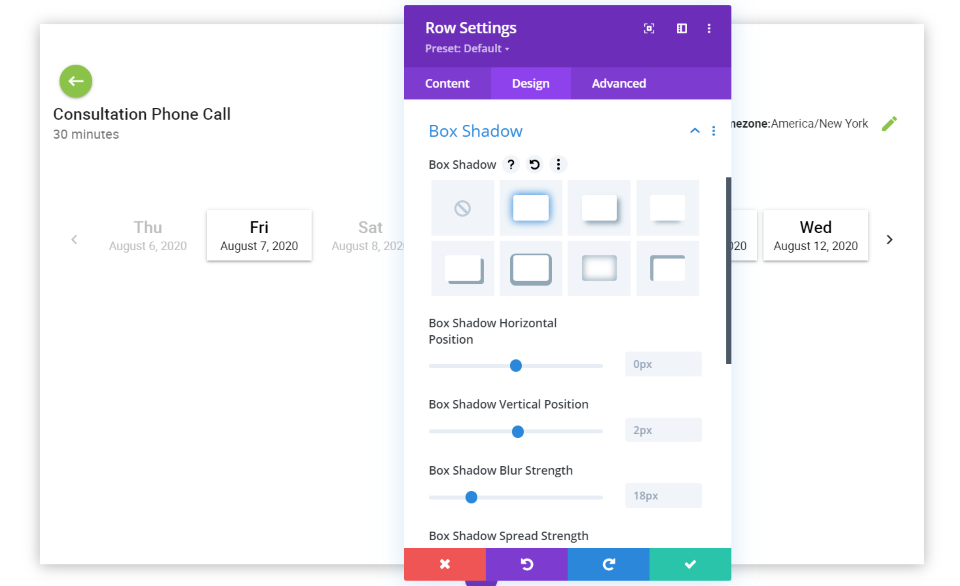
There isn’t a lot of adjustments, but it is enough to integrate the form into your Divi website. For example, it doesn’t include box shadow for the module. I added it here in the row. This works great for a single column row with no other modules.
Default Styling for the Form
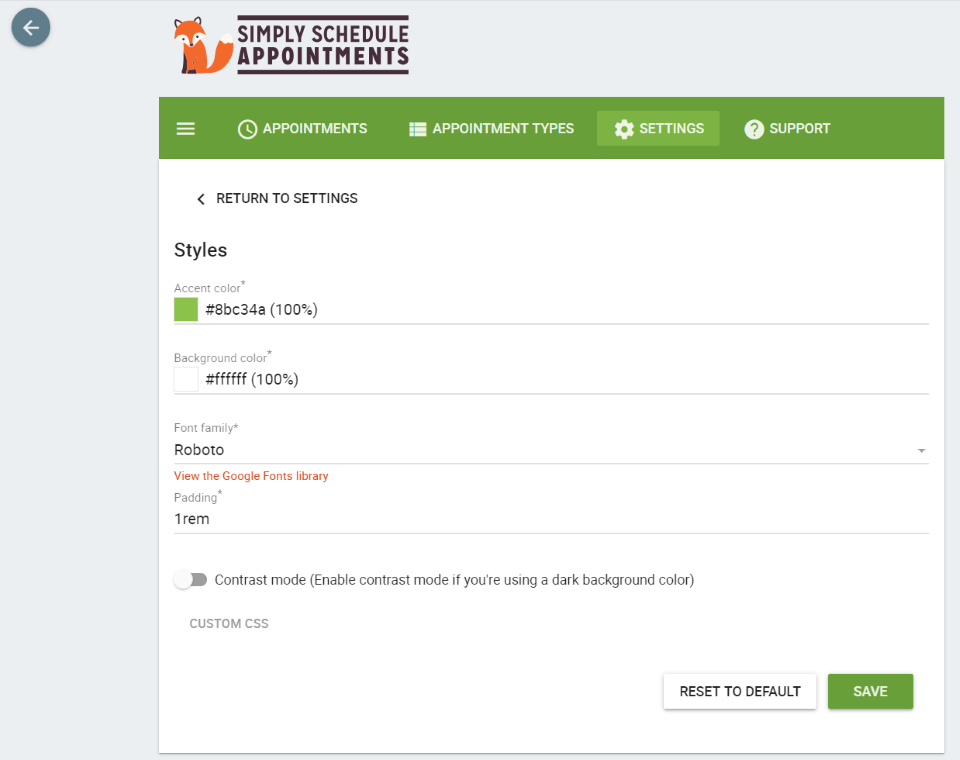
You can also style the form from the Settings screen in the dashboard menu or from the module itself. You can adjust the accent color, background color, font family, padding, enable contrast mode, and use custom CSS. This will be the default style that the forms use unless you style them within the modules.
Upcoming Appointments List
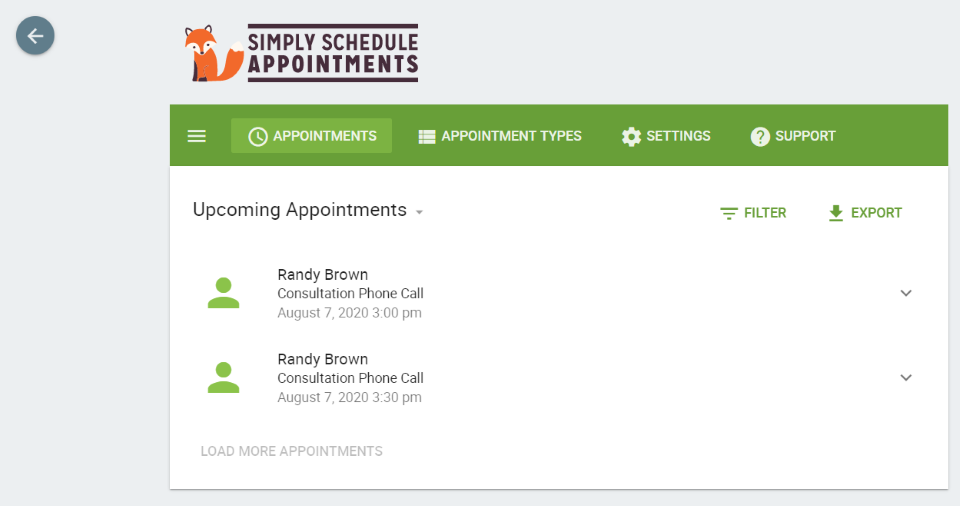
Once someone makes an appointment through your Divi form, you’ll see it in your list of appointments in the dashboard menu. You can filter this list, export it, and see appoints by upcoming, past, or a certain date range. Clicking on one opens a set of options to cancel it or see details.
Simply Schedule Appointments Divi Example
For this example, I replaced the contact form in the contact page of the Renovation layout pack with the Simply Schedule Appointments module. Using colors from the layout, I made the background a bold yellow and made the accent color black.
This is the second page. It displays the available times. The button changes to black on hover.
This is the form to enter your name and email. The background of the form with the fields is white. This part of the form isn’t adjustable in the regular settings. It stands out nicely and looks great with the layout.
Here’s the Thank You form. It also displays a white background. It resized to place all of the links on the screen and still looks great within the small space.
Price
There are several versions of Simply Schedule Appointments available. The Divi module is in each version including the free version. The paid versions include integrations from Google Calendar, PayPal, Google Analytics, Gravity Forms, Facebook Pixel, Mailchimp, Stripe, and more. Purchase options include:
- Free – includes Divi module
- Plus – $99, includes Google Calendar, custom fields, Mailchimp integration, classes and group events
- Professional – $199, adds payments, webhooks, email reminders, track goals, live support
Ending Thoughts
That’s our look at Simply Schedule Appointments for Divi. The plugin works well with Divi. I found the module simple to use. It does lack many of the styling features that are standard in Divi modules. Some of the stylings could be done in CSS. I would like to see the standard settings added back in such as font color, border, box shadow, etc. I was able to get some nice styling to fit my layouts.
The module works great. It resizes well. The forms are simple and intuitive for users. The dashboard works the same regardless of whether or not you’re using the shortcodes or the Divi module. If you’re interested in using a scheduling plugin with Divi, Simply Schedule Appointments might be the plugin you need.
We want to hear from you. Have you tried Simply Schedule Appointments with Divi? Let us know what you think about it in the comments.
Featured Image via VectorKnight / shutterstock.com


