Wishlist Member is a membership plugin for WordPress that makes it easy to build a membership site with multiple membership options. It’s easy to set up and use to restrict access to posts, pages, and custom post types. Wishlist Member now has built-in Divi integration, allowing you to control access to any section or row. In this article, we’ll look at how Wishlist Member integrates with Divi, see what it can do, and see how easy it is to use.
Integrating Wishlist Member with Divi
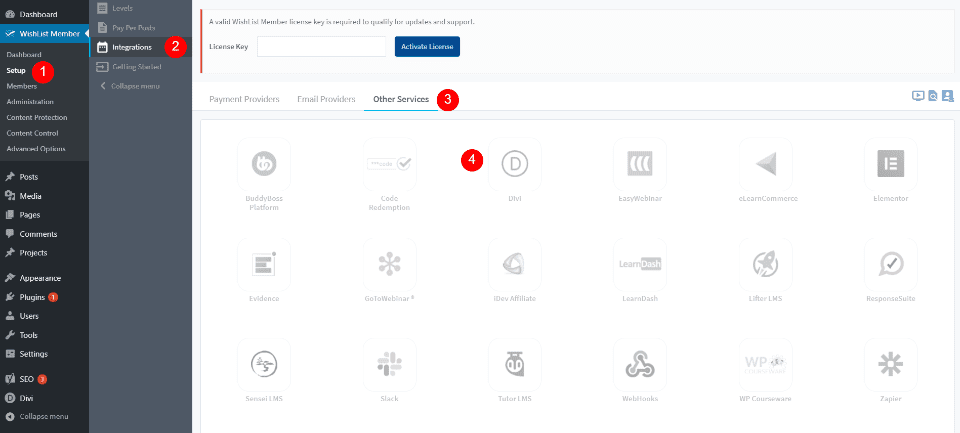
Wishlist Member has Divi integration built-in, but it’s disabled by default. To use Wishlist Member with Divi, you’ll need to enable Divi integration. Go to the Wishlist Member menu in the WordPress dashboard and select Setup > Other Services > Integration. You’ll see lots of apps to choose from. Select the Divi logo. This opens to a new screen.
Click the switch to enable Divi integration. Wishlist Member is now ready to use with the Divi Builder.
Wishlist Member Divi Integration
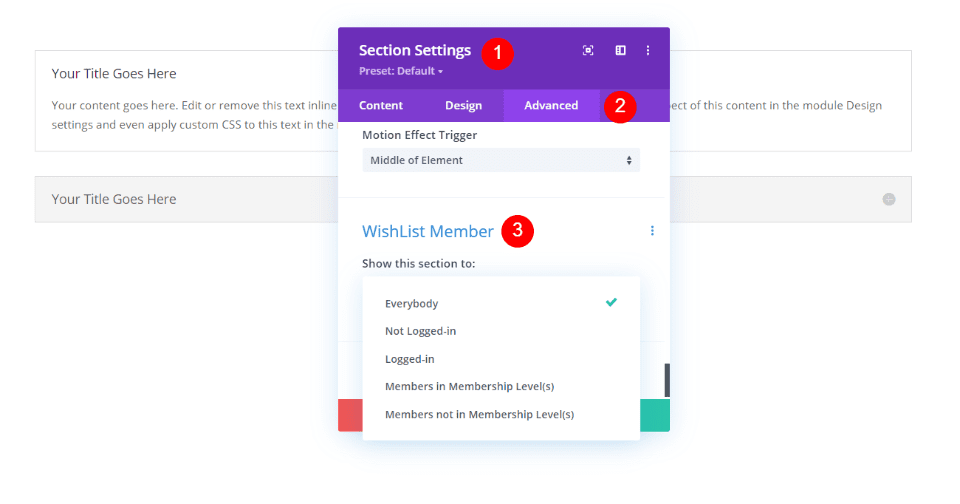
Once you’ve enabled Divi integration, the Wishlist Member options are added to the Advanced tab of sections and rows in the Divi Builder. The last option in the Advanced tab, called Wishlist Member, has five choices in a dropdown box:
- Everybody – every person that visits the website can see this section or row. This is the default selection.
- Not Logged-In – every person that isn’t logged into their account on your website will see the section or row.
- Logged-In – every person that is logged into their account on your website will see the section of row.
- Members in Membership Levels(s) – every person that’s logged in and has the required membership levels will see the section or row. You’ll select the levels from the list of those you’ve created.
- Members not in Membership Levels(s) – every person that’s logged in and does not have the specified membership levels will see the section or row. You’ll select the levels from those you’ve created.
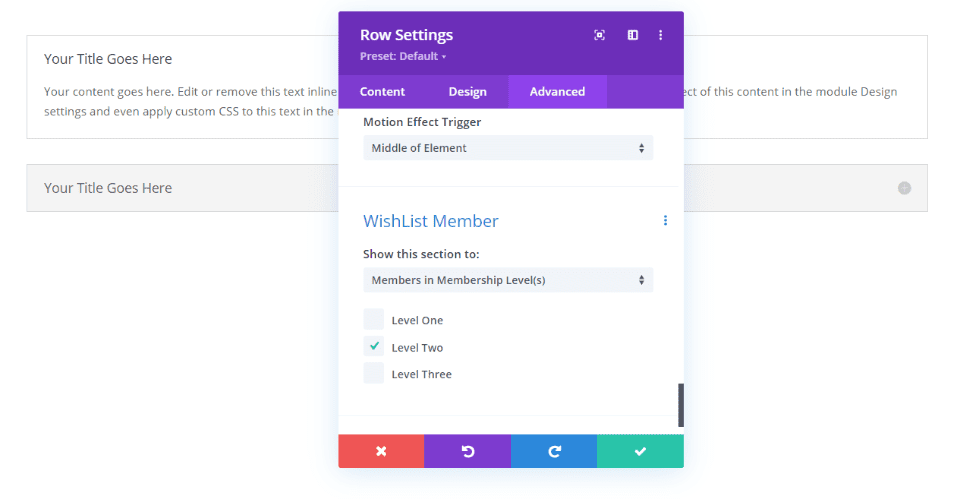
For those that allow you to specify a membership level, a set of selections will appear that shows the names of the levels that you’ve created in the Wishlist Member Setup screen in the WordPress dashboard. You can make any selections you want.
Making Multiple Selections
You can make your selections just in the section or row or use them together. Using the settings together with the settings of other sections and rows allows you to create targeted content. This is especially helpful if you have multiple levels and multiple memberships. The use of sections and rows together allows you to create some interesting logic, but it gets tricky and confusing if you have a lot of options. For most uses, I recommend using just the section or row.
I’d like to see a two-step option that would allow you to make multiple selections for the same section or row. This would allow you to create Boolean logic without having to create multiple sections and multiple rows. For example, you might want to show a row to those who are in level one, but if they’re also in level two then don’t show it. Of course, this isn’t the focus of this plugin. It keeps it simple with either a “do show” or a “don’t show” option, and it works perfectly for this.
Let’s look at a few examples. First, we’ll need a few levels to choose from.
Wishlist Membership Level Setup
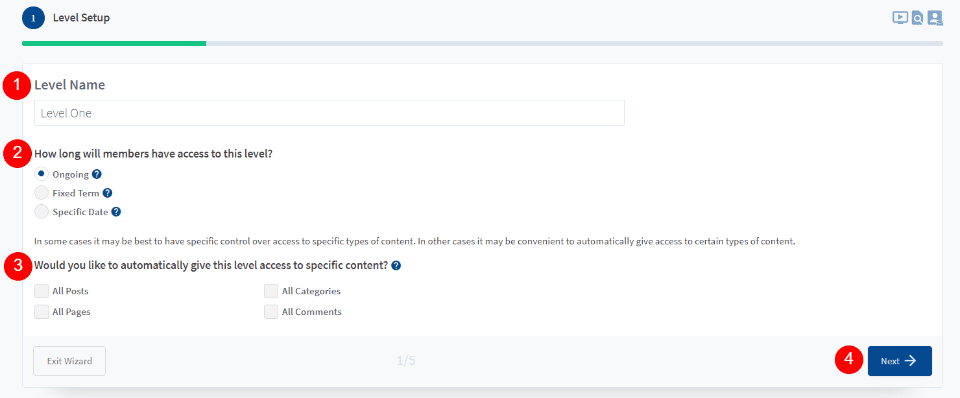
Before Divi can do it’s Wishlist Member magic, you’ll need to create a few membership levels. This is easy to do. In the dashboard menu, go to Wishlist Member > Setup. Select to add a new level. If you don’t have any levels, you’ll see the level creation wizard. Provide the level a name, choose how long members have access to the level, and choose the types of content they have access to. Click Next.
Choose if members need admin approval and if they must confirm their email.
Choose if you want your new pages and posts automatically protected with the Wishlist Membership restriction rules. You can also select it to only show content for the specific membership levels. You won’t need to include this. We’ll control this with Divi.
Enter the email name and address that Wishlist Member will use to send messages to members.
Setup the payment gateway and email service options.
Run the wizard again to create multiple levels. Or exit the wizard and create more levels later.
Once you have the levels you want, you can then add the membership restrictions to your Divi sections and rows. You won’t have to go through this wizard to create new levels. They’ll follow the settings you’ve already set up. Now, let’s see how it works.
Wishlist Member Divi Examples
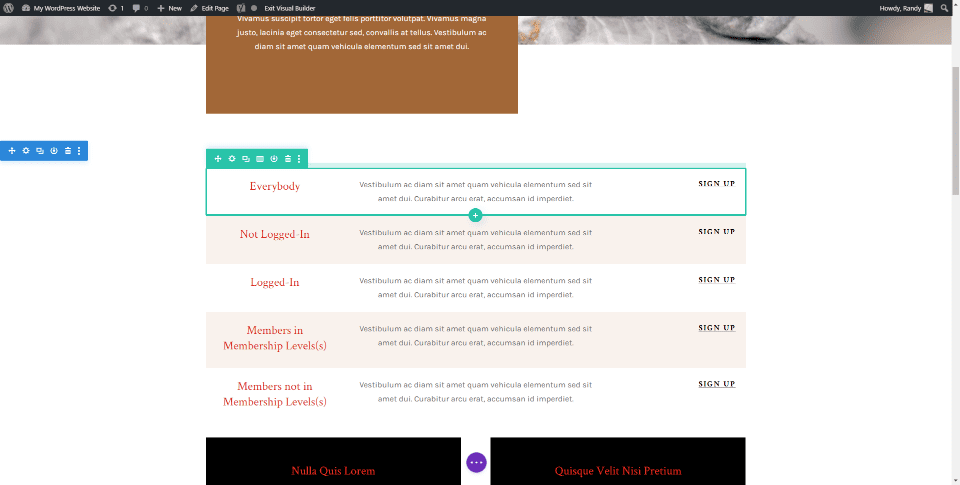
To demonstrate how Wishlist Member Divi integration works, I’m making some adjustments to a set of rows from the Meditation Center layout pack Classes page. I’ll also make a CTA for the Landing Page layout. I’ve adjusted the membership restrictions for each row according to its title to help make it easier to follow.
The content is just a title, description, and button, but it can be anything you want it to be. This would work great for displaying links to course pages, embedded videos, links to articles such as tutorials or recipes, or any other type of membership content.
Wishlist Member Divi Example One
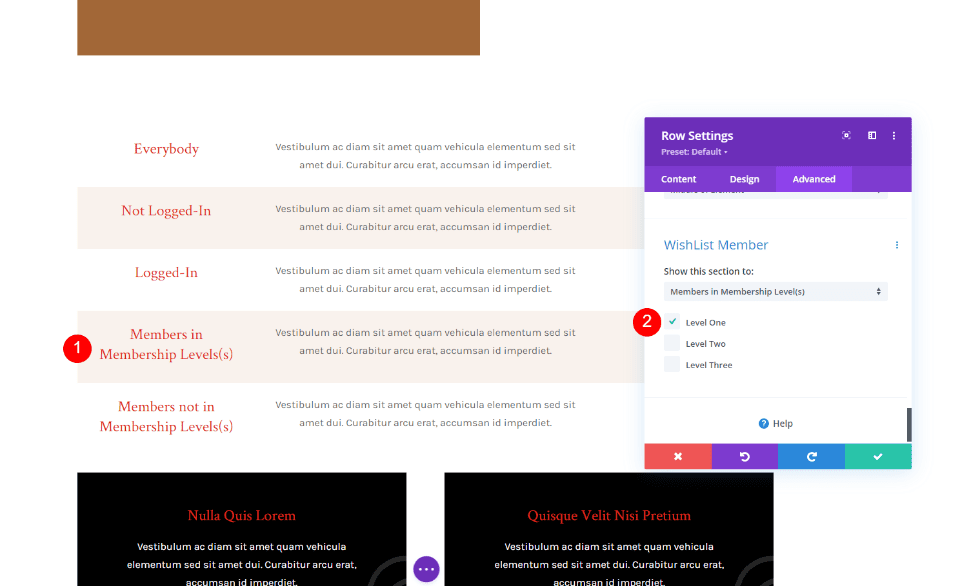
For Members in Membership Level(s), I’ve set it to only display to anyone in Level One. Those in Level Two and Level Three will not see this row.
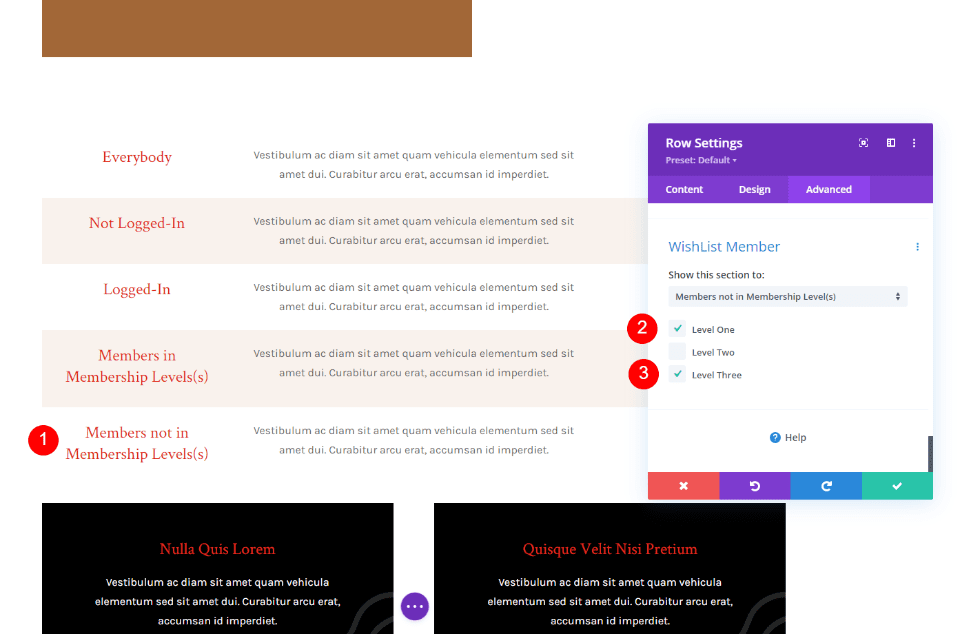
For Members not in Membership Level(s), I’ve set it to only display to anyone not in Level One or Level Three. Only those in Level Two will not see this row.
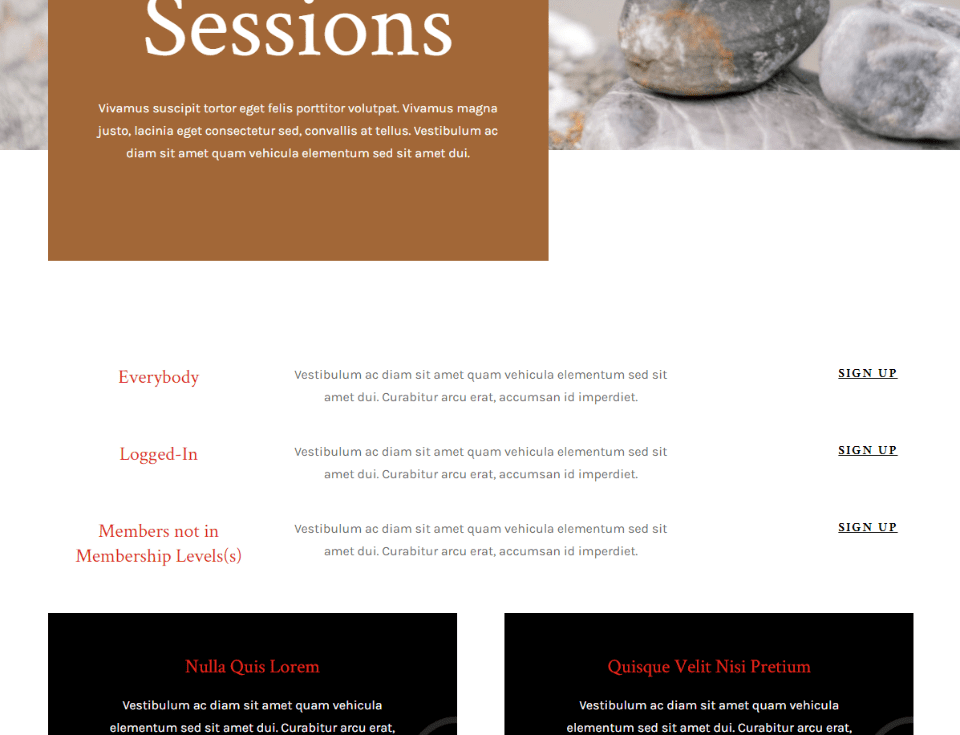
I’m logged-in and I’m not a member of Level One, Level Two, or Level Three, so it shows me the rows for Everybody, Logged-In, and Members not in Membership Level(s).
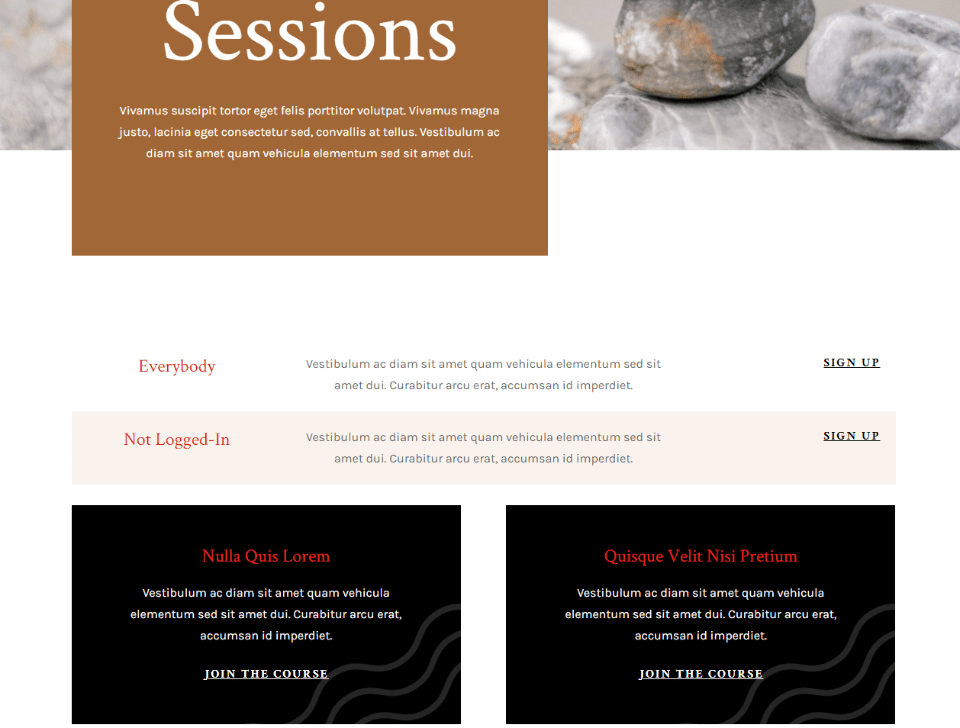
In this example, I’ve logged out of the website. It’s now showing me the row that everybody sees and the row that only those that are not logged-in will see.
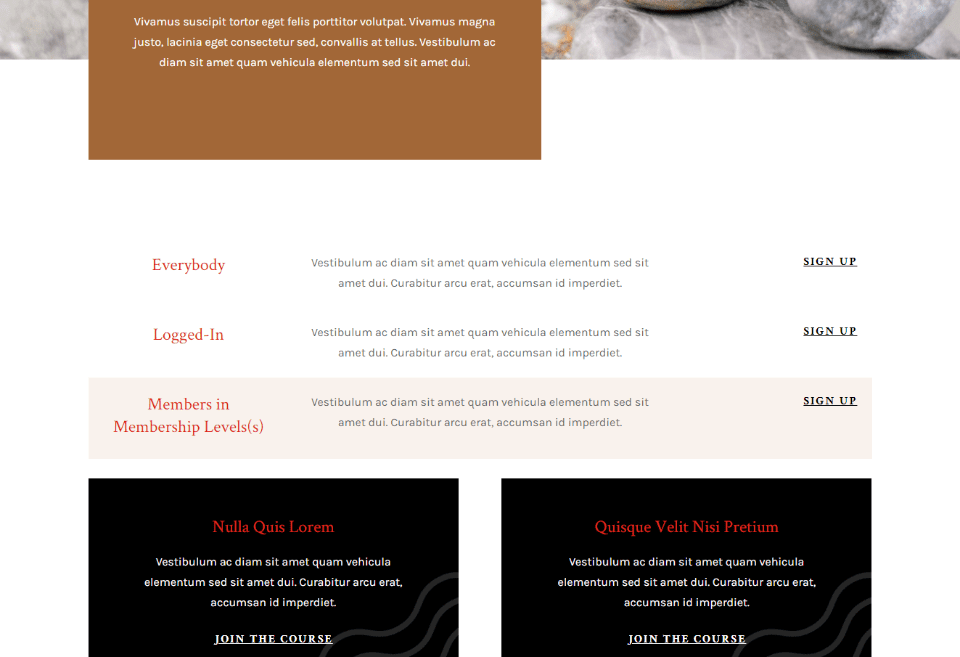
I’ve added myself to membership Level One. Since Members in Membership Level(s) displays to anyone with Level One membership, it now displays that row to me.
Wishlist Member Divi Example Two
I’ve created a new example that will show a CTA for members of certain membership levels. It will show One, Two, or Three. Since a member can be in more than one membership level, it will show every membership level they’re a member of.
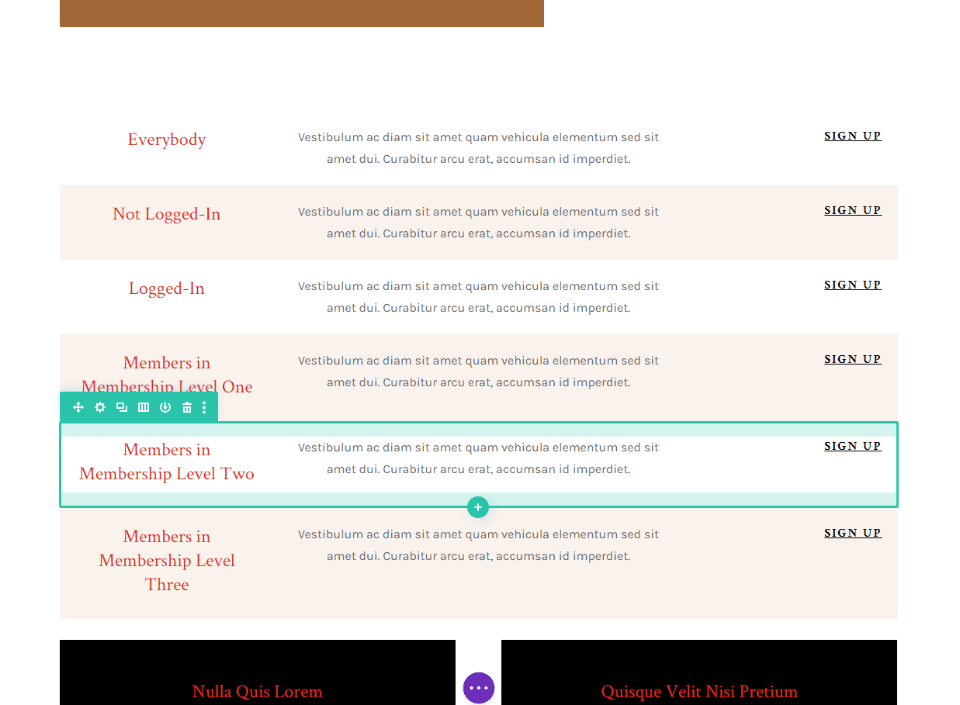
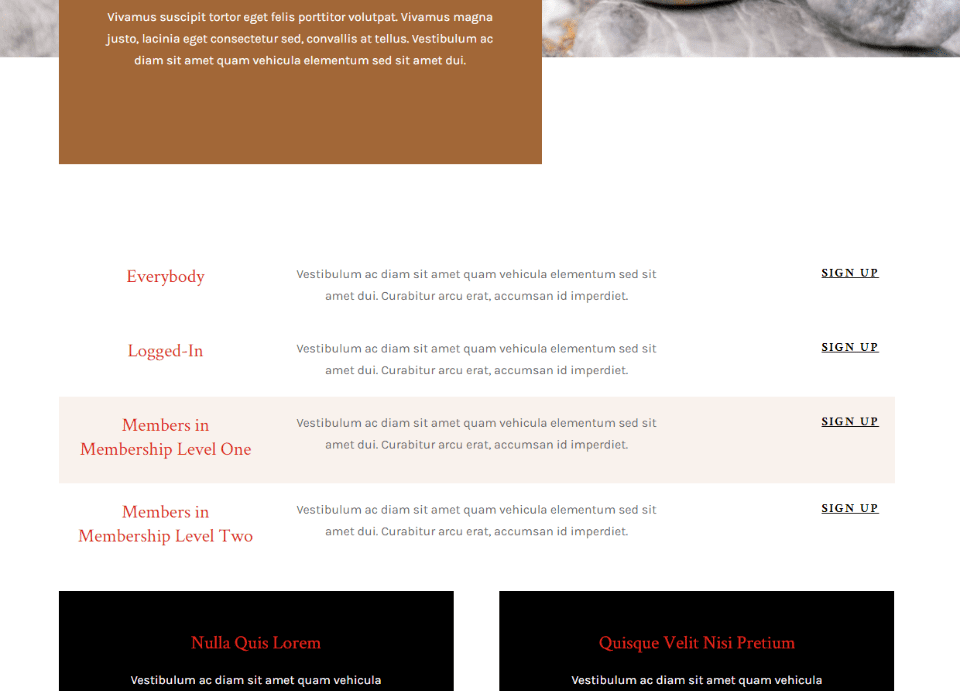
I’ve signed myself up to level one and level two, so I only see those options. In this case, I see Everybody, Logged-In, Members in Membership Level One, and Members in Membership Level Two.
Wishlist Member Divi Example Three
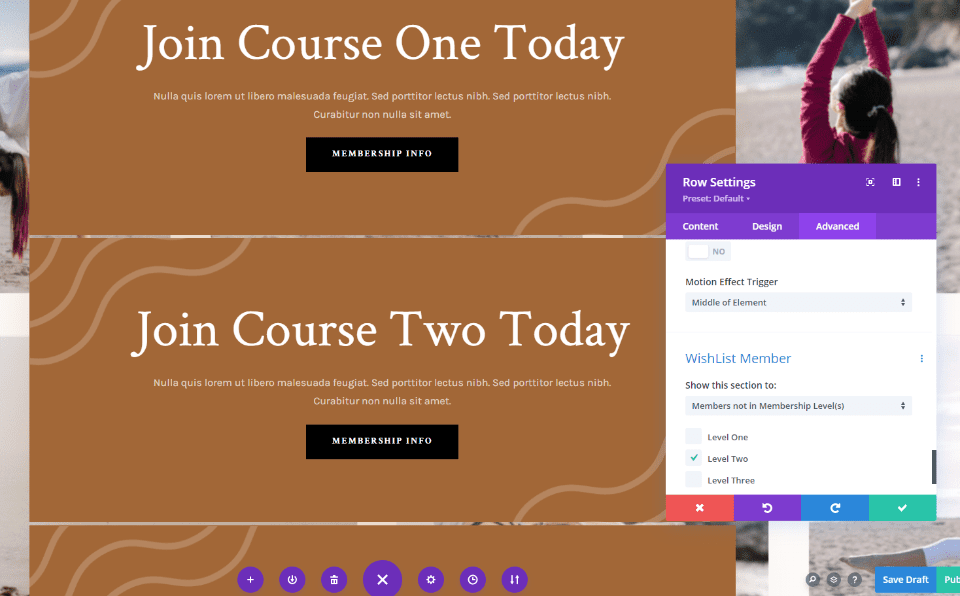
For this example, I’m creating a course CTA that’s targeted to those in other courses. I’ve made multiple copies of the CTA row and I want it to only show the courses they’re not a member of. To accomplish this, I’m selecting Members not in Membership Levels and then selecting the level that row corresponds to. This will show the CTA to those that are not members of that course.
For this example, I’m not a member of any of the courses, so it shows me all three CTAs.
I’ve adjusted my membership levels so I’m now a member of Course Two, so it shows me courses One and Three.
For this example, I am a member of courses One and Two, so it only shows me the CTA for Course Three.
Purchase Wishlist Member with Divi Integration
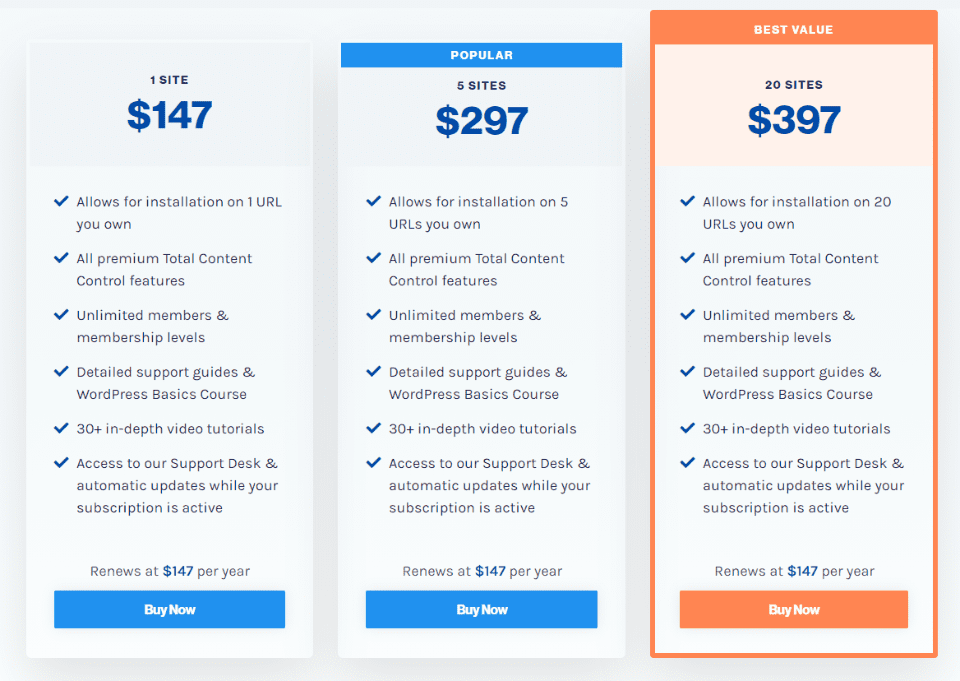
Wishlist Member is available from the publisher’s website. There are three purchase options available. All levels include Divi integration, all premium content control options, unlimited membership levels, and tutorials. It’s subscription-based. Support and updates are included for as long as the subscription is active.
- 1 site – $147 per year
- 5 sites – $297 per year
- 20 sites – $397 per year
Ending Thoughts
Wishlist Member with Divi integration is an excellent way to show sections and rows to specific types of users. I found it simple to use and the tools work well within the Divi settings. A two-step logic option would be helpful, but that can also become complex. If you’re already a Wishlist Member user, then you should use Divi integration. If you’re interested in a membership plugin that works well with Divi, Wishlist member is worth a look.
We want to hear from you. Have you tried Wishlist Member Divi integration? Let us know what you think about it in the comments.
Featured Image via bsd / shutterstock.com

