Do you want to add an external link icon to your WordPress site?
By clearly marking your external URLs, you can keep people on your site for longer, and make it clear that clicking on a particular link will open a new window or tab.
In this article, we will show you how you can add an external link icon to WordPress.
Why Add an External Link Icon on Your WordPress Site?
An external link icon is a small picture that appears next to a link that will take the user to a different website.
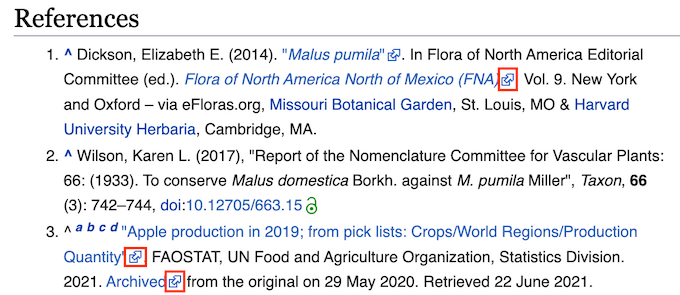
For example, you can scroll to the bottom of any Wikipedia post and see that most links in the References section have an external link icon.
By using external link icons on your WordPress blog, your visitors will easily be able to tell the difference between outbound links and internal links. Many sites also use external link icons to make it clear that the link will open in a new window or tab.
These icons can keep visitors on your site for longer and increase your pageviews since there’s less risk of them clicking on an external link and leaving your website by accident.
With that being said, let’s see how you can add an external link icon to your WordPress site.
How to Add an External Link Icon on Your WordPress Site
The easiest way to add an external link icon to your website is by using WP External Links.
You can use this plugin to add different images, Dashicons, and Font Awesome icons to your external links automatically.
First, you’ll need to install and activate the WP External Links plugin. If you need help, then please see our guide on how to install a WordPress plugin.
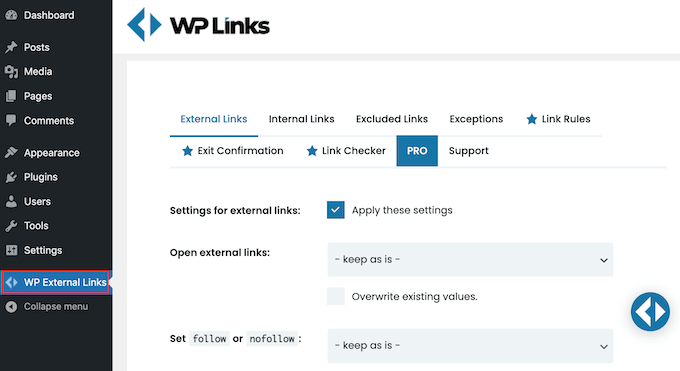
After that, just click on the new WP External Links setting in the left-hand menu.
If you get a popup asking you to upgrade, then you can simply click anywhere outside the popup to close it.
As you can see, the plugin can do a lot more than just add an external link icon to your site. For example, it can automatically add nofollow to all external links in WordPress.
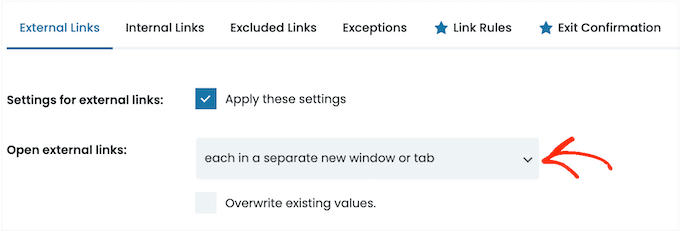
WP External Links can also keep people on your site by opening all external links in a new window or tab. We recommend enabling this feature since many users assume links with an external link icon will open in a new window or tab, anyway.
To open all external URLs in a new window or tab, open the ‘Open external links’ dropdown and click on ‘each in a separate new window or tab.’
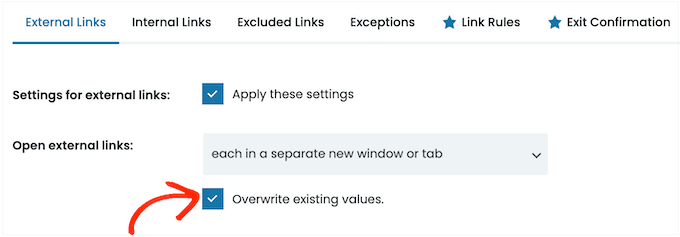
By default, WP External Links will apply this rule to every new external link that you create.
However, it can also scan your site and change any external URLs that you’ve previously added to your website. This will provide a more consistent experience for your users, so it’s a good idea to go ahead and click on the ‘Overwrite existing values’ box.
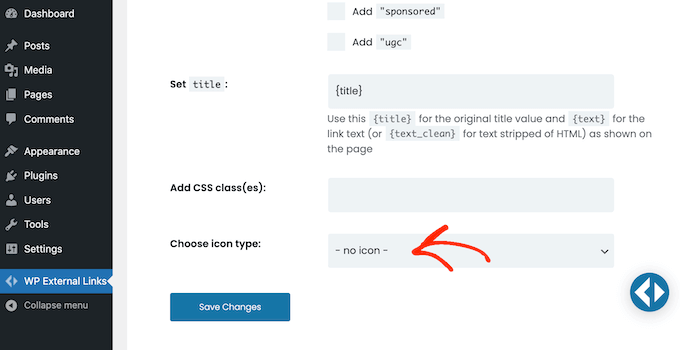
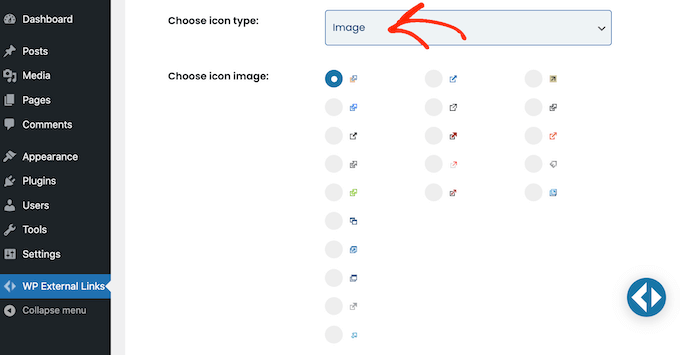
Once you’ve done that, you’re ready to create an icon for your external links. To start, scroll to the ‘Choose icon type’ section.
Now you can click where it says ‘no icon’ to open the dropdown.
Your options are Image, Font Awesome, or Dashicon.
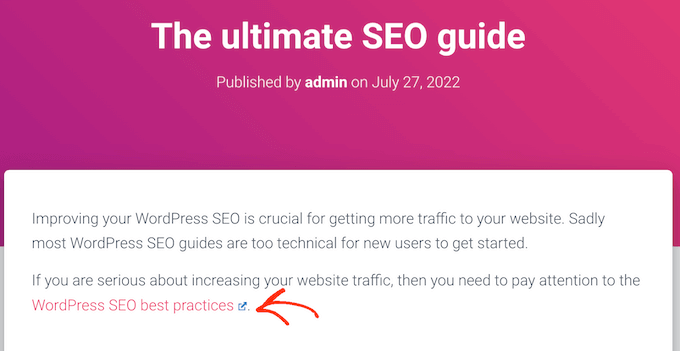
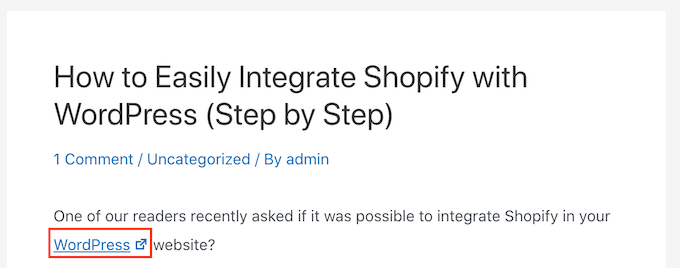
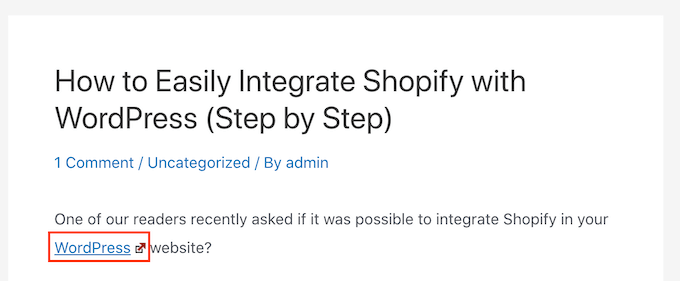
Both Font Awesome and Dashicon come with a single box-with-arrow icon that you can use as your external link icon. This icon will always appear blue on your site, as you can see in the following image.
This is the exact icon that many websites use for their external links, so most visitors will understand what the box-with-arrow icon means.
However, ‘Image’ lets you choose between several box-with-arrow icons including some that have a slightly different style and color.
In the following image, you can see an example of how a colorful box-with-arrow icon will look on your WordPress website.
If you want to add a colorful icon to your site, then you’ll need to select ‘Image’ from the ‘Choose icon type’ dropdown.
You can then click on the one that you want to use for your external links.
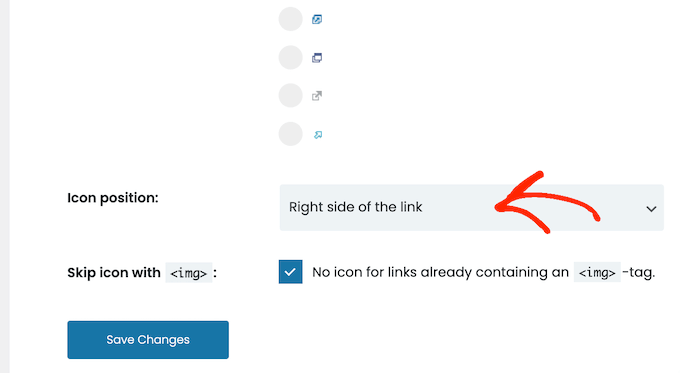
Once you’ve done that, open the ‘Icon position’ dropdown.
Here, choose whether the icon will appear on the ‘Right side of the link’ or the ‘Left side of the link.’ Most websites show the external icon to the right of the link.
Do you want to use the standard blue box-with-arrow icon instead?
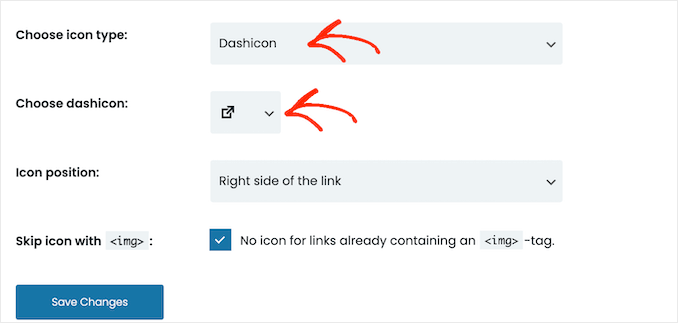
Then you can open the ‘Choose icon type’ dropdown and click on either ‘Font Awesome’ or ‘Dashicon’ instead.
Next, open the dropdown menu beside ‘Choose Dashicon’ or ‘Choose FA,’ and then click on the box-with-arrow icon.
Note: Both Font Awesome and Dashicons give you access to dozens of other icons. However, we recommend using the box-with-arrow icon as more people will recognize this as an external link icon.
After clicking on the Font Awesome or Dashicon that you want to use, you can specify whether it should appear to the right or left of the link following the exact same process described above.
When you’re happy with the external link icon you’ve chosen, simply click on ‘Save changes.’
The plugin will then add the icon to all the external URLs on your site automatically.
We hope this article helped you learn how to add an external link icon to your WordPress site. You can also go through our guide on proven ways to make money online blogging and how to track website visitors to your WordPress site.
If you liked this article, then please subscribe to our YouTube Channel for WordPress video tutorials. You can also find us on Twitter and Facebook.


