[ad_1]
Technology can be full of minor headaches and slight inconveniences. Having to re-enter your login details for every platform you use is one of them. Fortunately, technology can also be the solution. By adding one-click Gmail login to your WordPress site, you can streamline your admin experience.
In this article, we’ll give you an overview of what one-click login is and why you might want to use it. Then we’ll take you through four simple steps to add seamless WordPress Gmail login to your site.
Let’s dive right in!
An Introduction to One-Click WordPress Gmail Login
Even if you’re not familiar with the term, you’ve probably seen opportunities for a “one-click login” before. A one-click Gmail login is when a third-party site uses Google to verify your identity and give you access to its content. In this case, your WordPress site is that third party.
There are a few benefits to using a one-click feature. For one, it can speed up your login process significantly, and let you easily access your content with a single click. This can be particularly helpful for organizations with several Google Workspace (formerly G Suite) and WordPress users.
By the same token, a one-click login may help increase your security. Complex passwords are more secure but admittedly hard to remember. With this feature, you can set up lengthy login details for your WordPress site without having to type them in every time.
While we’re on the topic of safety, you might be asking yourself if a third-party integration will make your site more vulnerable. The good news is that the single login process is a secure one. It operates on the open protocol OAuth, and Google itself supports most common OAuth scenarios.
However, it’s still important to stay on top of your site’s security as a whole. We recommend making sure your plugins, themes, and WordPress software are all up to date. You also may want to complete regular security scans for malware.
How to Add One-Click Gmail Login to Your WordPress Website (In 4 Steps)
If you’re interested in a quicker login process, you can add a one-click Gmail option in WordPress by following these four steps.
Step 1: Choose a Plugin to Facilitate the WordPress and Gmail Integration Process
Let’s start with picking the right tools. A one-click Gmail login can be fairly simple to add. However, you’ll need a plugin to help you get the job done. There are a few quality options available, but for the purpose of this walkthrough, we’ll be using Google Apps Login:
We like this plugin because it’s simple yet effective. Additionally, Google Apps Login is suitable for both Google Workspace domains and regular Gmail accounts.
This plugin also offers a premium version. Licenses start at $29 for a single site, and offer extra features such requiring users to log in through Gmail. However, you’ll only need the free version to follow the remainder of this tutorial.
Once you’ve decided on a plugin, you can install and activate it. After that, you can set your WordPress site to the side for a bit while you set things up with Google.
Step 2: Create a New Project With Google Cloud Console
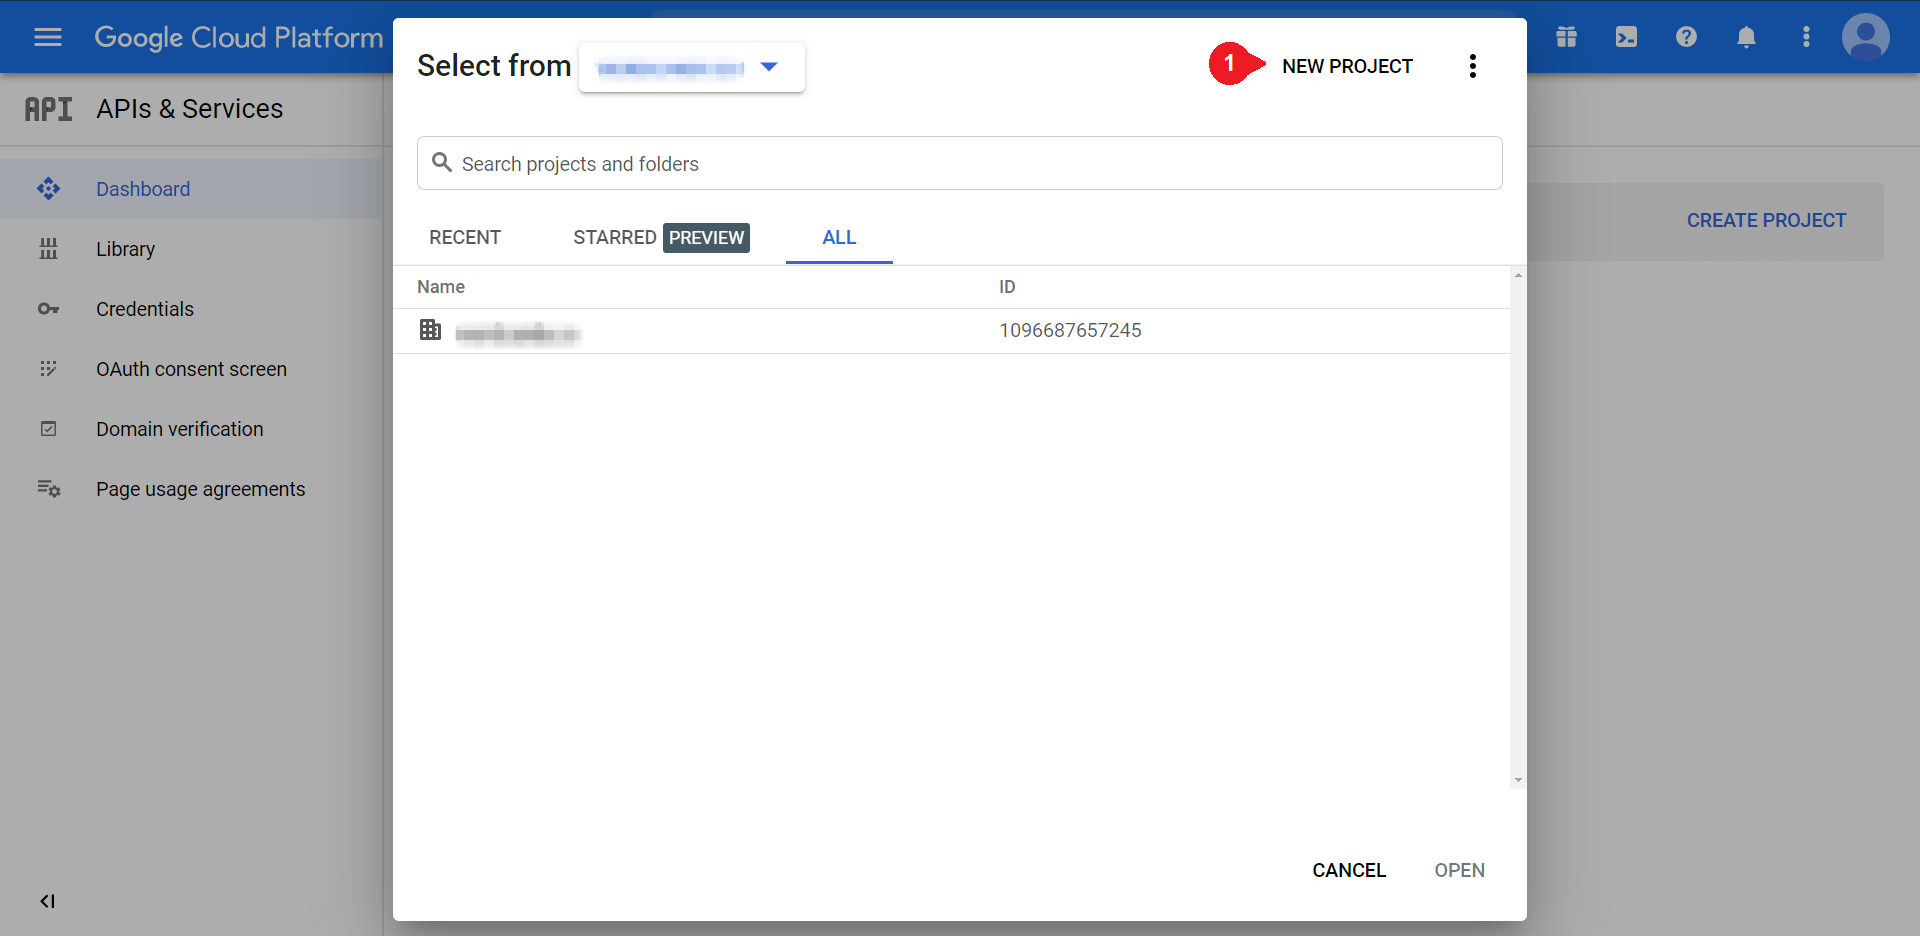
For this step, we set up our information on the Google Cloud Console page. You can head over to the Console’s home page to get started. Once there, navigate to the upper-left corner and click on Select a project. That should display the following pop-up:
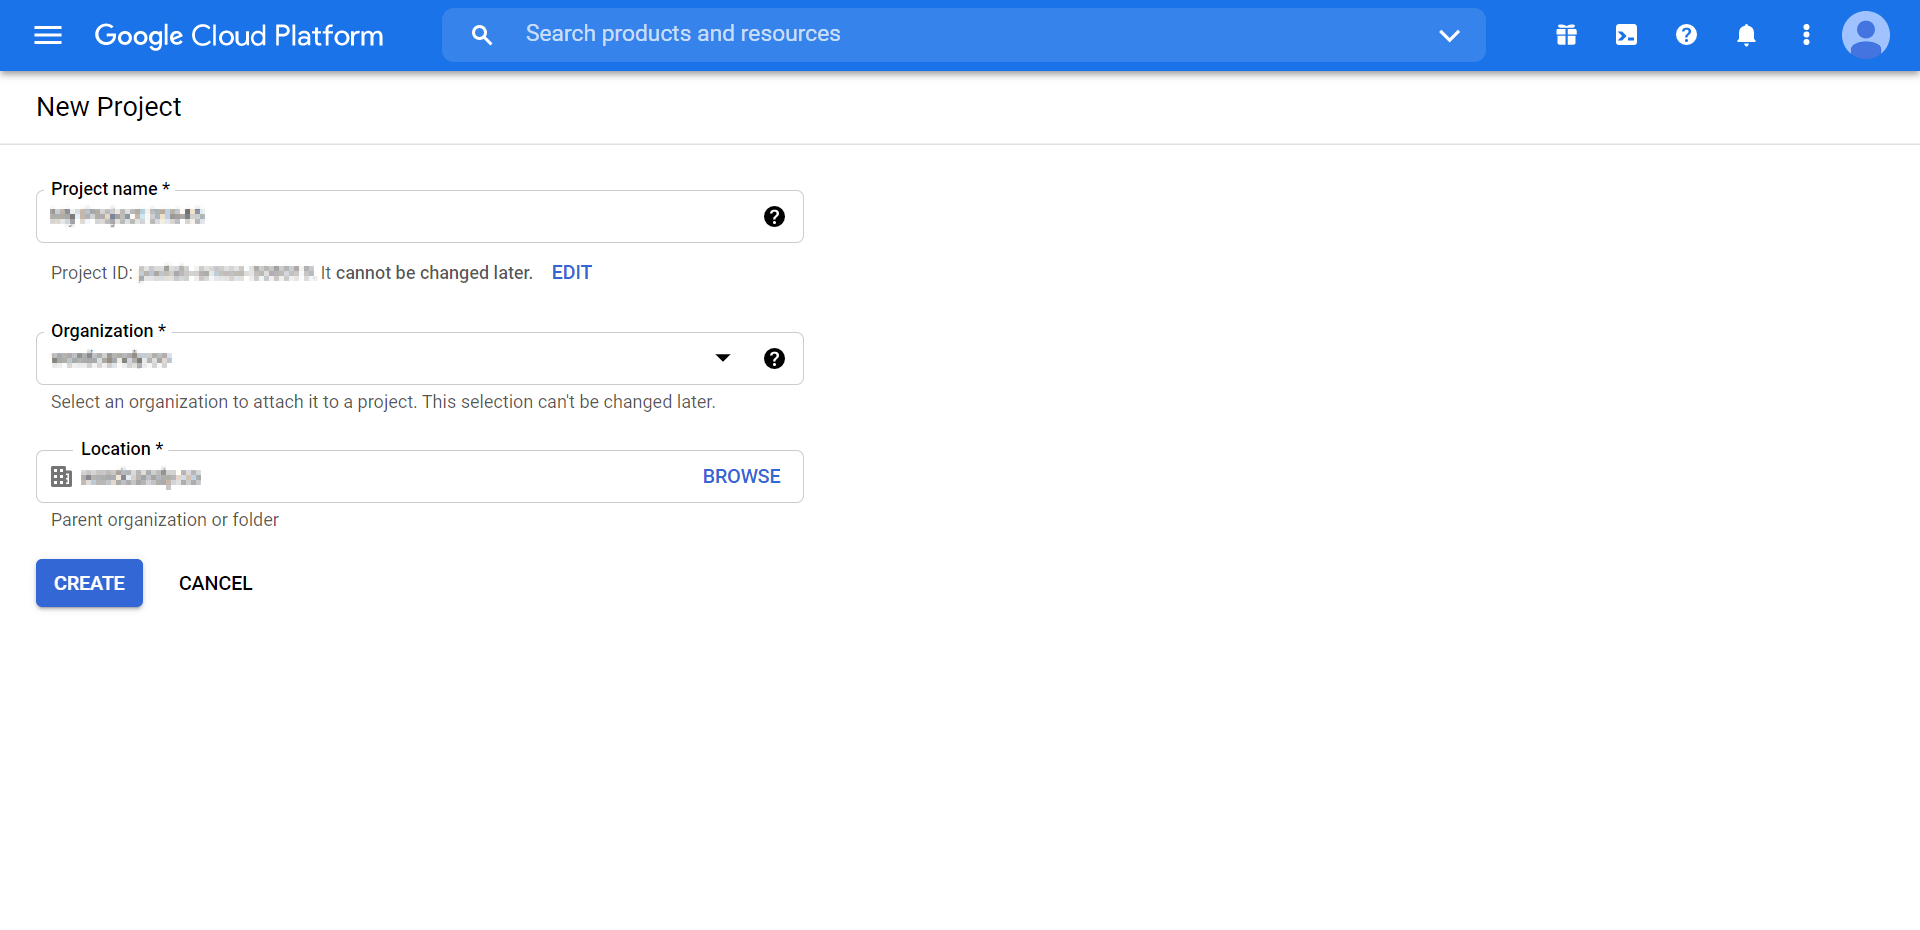
Next, you can click on New Project in the upper-right corner of the page. This will take you to a creation screen. From there, you’ll have a couple of values to fill in:
You can supply your project name with something like “WordPress Login”. If you’re creating a one-click login for your work email, you might also want to select your group under Organization.
You’ll then determine the parent folder for your project under Location. Once those details are all set, you can click on Create.
Step 3: Set Up OAuth Consent
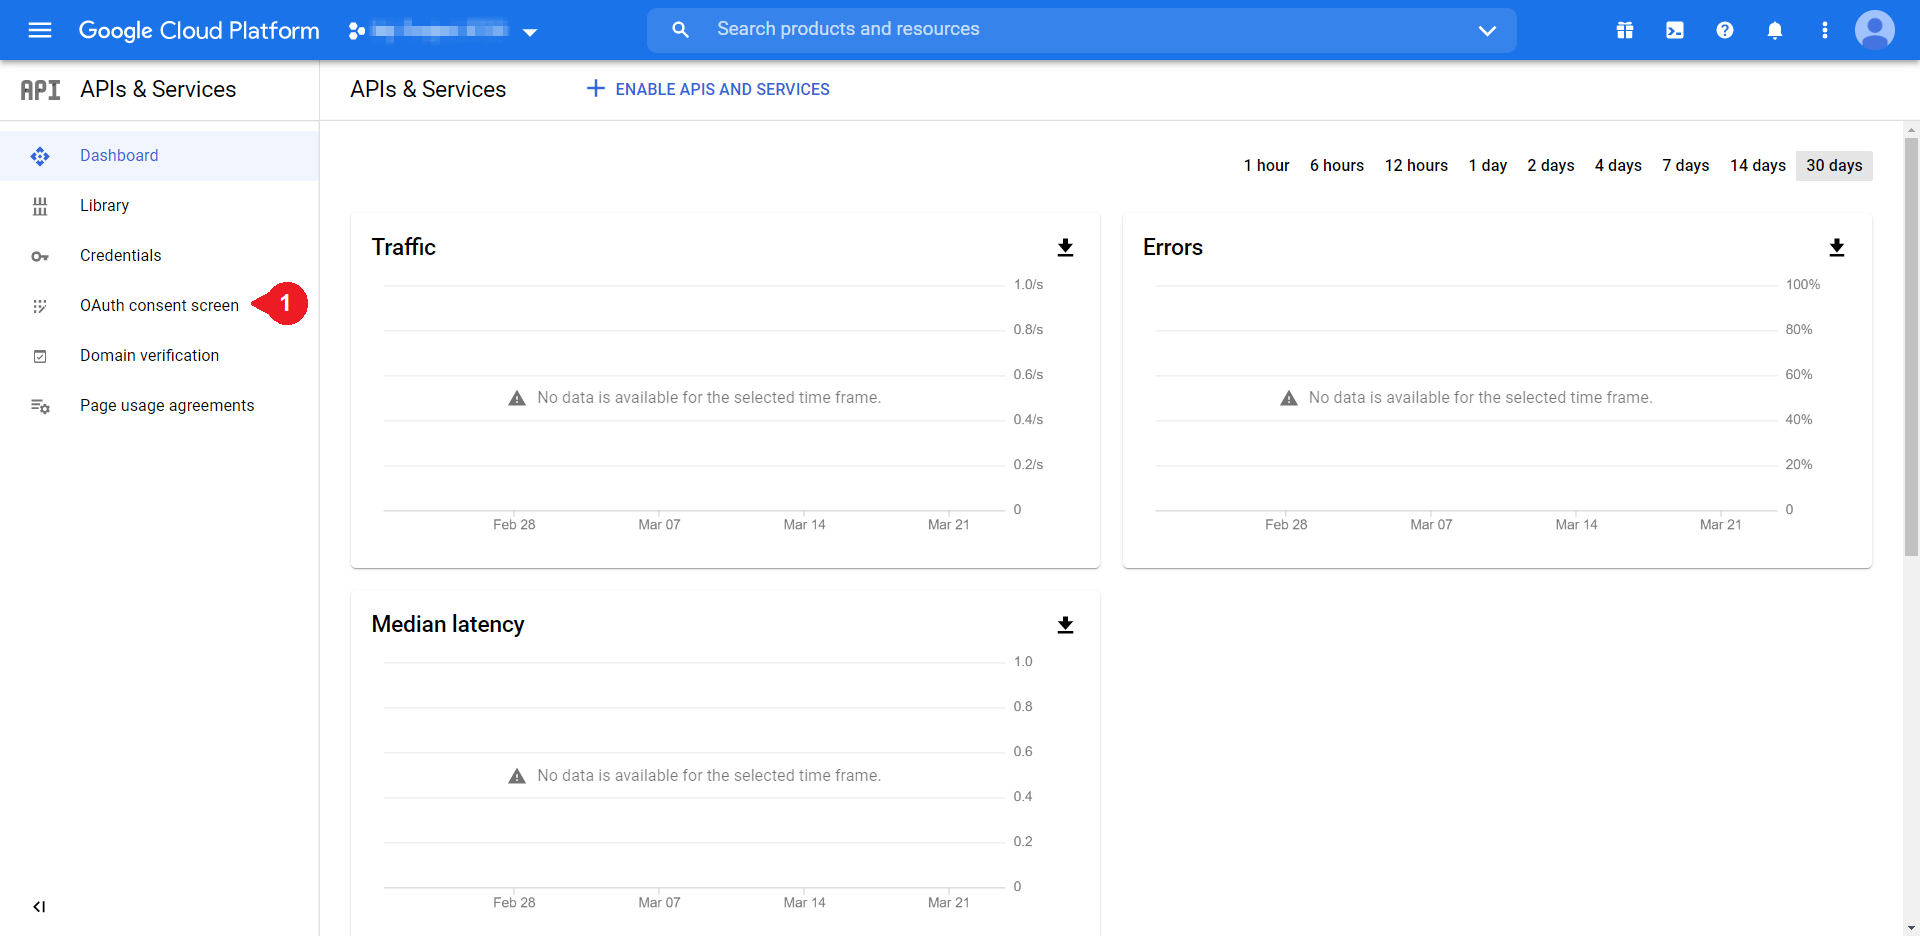
Next, you can return to the Google Cloud Console dashboard. Navigate to the left-hand menu and select OAuth consent screen to move on to the next step:
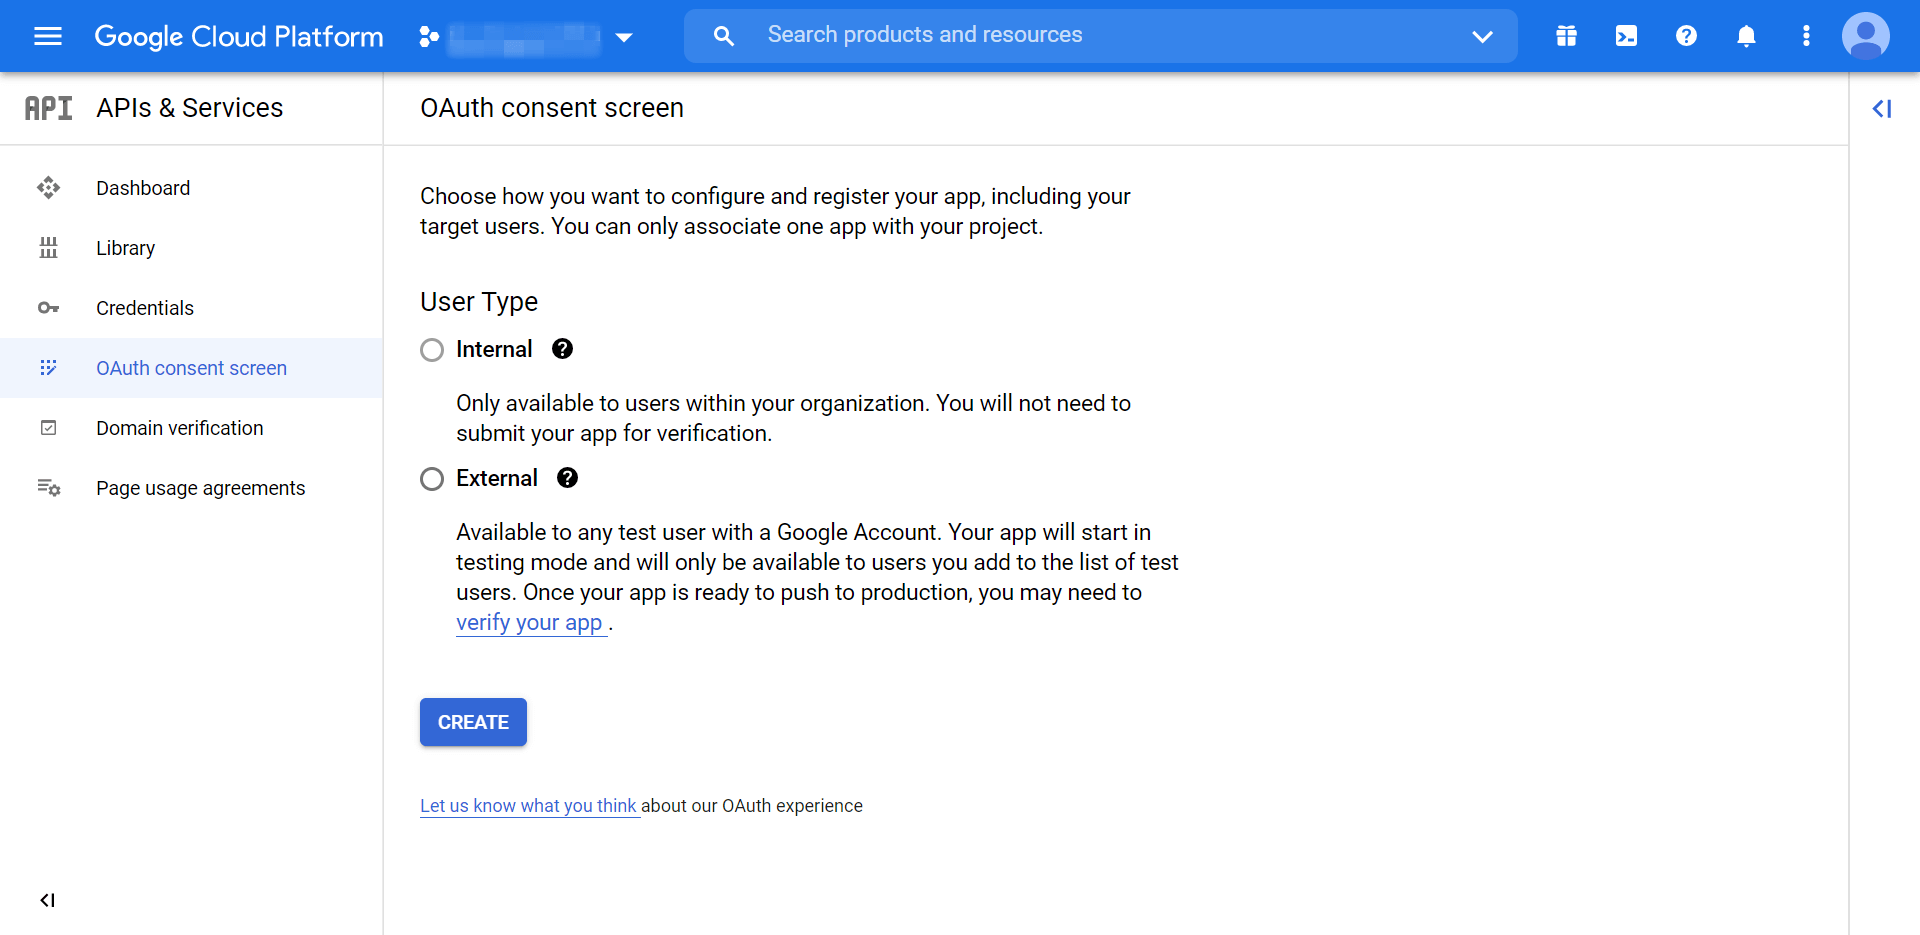
At this point, you’ll be brought to a screen to decide between Internal or External user types:
“Internal” refers to people within your organization, while “External” refers to those without an organization login. If you’re not using Google Workspace, you’ll only be able to choose External. Select your preferred option, and then click on Create to move to the next screen:
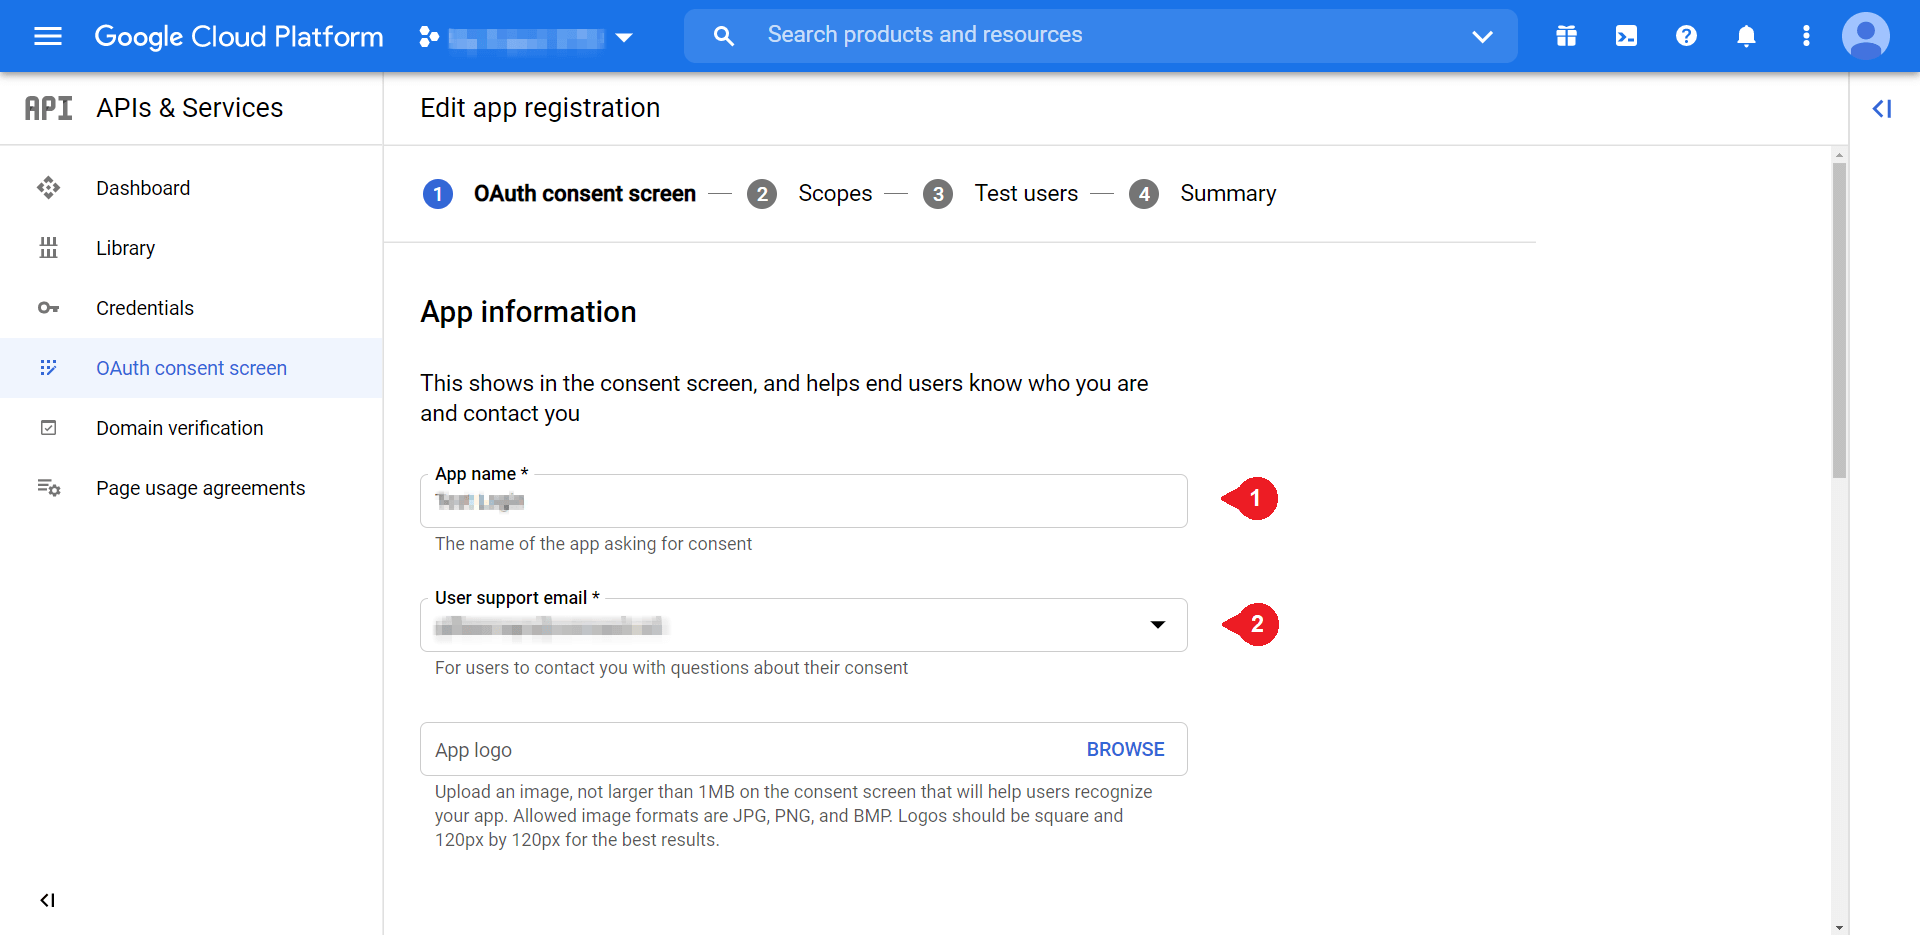
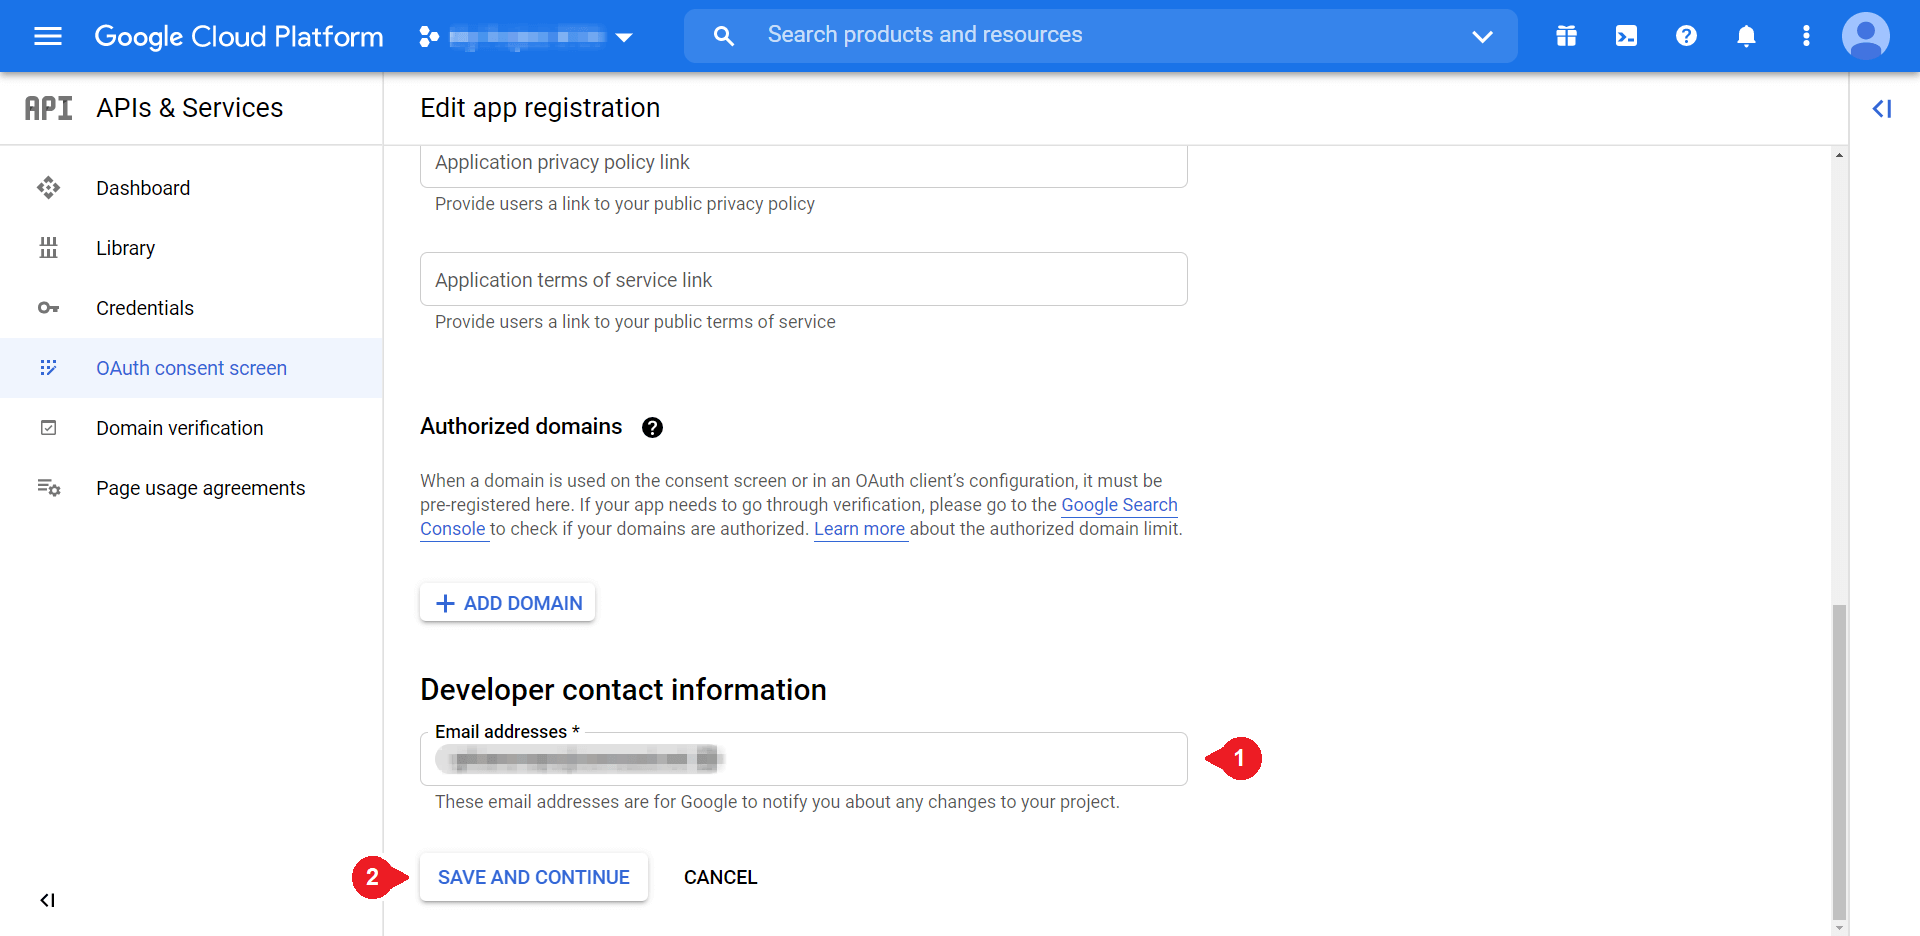
We’ll only pay attention to a few of these fields. To start, fill in the App name and User support email fields. You can enter a name that’s helpful to you and your relevant email respectively. Scroll down to find Developer contact information:
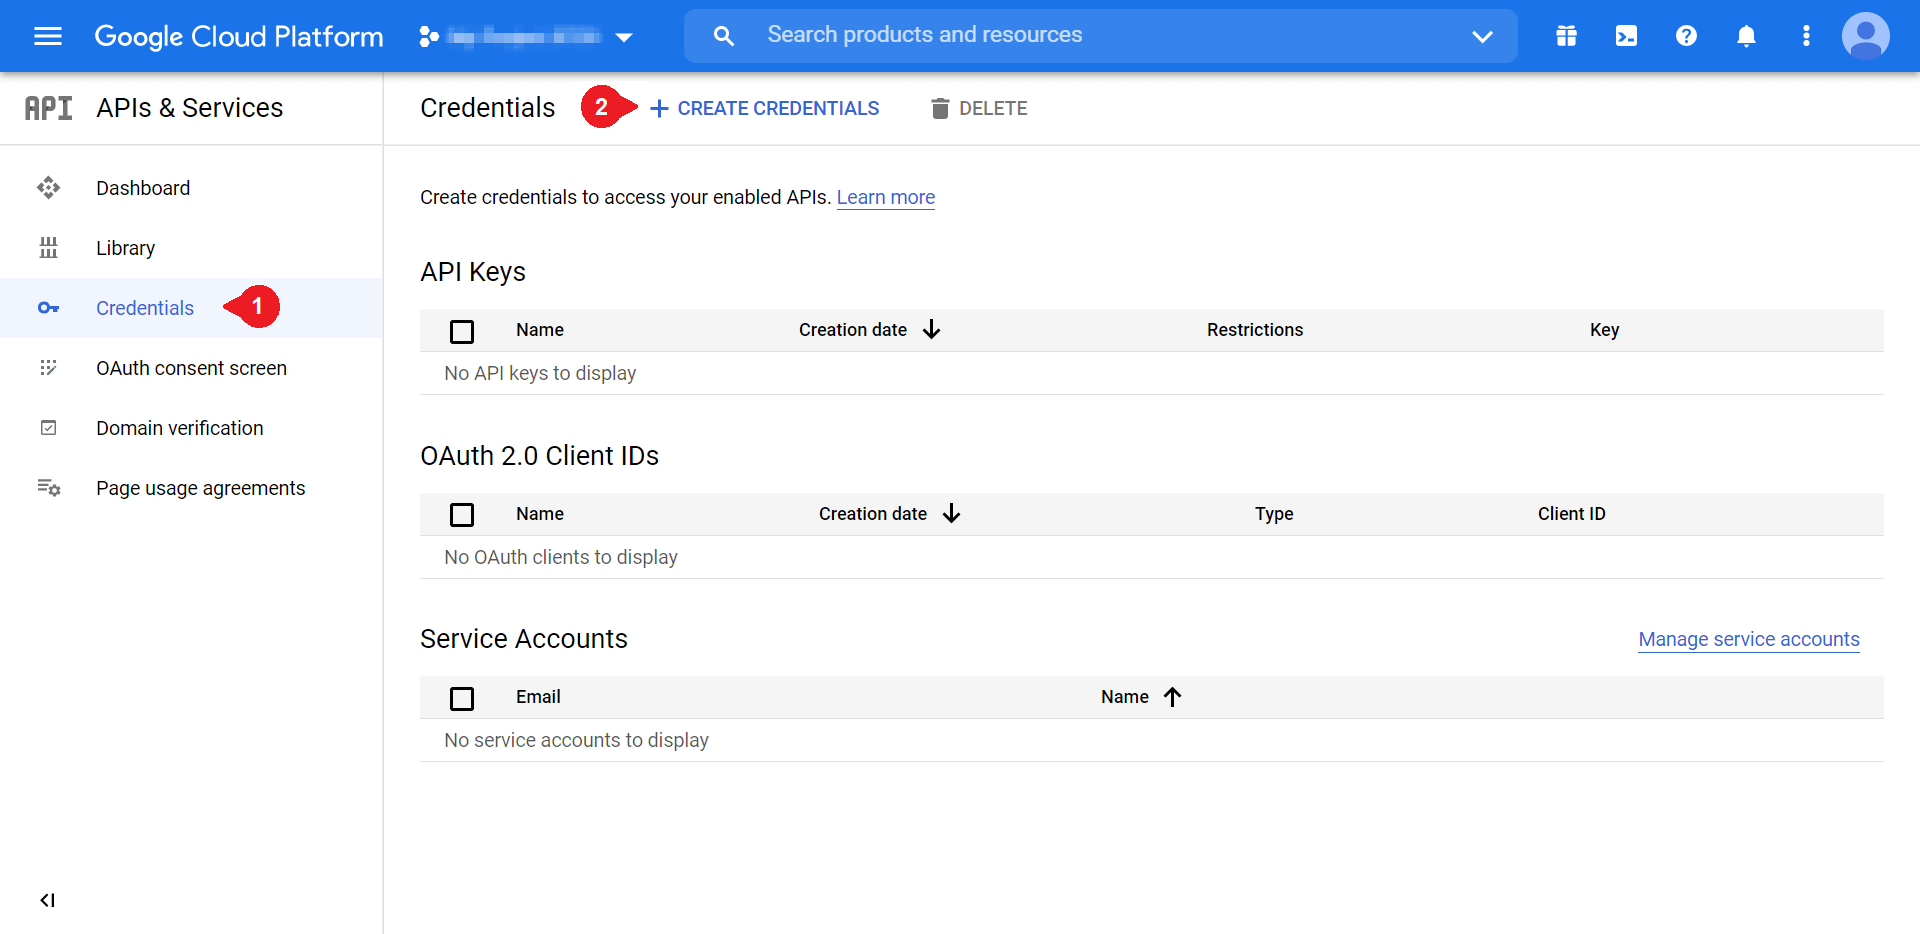
You can add the same email you used for User support email. Once you’re ready, click on Save and Continue. Then you can navigate back to the left-hand menu and select Credentials to bring up the following options:
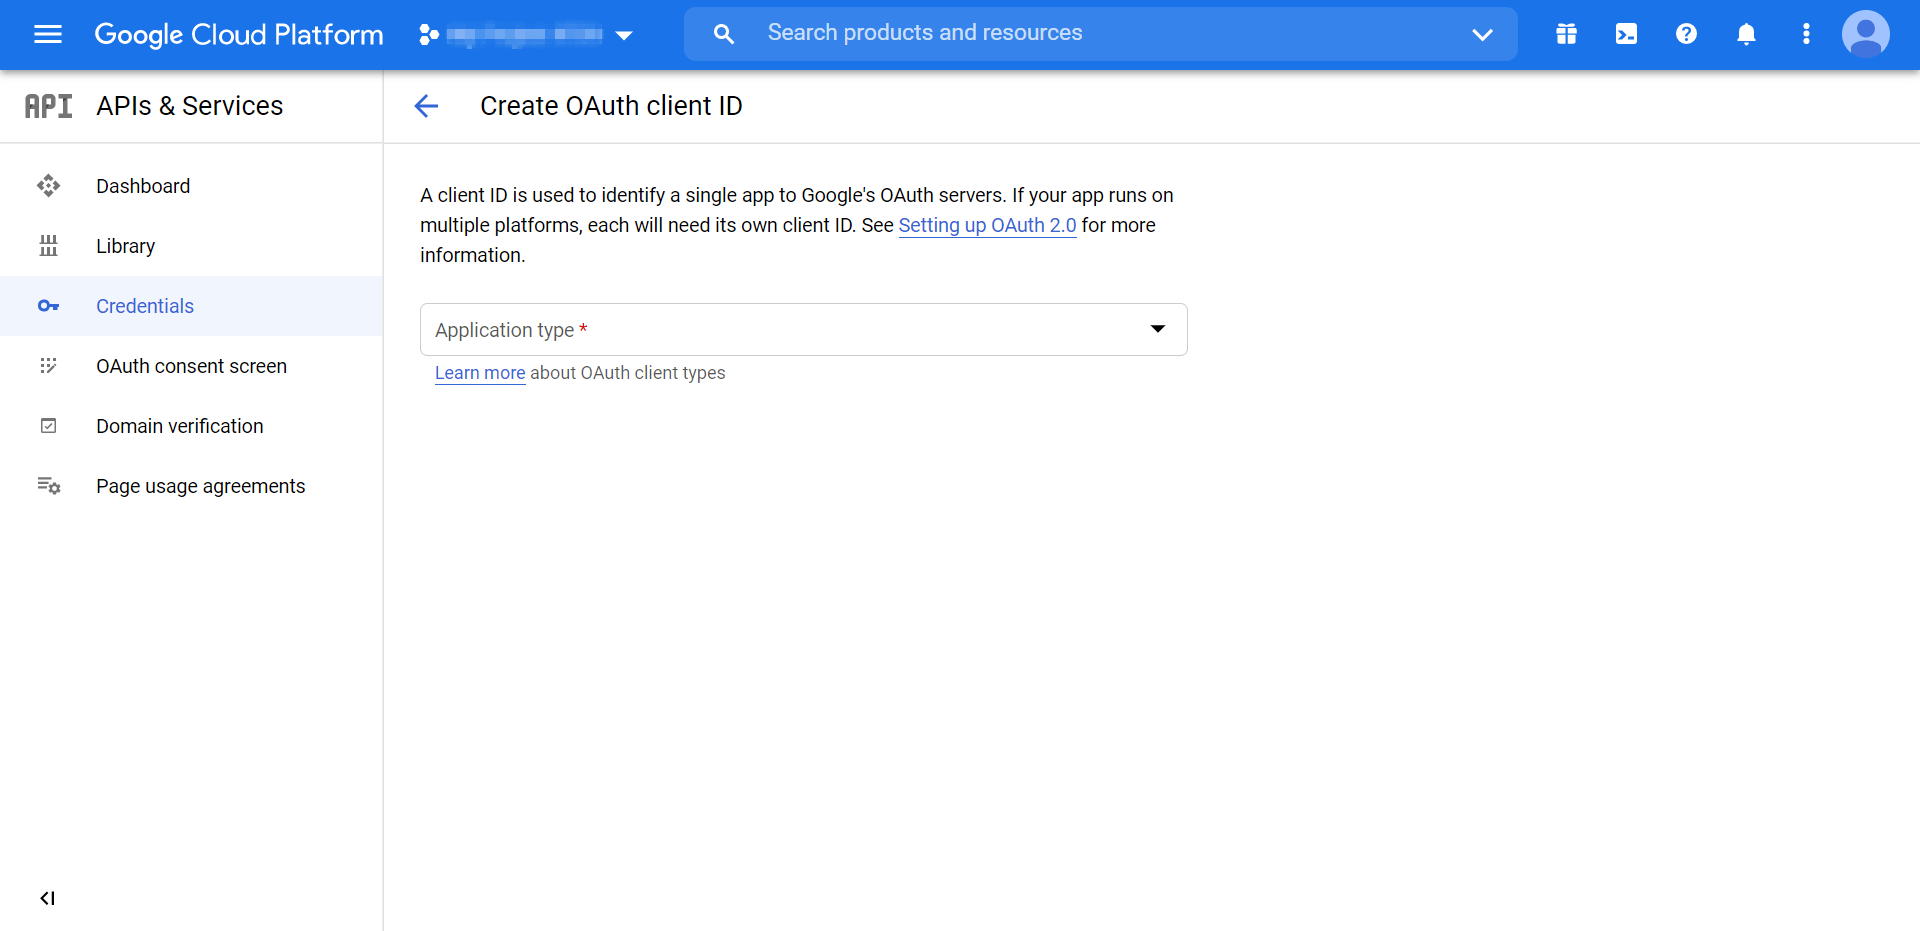
Once there, select Create Credentials > OAuth client ID:
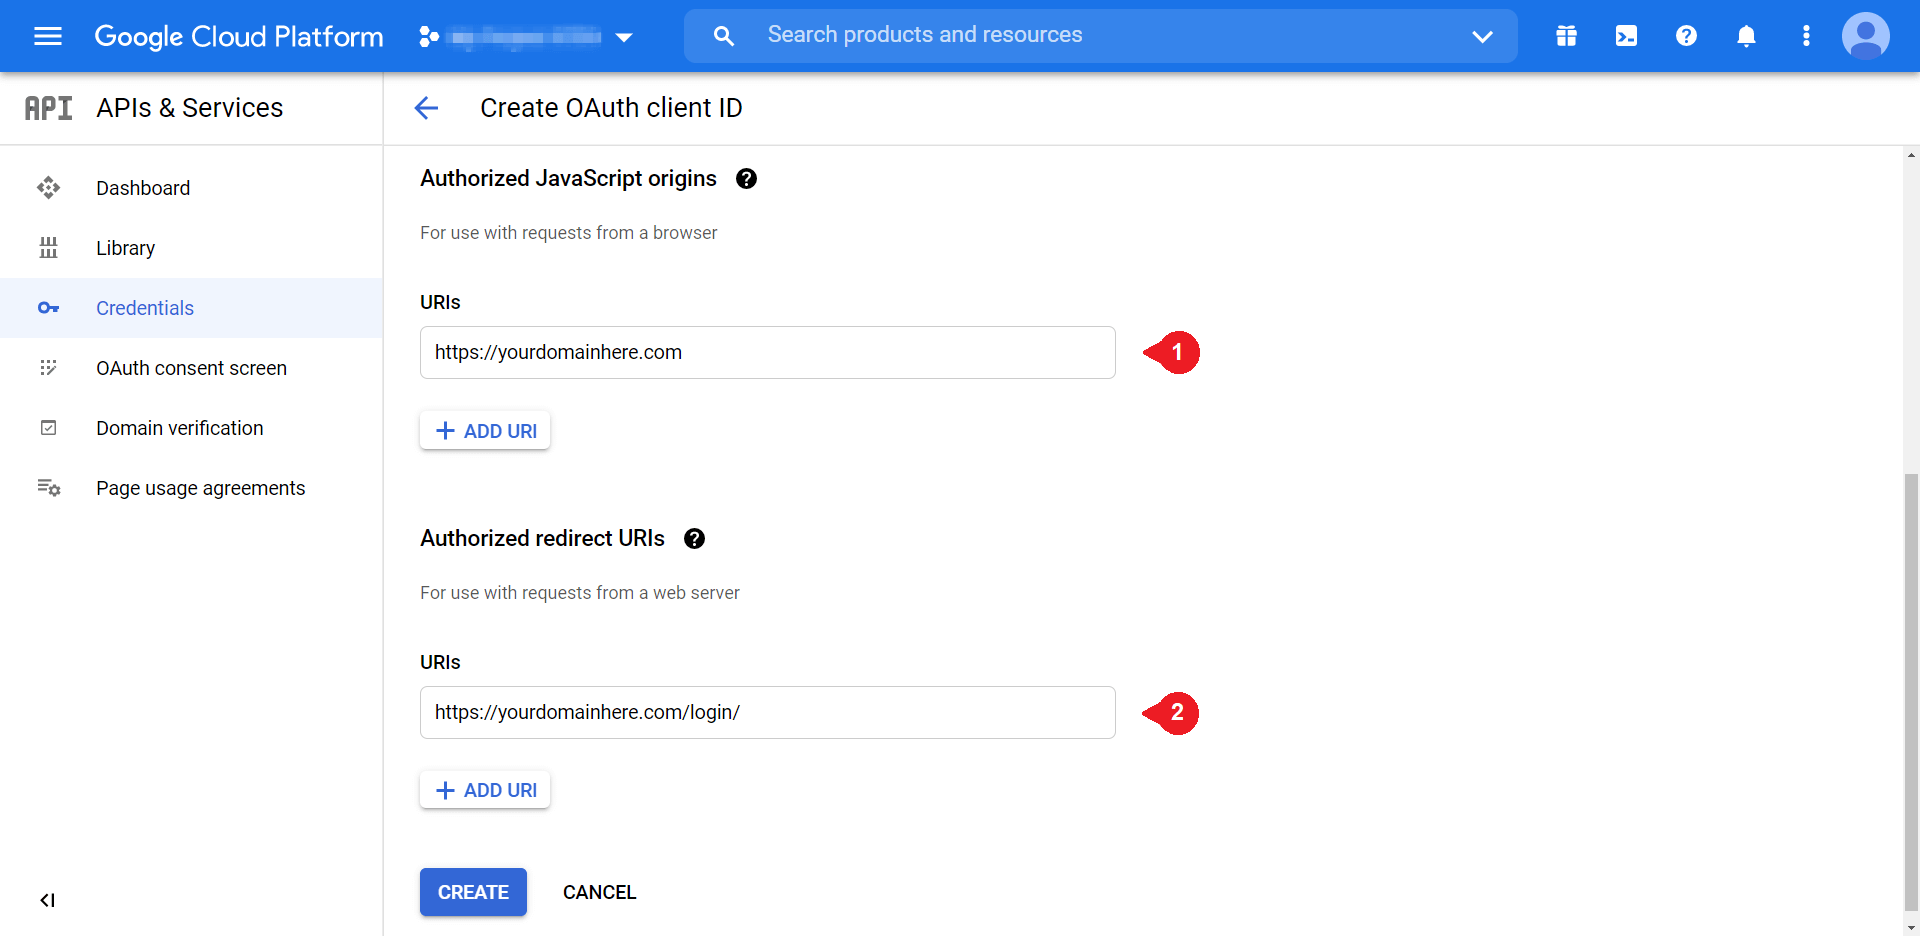
Choose Web application from the drop-down menu. That will create more fields, but the only ones we need to complete are the following two:
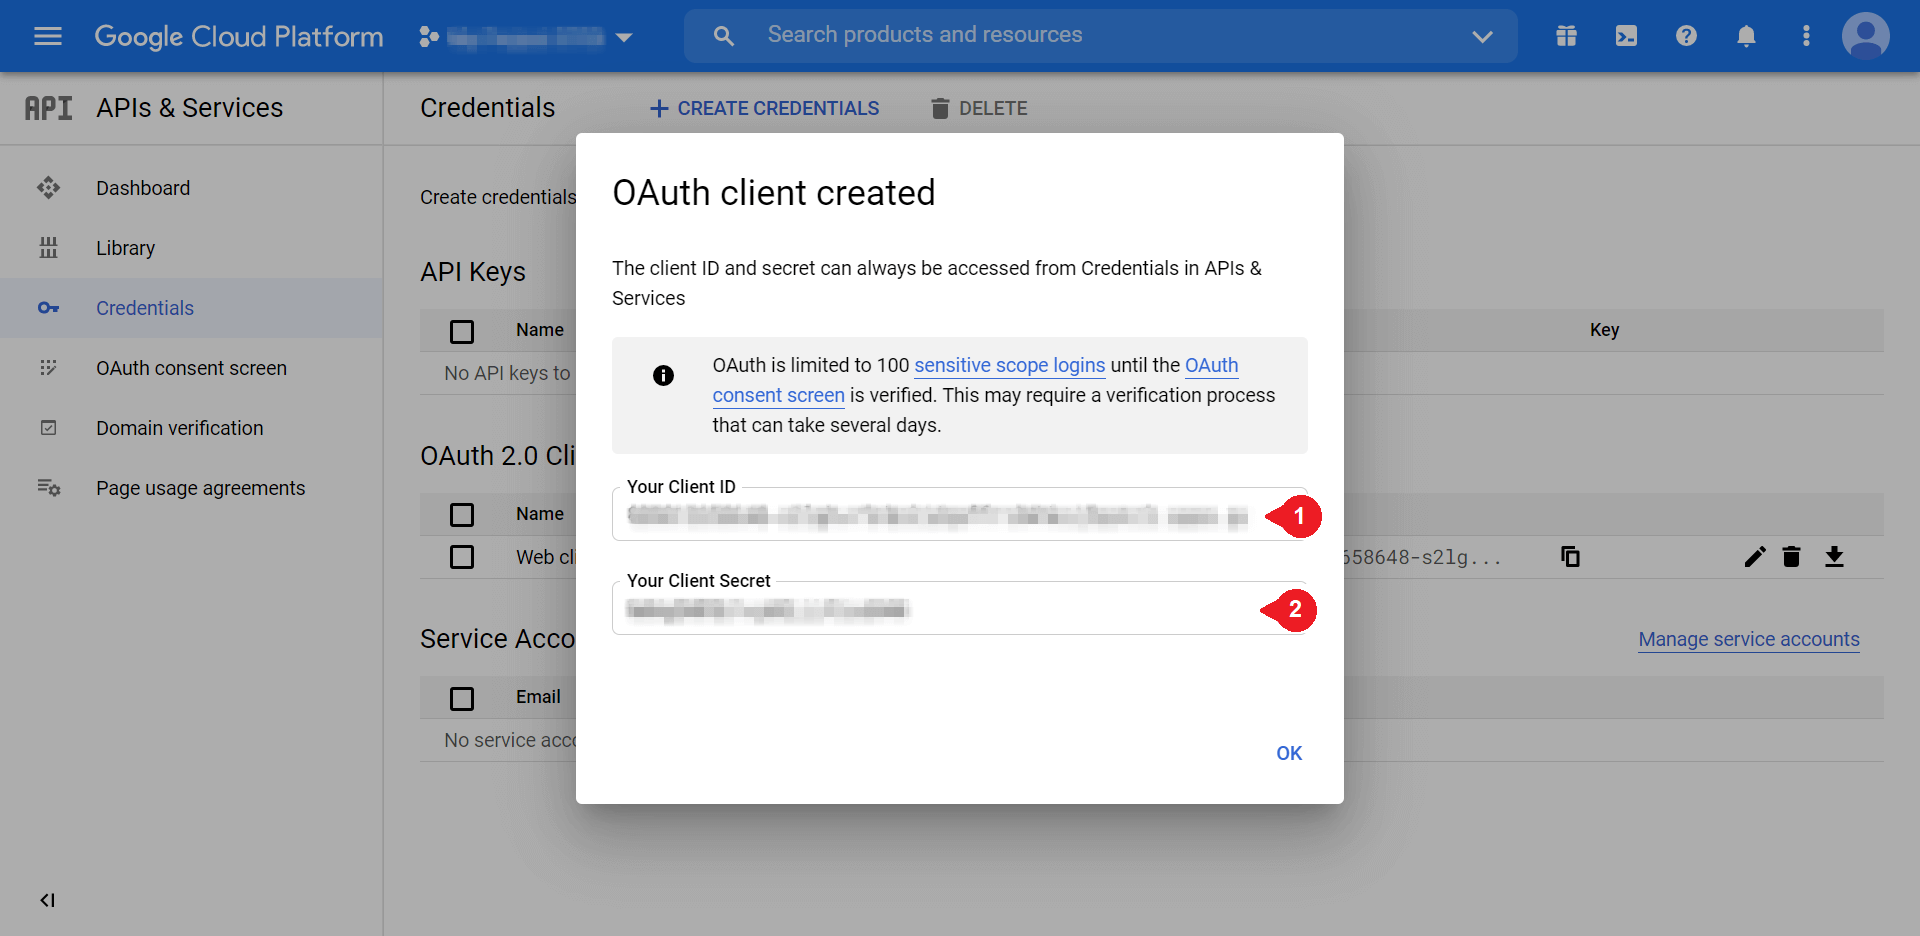
Under Authorized JavaScript Origins, you’ll want to enter your domain in the same format as the above example. Then, you can enter your site’s login URL under Authorized redirect URIs. Select Create when you’re done:
You’ll need both of these credentials to finish setting up your one-click login, so consider keeping them handy. We’ll use them in the last step.
Step 4: Customize Your Google Apps Login Settings
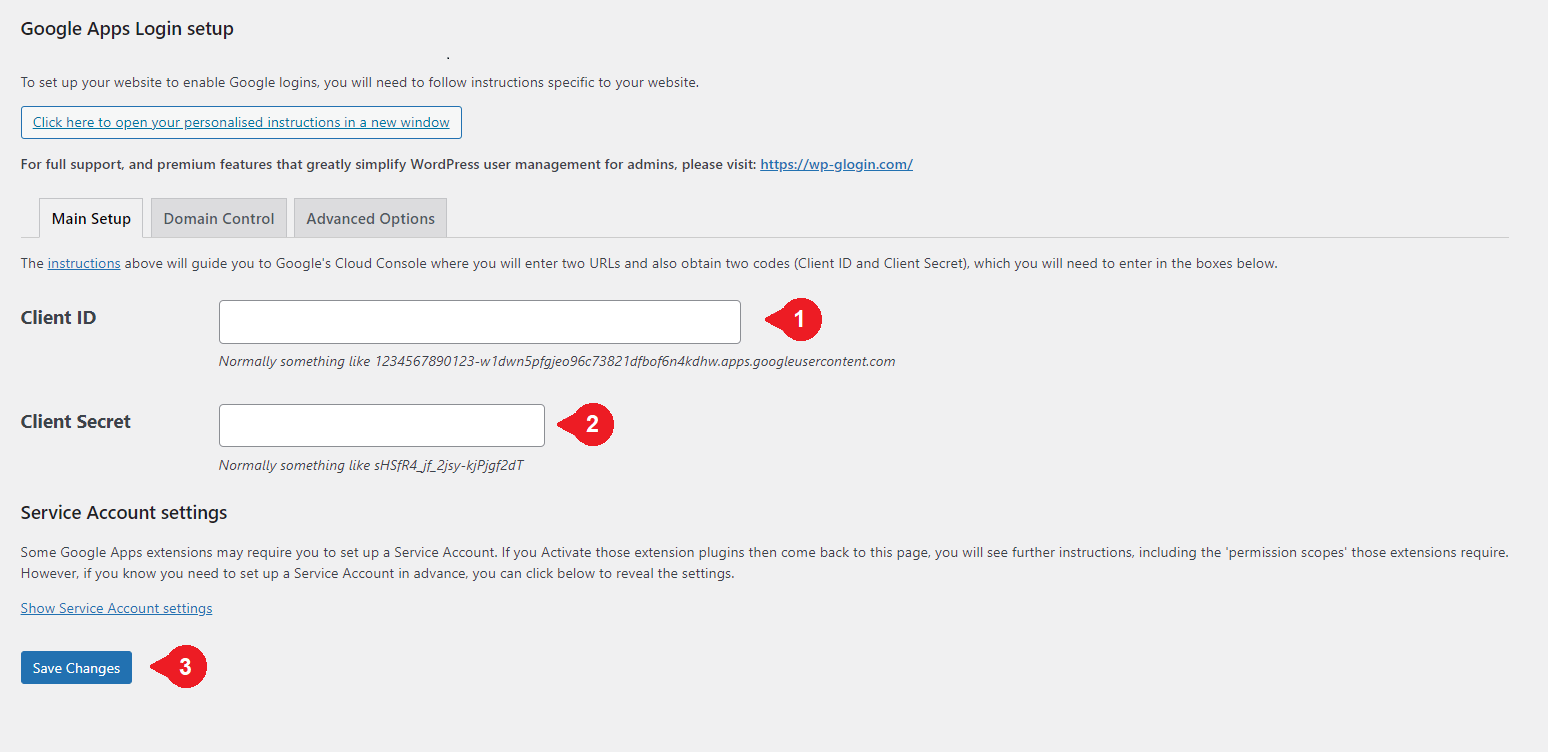
Finally, all that’s left to do is enter your Client ID and Client Secret into the plugin. To do so, return to your WordPress site, access your plugins, and navigate to Google Apps Login. Make sure you’re in the Main Setup tab:
Enter the values you received at the end of Step 3 into the corresponding fields, and then make sure to save your changes.
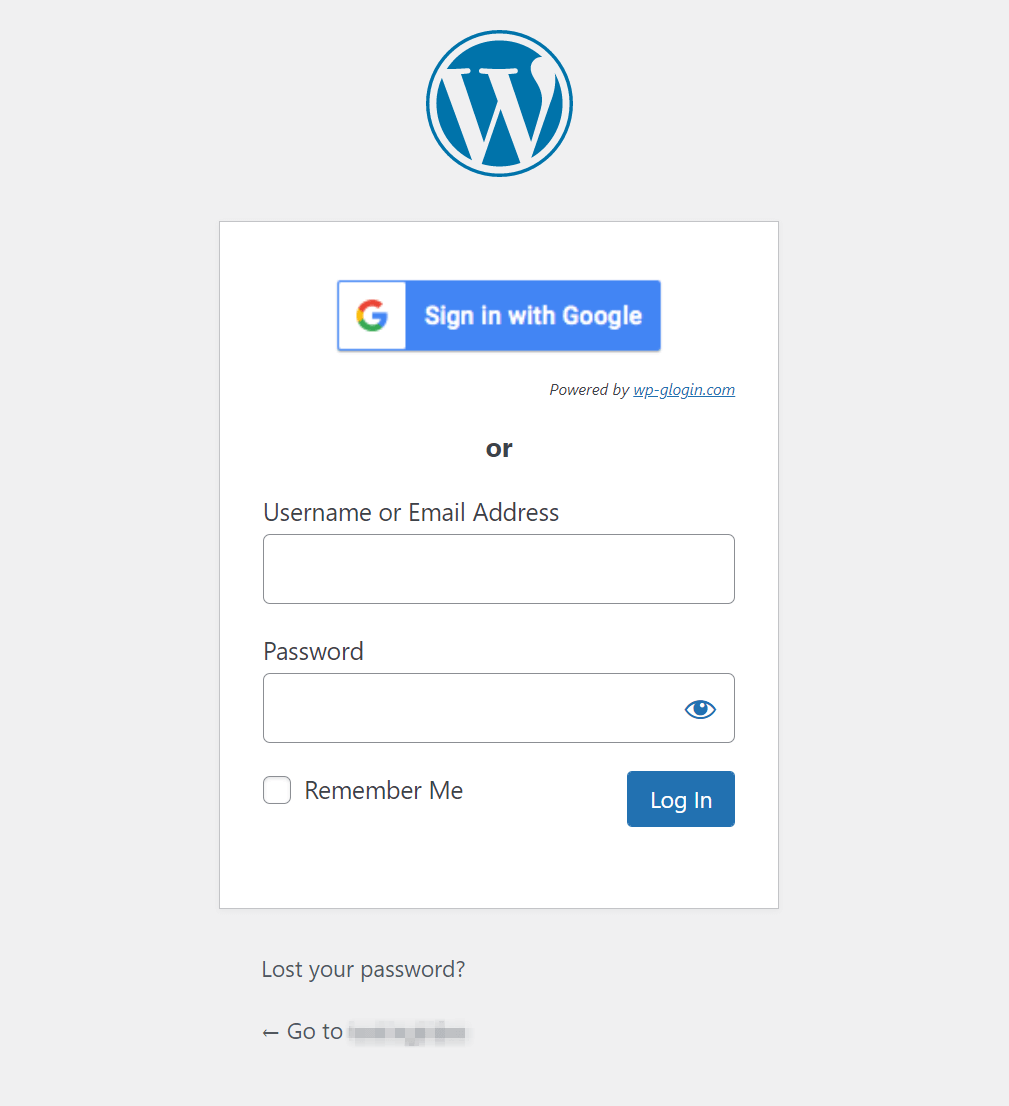
To see the products of your hard work, you can log out of your WordPress account and return to the login screen. The final product should look something like this:
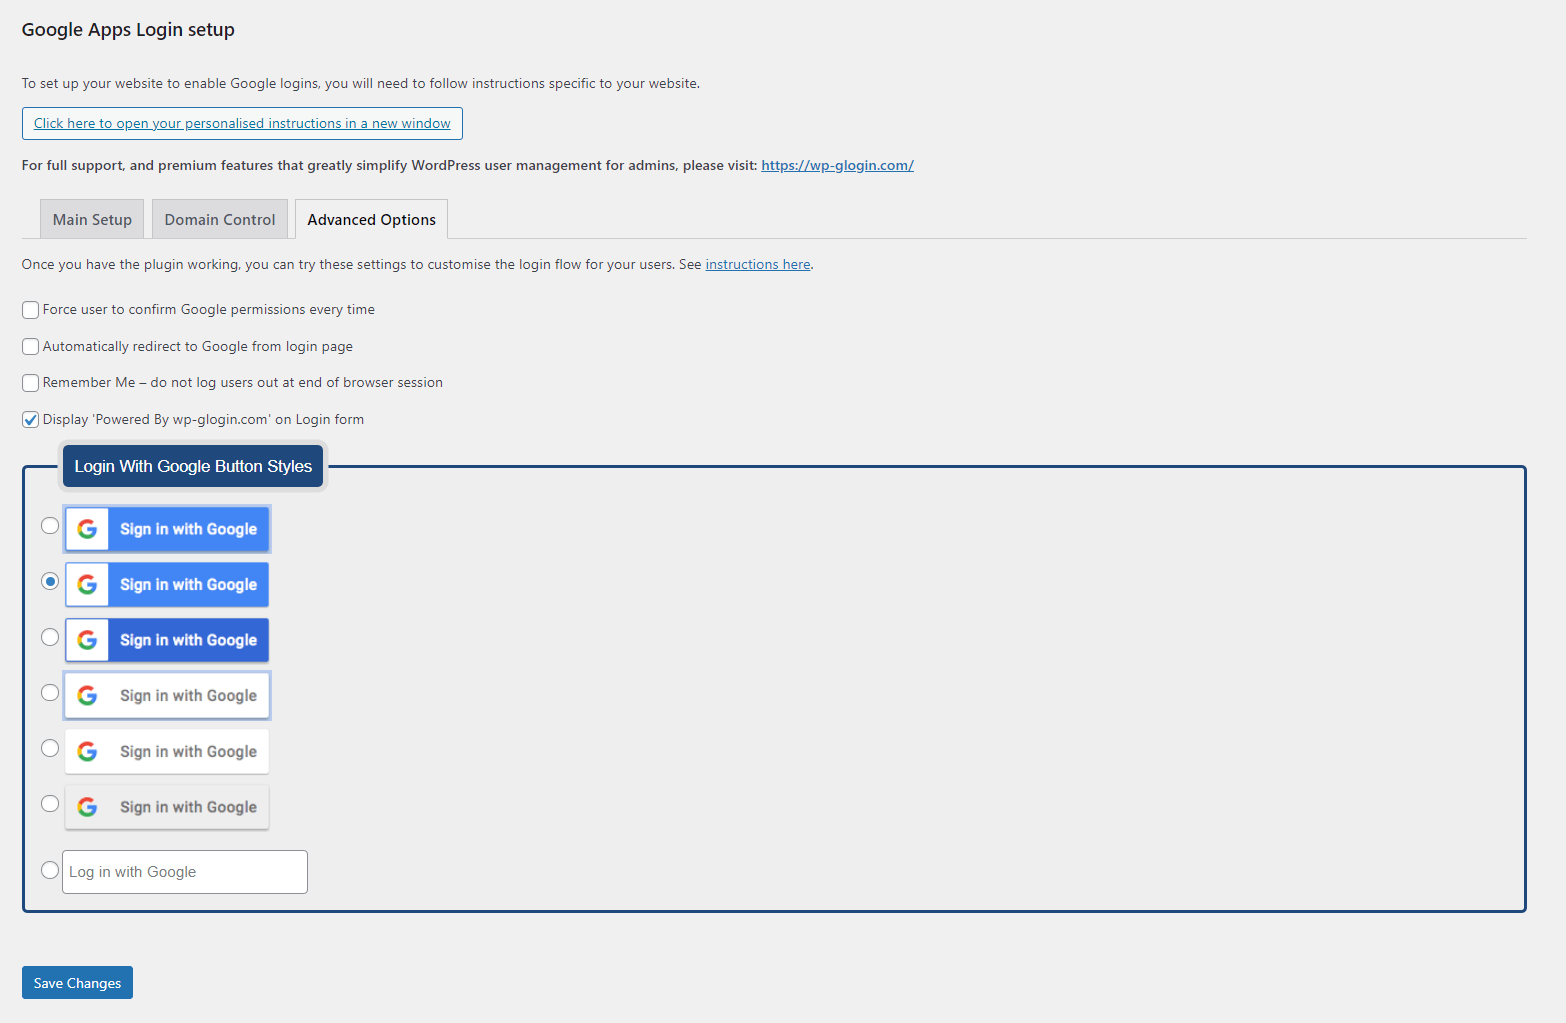
Before we wrap up, let’s quickly cover some possible customization options. To see yours, you can navigate back to the Google Apps Login plugin and check out the Advanced Options:
If you want some extra convenience, you can choose to provide a Remember Me option. You can also customize your login screen’s aesthetics by choosing from one of the seven design choices.
Alternatively, if none of these options appeal to you, you don’t have to choose any of them. You’re free to enjoy your expedient login process as-is.
Conclusion
There are multiple reasons you might want to streamline your WordPress Gmail login process. Whether you’re looking to skip an extra step or simply not remember yet another password, adding one-click Gmail login to your WordPress website is an effective solution.
In this article, we took you through four steps you can follow to set up one-click Gmail for your WordPress site:
- Pick a plugin that suits your needs, such as Google Apps Login.
- Create a new project in Google Cloud Console.
- Set up OAuth consent for your site.
- Customize your settings for a personal touch.
Do you have any questions about creating a one-click WordPress Gmail login? Let us know in the comments section below!
Featured image via Eny Setiyowati / shutterstock.com
[ad_2]
Source link


