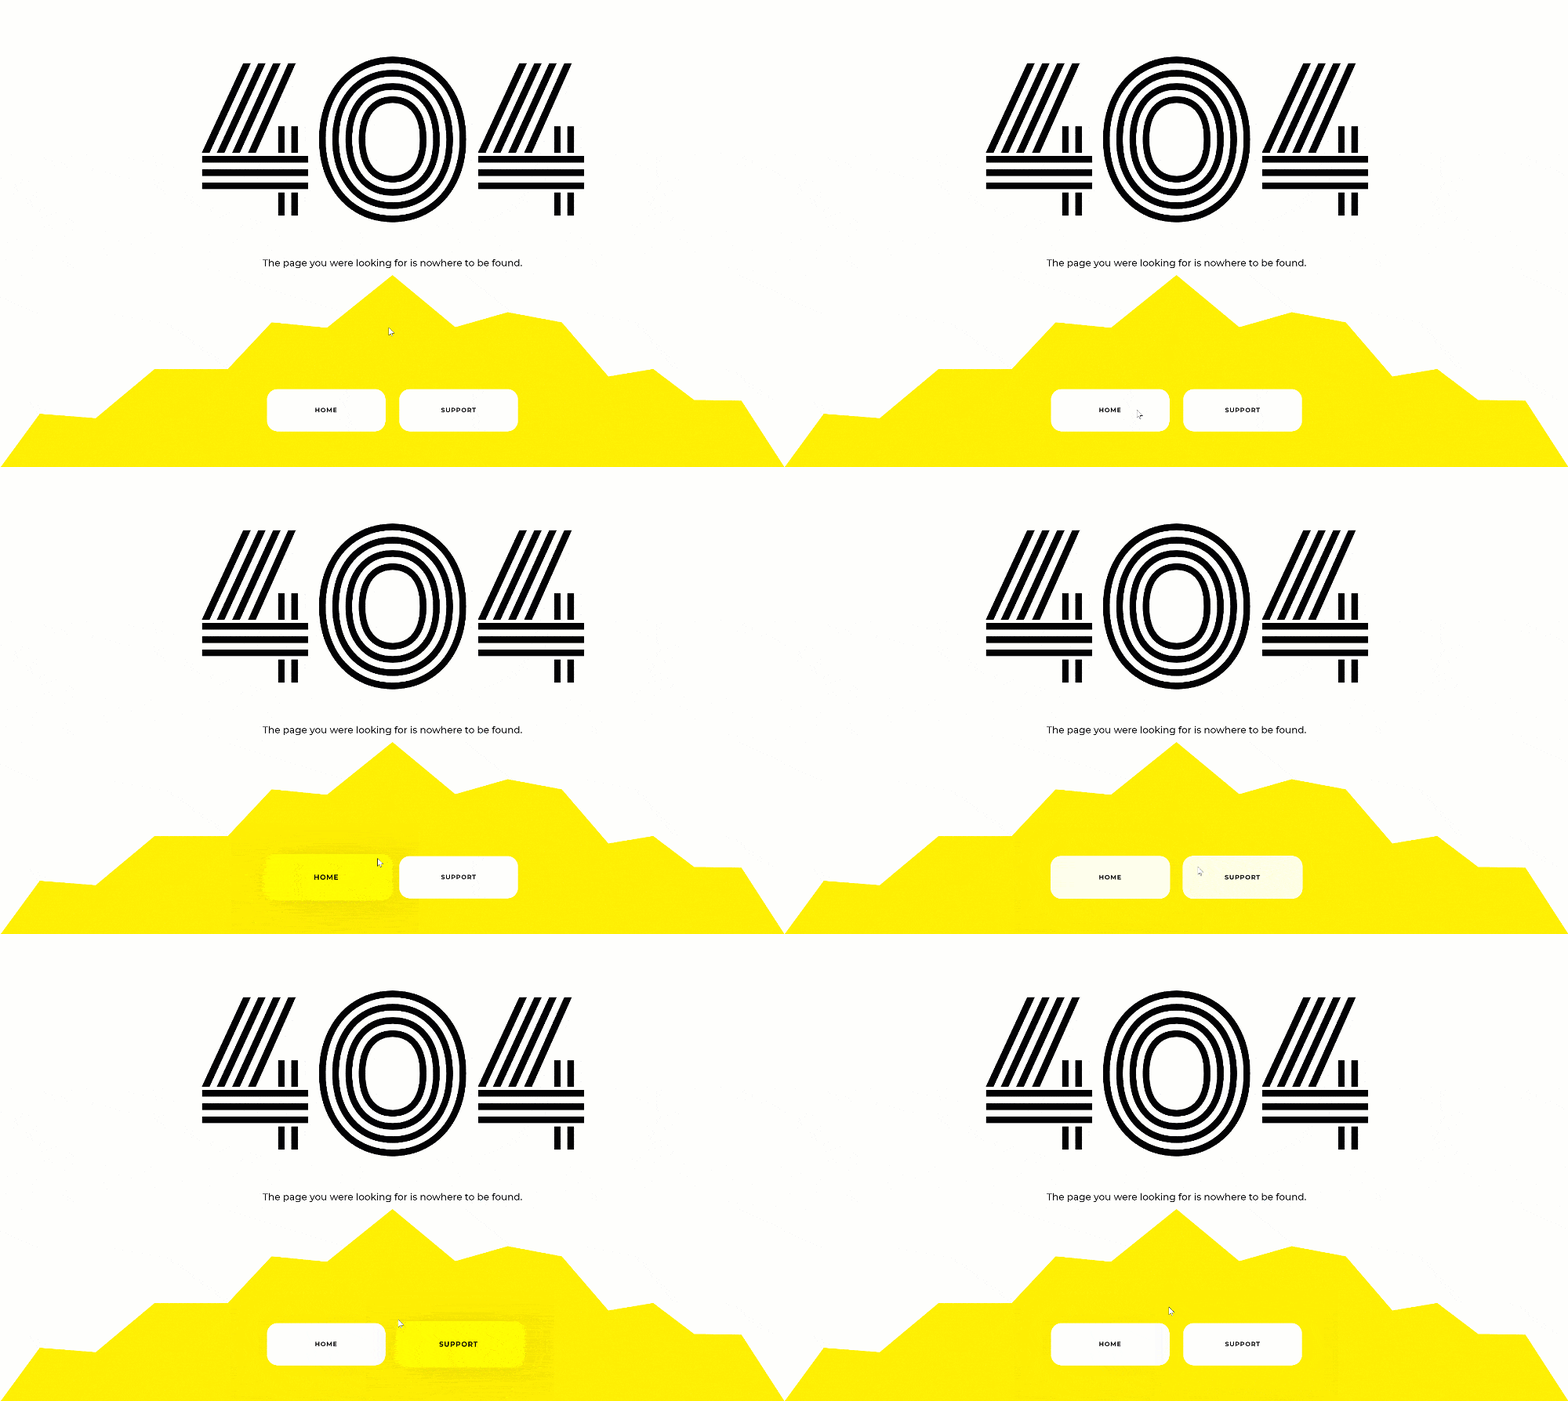
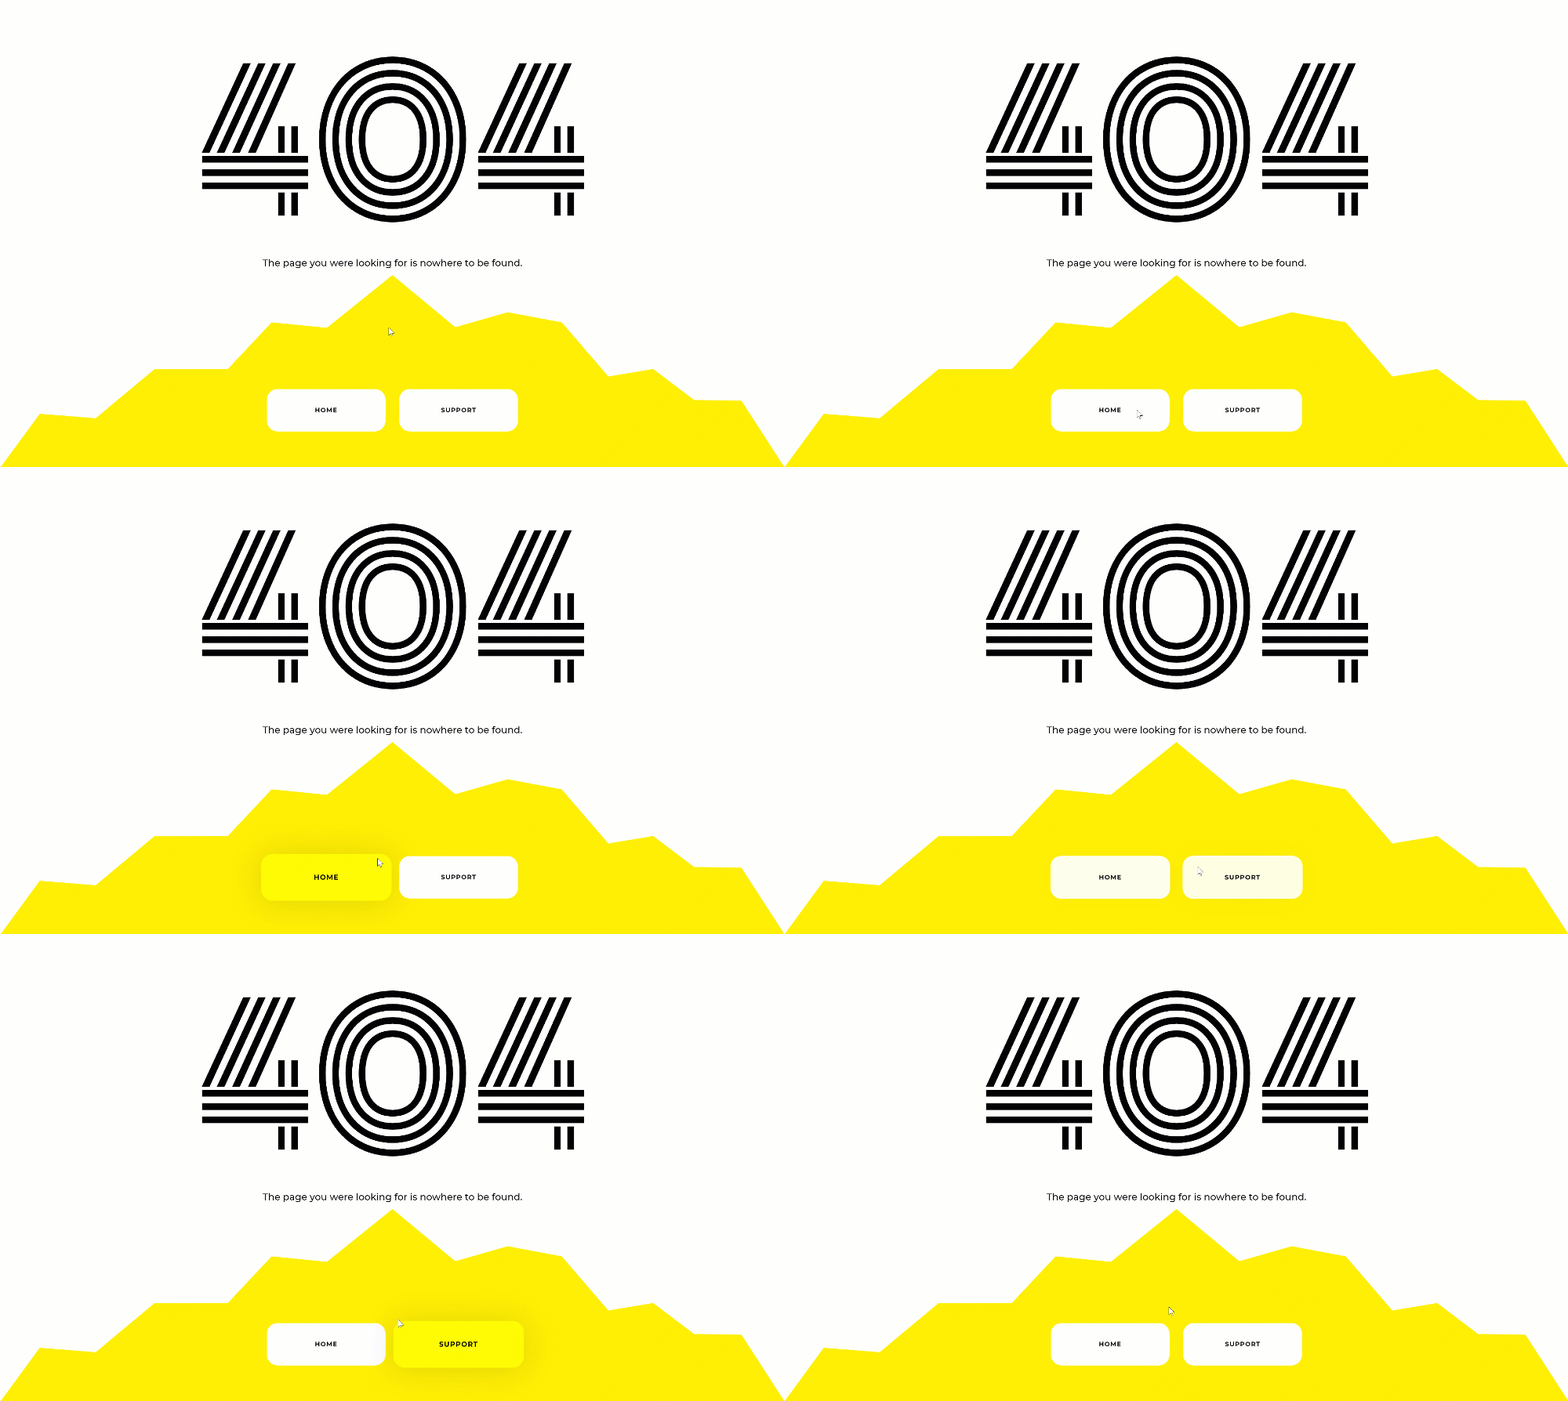
Divi, it’s Theme Builder and the built-in design options have opened a ton of new doors. More than ever before, you’re now able to customize every single page your customers land on. This includes setting up a 404 page. In this tutorial, we’ll show you how to create a beautiful 404 page template and have it apply to your website right away. We’ll only use Divi’s built-in options and you’ll be able to download the template JSON file for free as well. We hope this tutorial inspires to get creative with your next 404 page design.
Let’s get to it!
Preview
Before we dive into the tutorial, let’s take a quick look at the outcome across different screen sizes.
Desktop
Mobile
Download The 404 Page Template for FREE
To lay your hands on the free 404 page template, you will first need to download it using the button below. To gain access to the download you will need to subscribe to our newsletter by using the form below. As a new subscriber, you will receive even more Divi goodness and a free Divi Layout pack every Monday! If you’re already on the list, simply enter your email address below and click download. You will not be “resubscribed” or receive extra emails.
Subscribe To Our Youtube Channel
1. Go to Divi Theme Builder & Create New Template
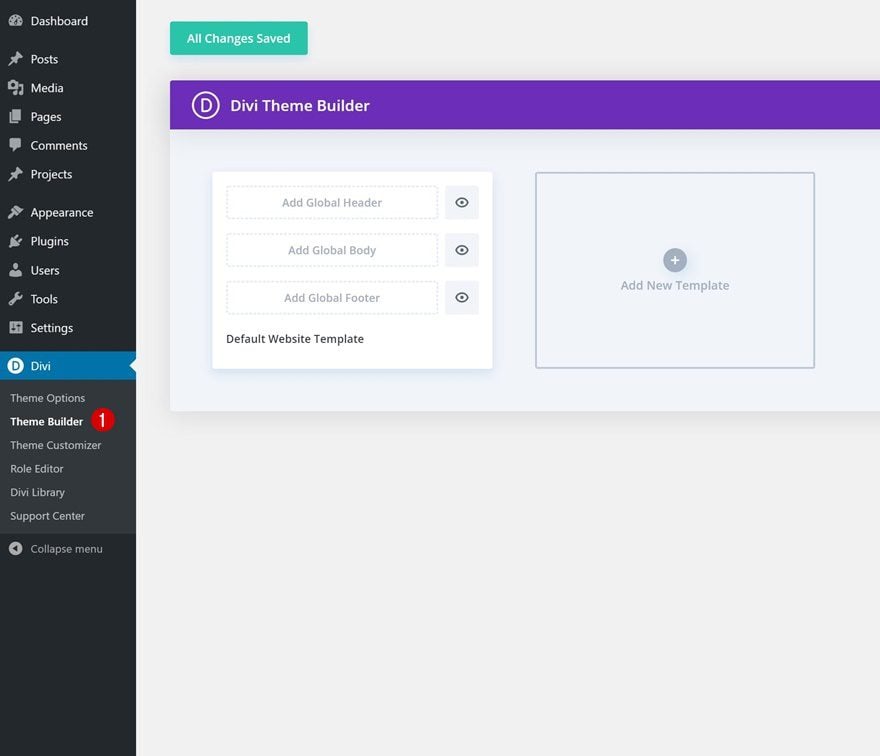
Go to Divi Theme Builder
To start creating the 404 page template, go to the Divi Theme Builder in your Divi settings.
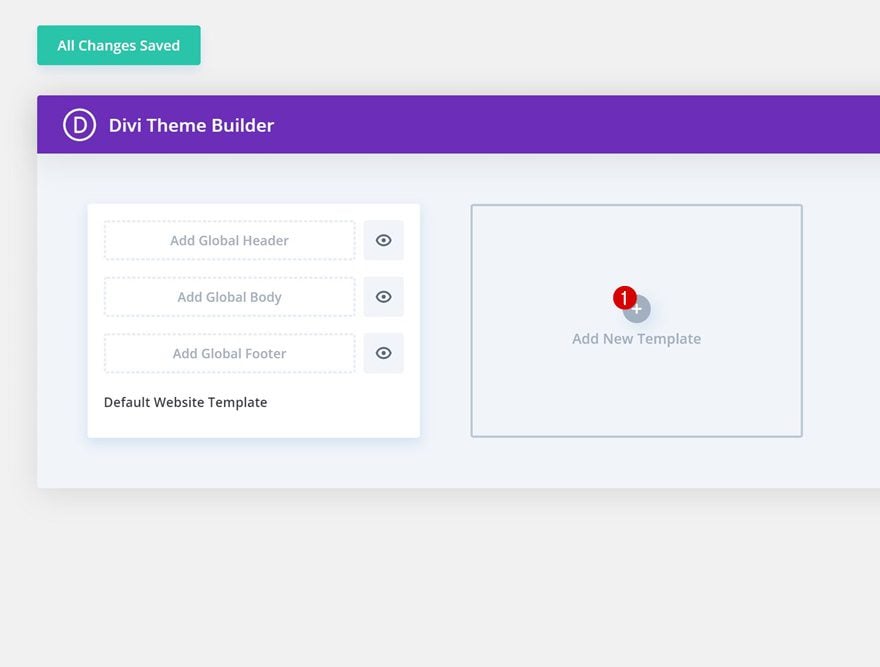
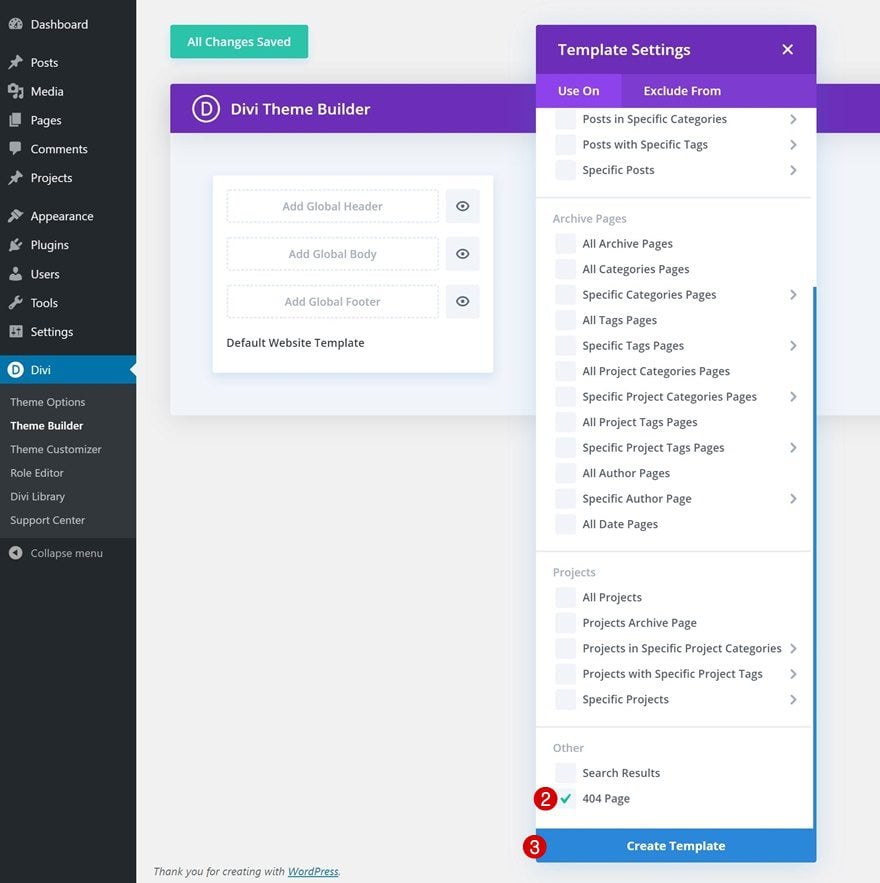
Create New Template
Click on ‘Add New Template’ and set up a new template for your 404 page.
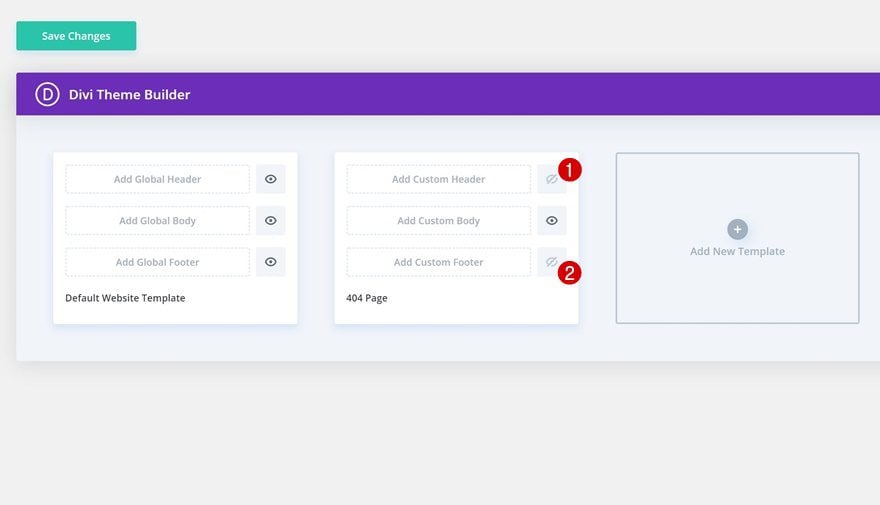
Hide Header & Footer Area
Continue by hiding the custom header and footer of your 404 page by clicking on the eye icon.
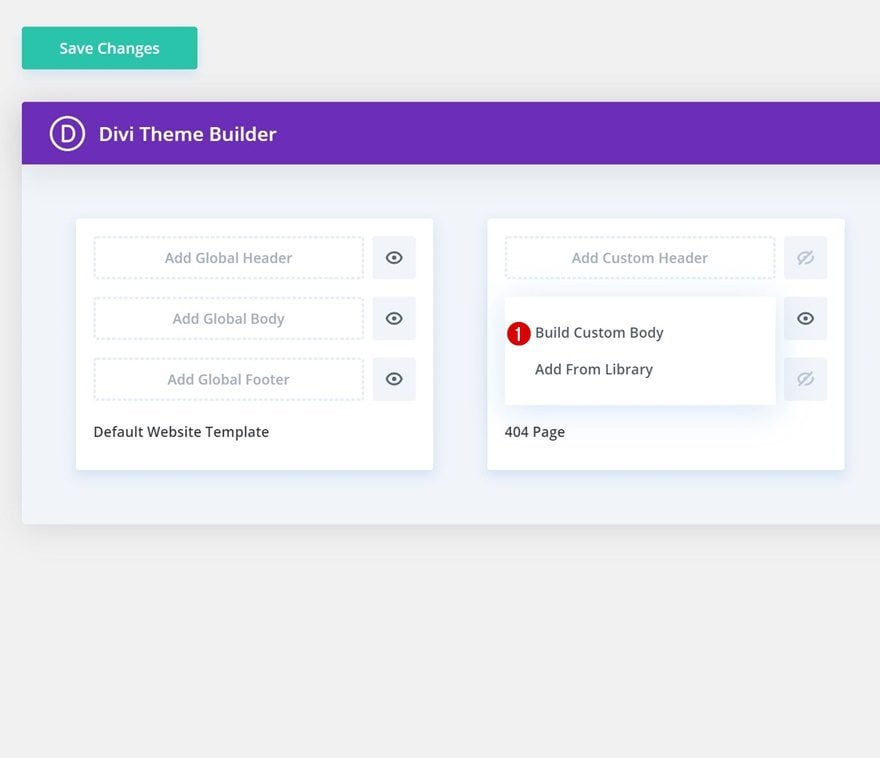
Build Global Body
Once you’ve gone through all previous steps, you can start building the 404 page body by selecting ‘Build Custom Body’.
2. Start Building 404 Page Body
Add New Section
Background Color
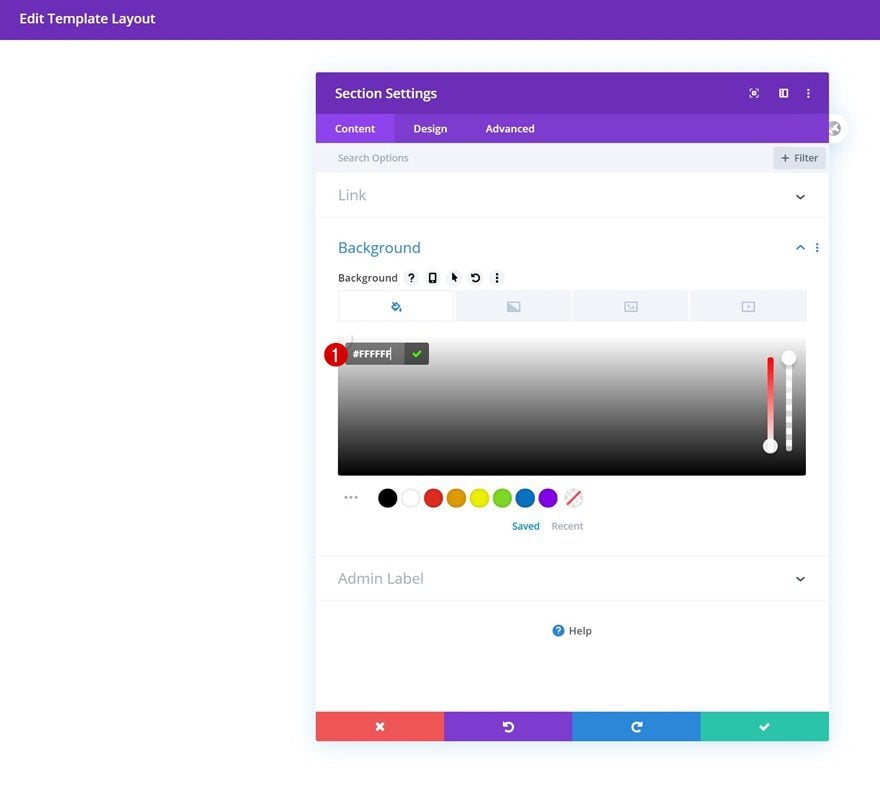
Once you’re inside the template editor, you’ll notice a section on your page. Open this section and add a white background color.
- Background Color: #FFFFFF
Bottom Divider
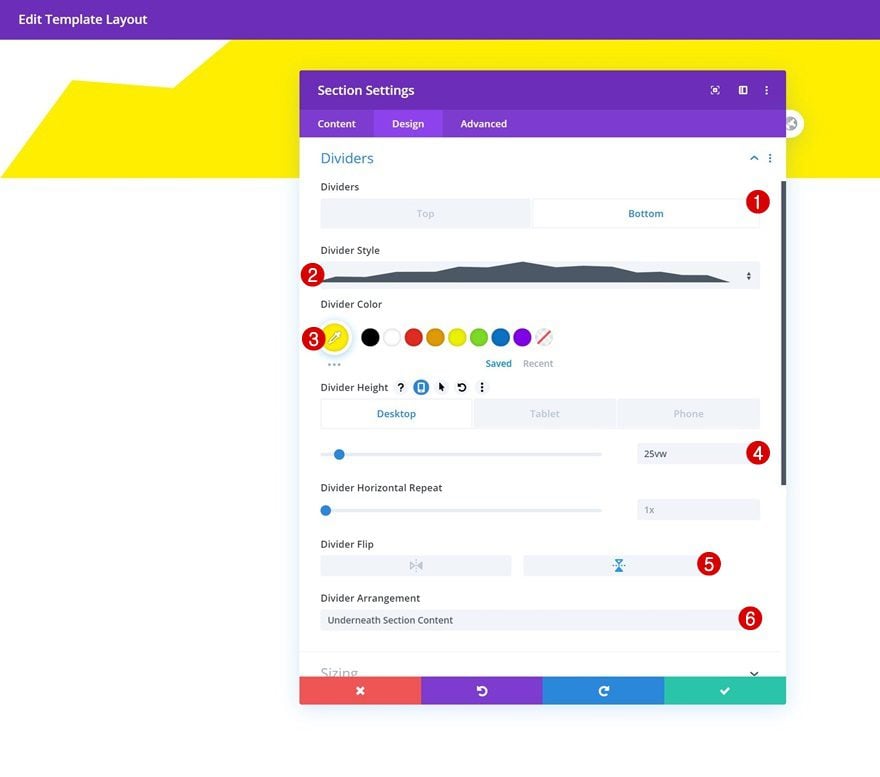
Move on to the section’s design tab and add a bottom divider:
- Divider Style: Find in List
- Divider Color: #ffee00
- Divider Height: 25vw (Desktop), 77vw (Tablet), 90vw (Phone)
- Divider Flip: Vertical
- Divider Arrangement: Underneath Section Content
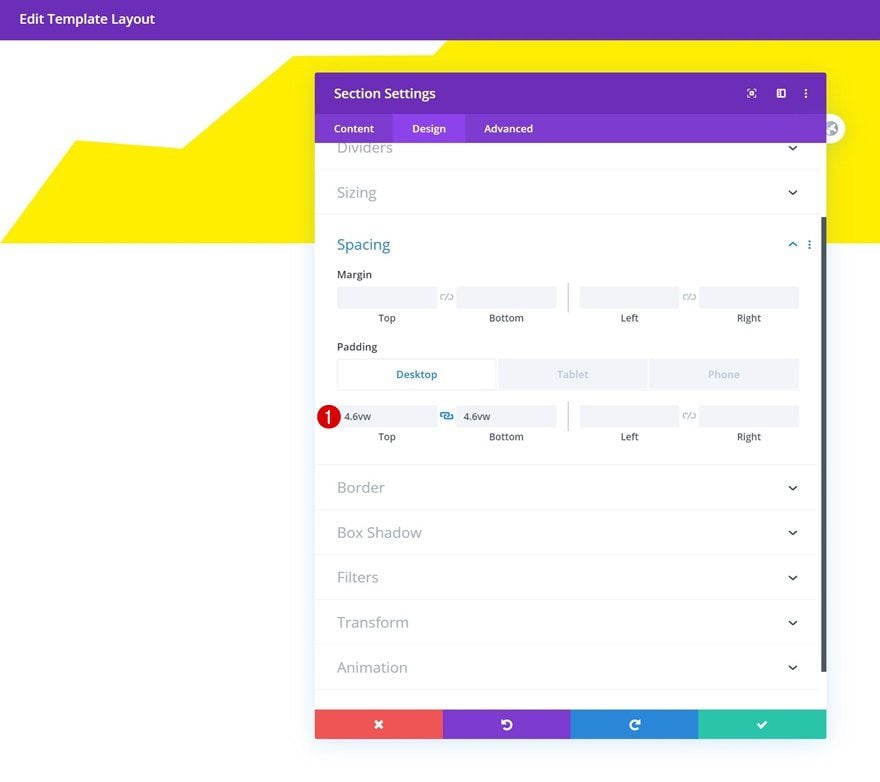
Spacing
Add some custom padding values across different screen sizes next.
- Top Padding: 4.6vw (Desktop), 23vw (Tablet), 25vw (Phone)
- Bottom Padding: 4.6vw (Desktop), 13vw (Tablet), 11vw (Phone)
Add Row #1
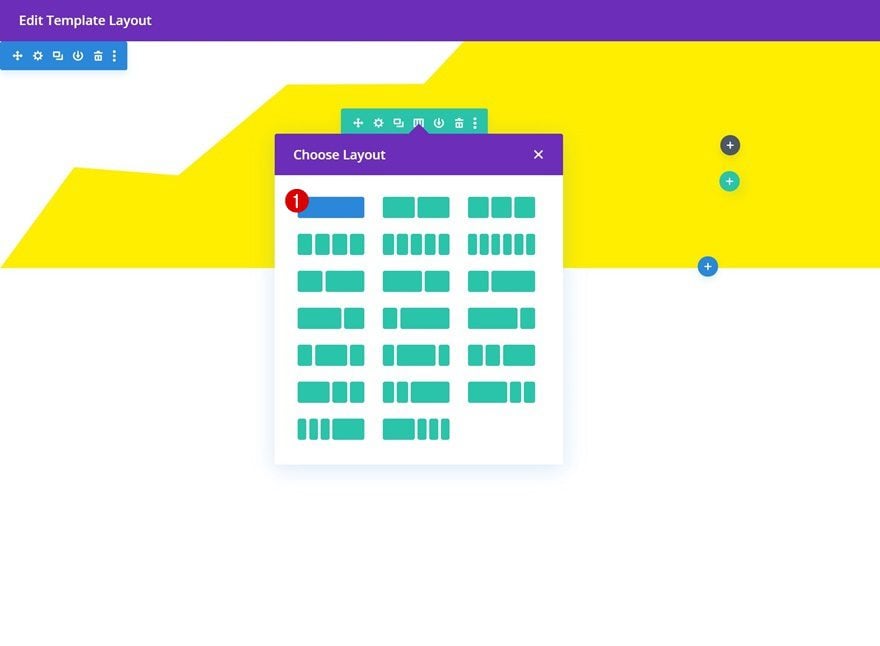
Column Structure
Once you’ve completed the section settings, you can add the first row. Choose the following column structure:
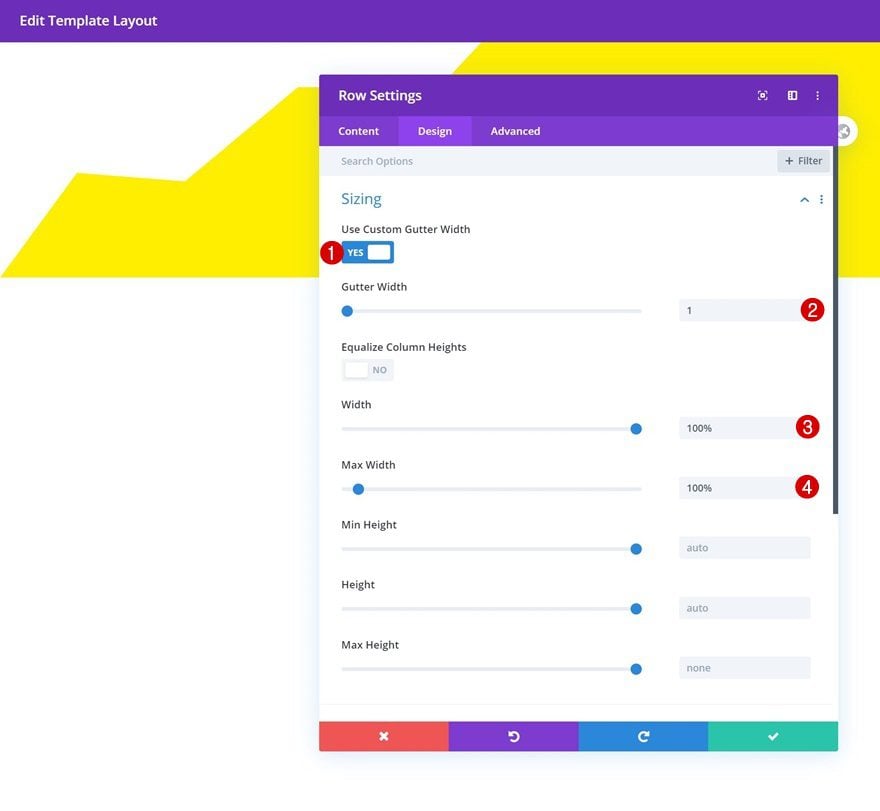
Sizing
Without adding any modules yet, open the row settings and allow the row to take up the entire width of the screen.
- Use Custom Gutter Width: Yes
- Gutter Width: 1
- Width: 100%
- Max Width: 100%
Spacing
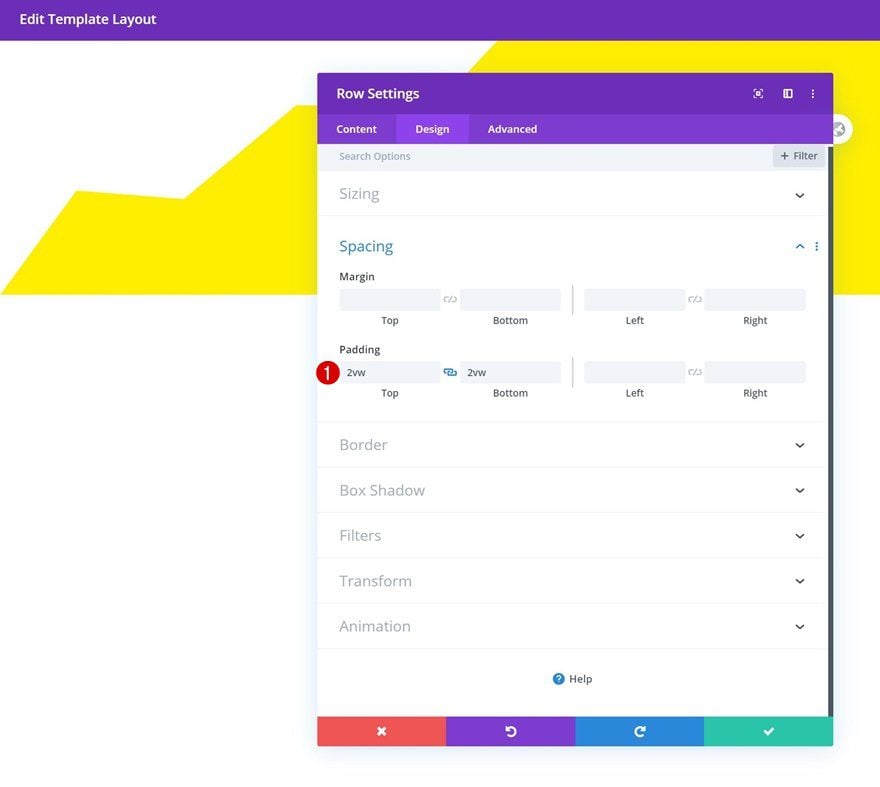
Modify the row’s top and bottom padding values next.
- Top Padding: 2vw
- Bottom Padding: 2vw
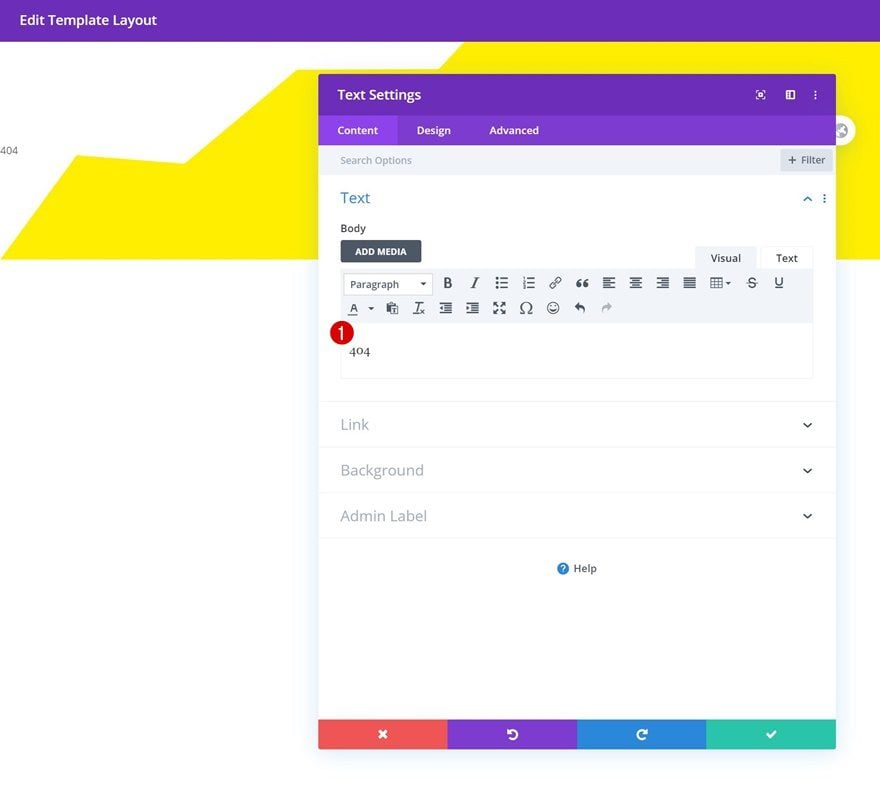
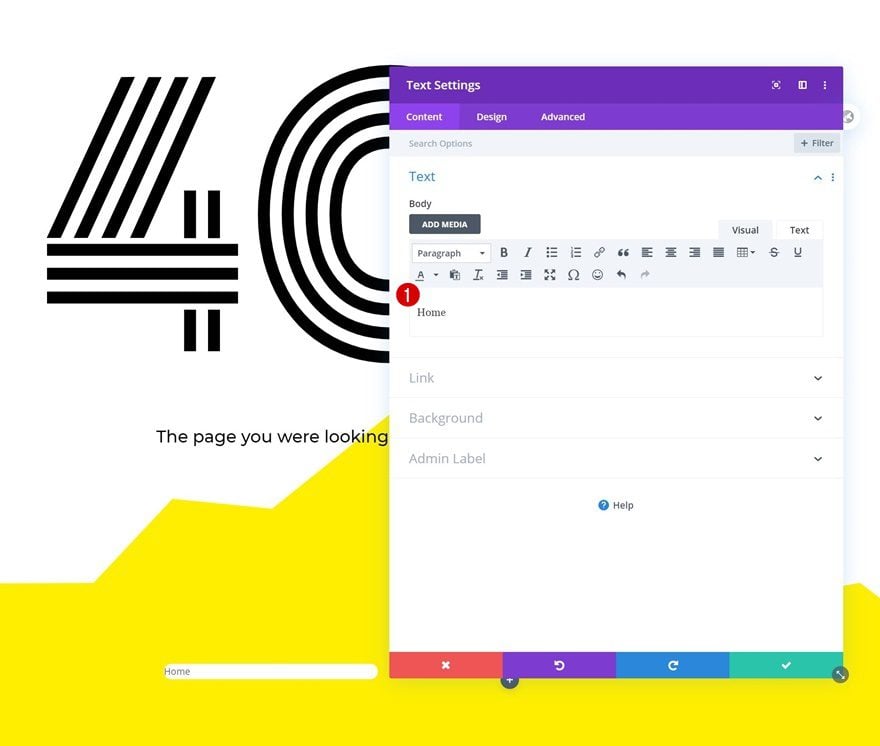
Add Text Module 1 to Column
Add Content
Time to start adding modules! The first module we’ll need is a Text Module. Insert some paragraph content of your choice.
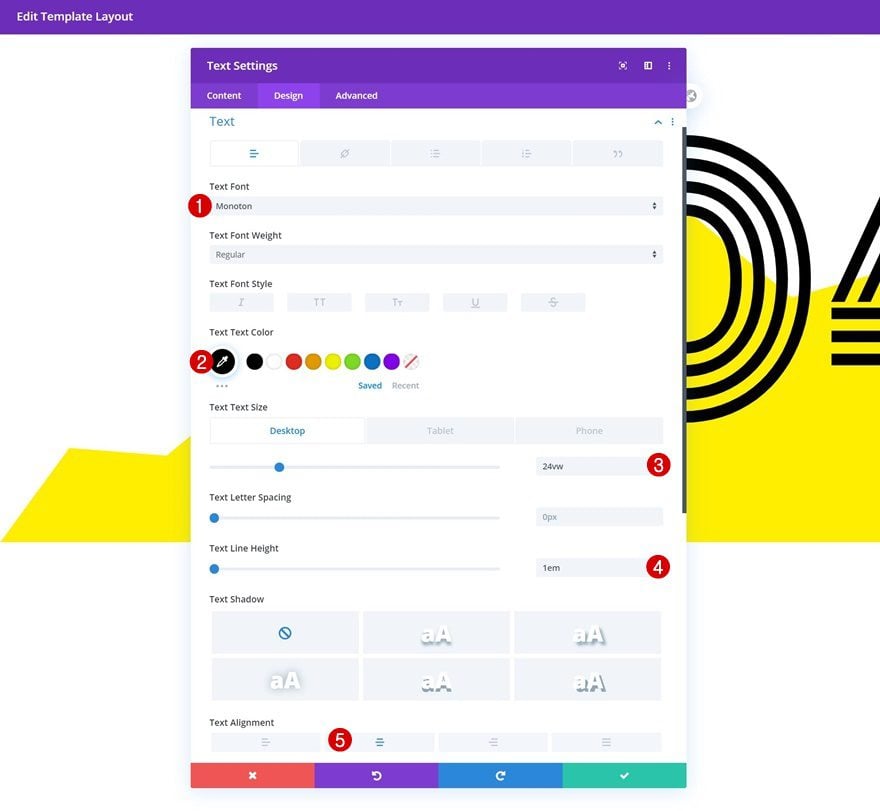
Text Settings
Move on to the module’s design tab and change the text settings as follows:
- Text Font: Monoton
- Text Color: #000000
- Text Size: 24vw (Desktop), 35vw (Tablet & Phone)
- Text Line Height: 1em
- Text Alignment: Center
Add Text Module #2 to Column
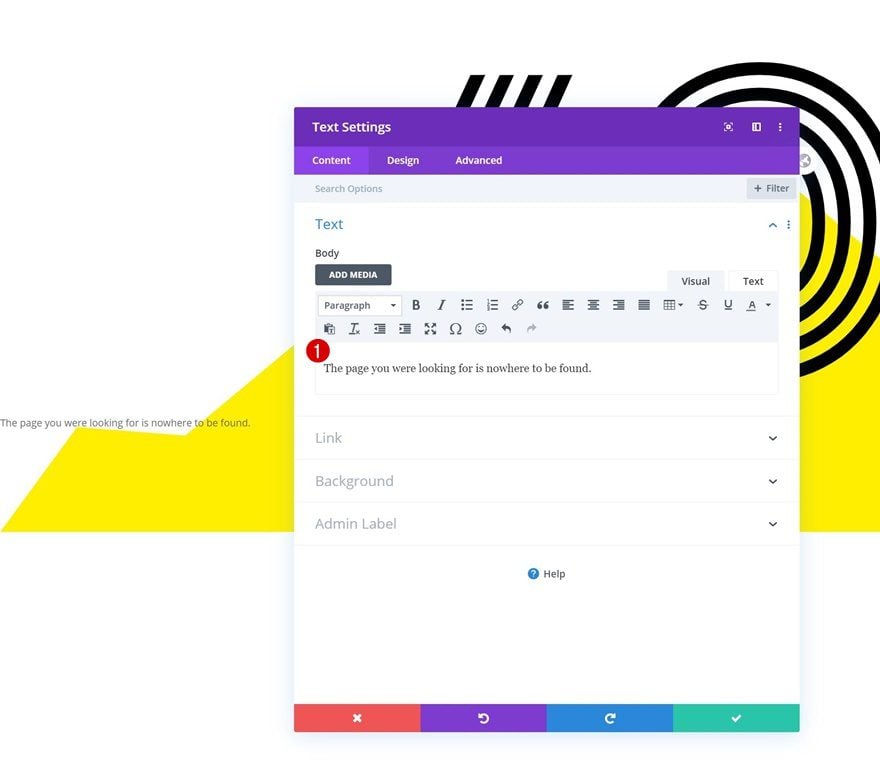
Add Content
On to the next module, which is another Text Module. Add some content of your choice.
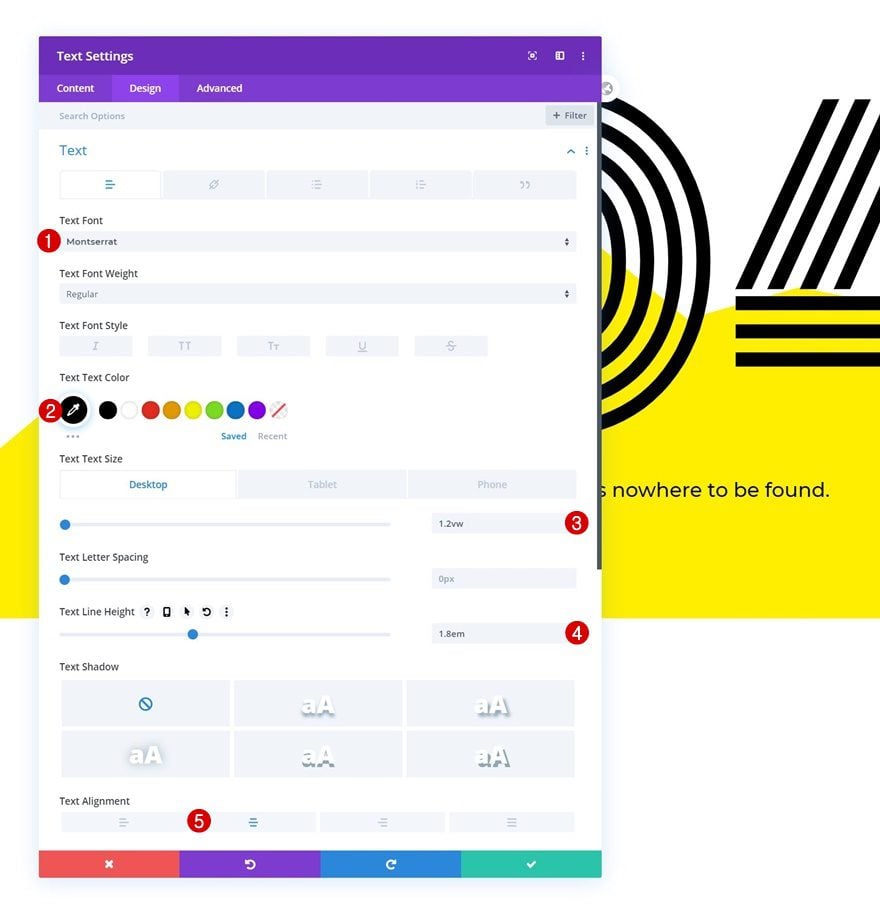
Text Settings
Change the module’s text settings accordingly:
- Text Font: Montserrat
- Text Color: #000000
- Text Size: 1.2vw (Desktop), 2.6vw (Tablet), 3vw (Phone)
- Text Line Height: 1.8em
- Text Alignment: Center
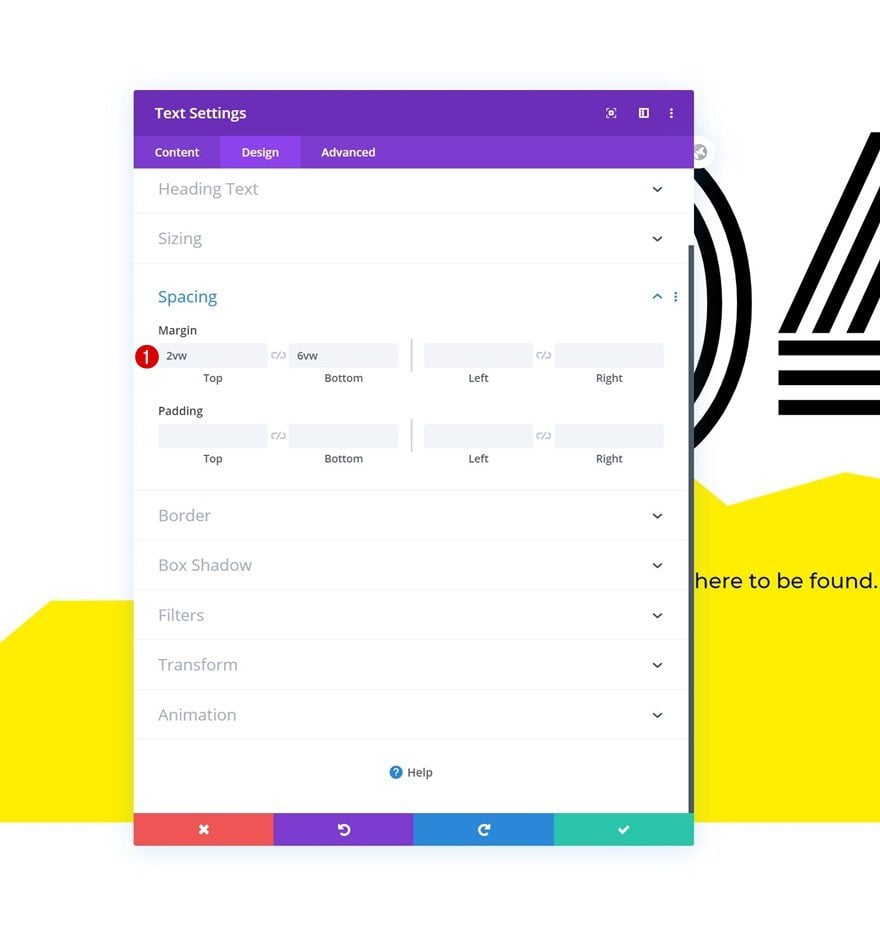
Spacing
Complete the module’s settings by adding some custom top and bottom margin.
- Top Margin: 2vw
- Bottom Margin: 6vw
Add Row #2
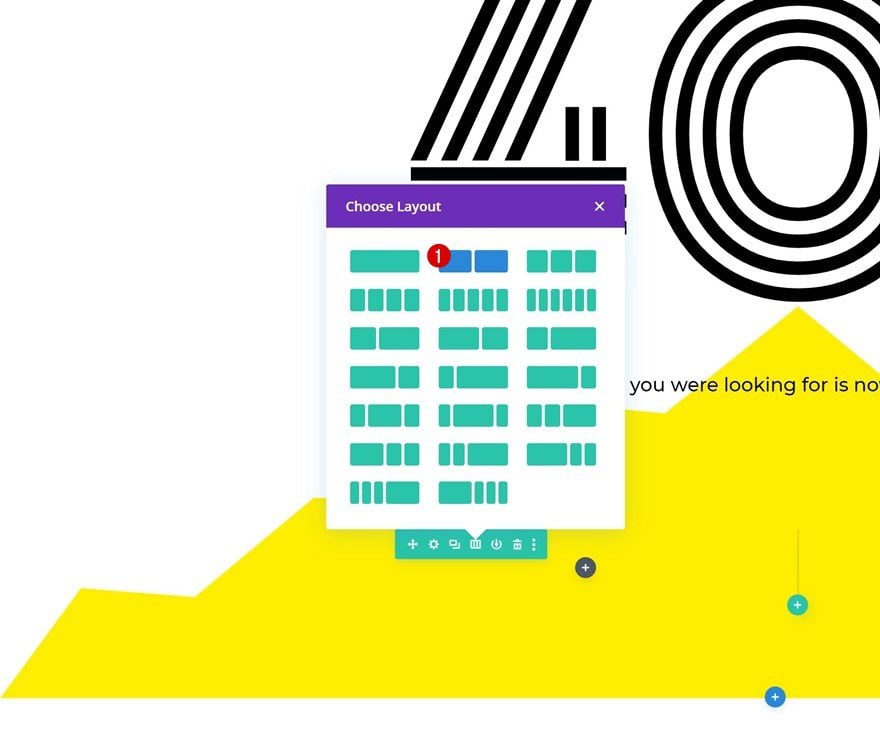
Column Structure
Continue by adding a new row using the following column structure:
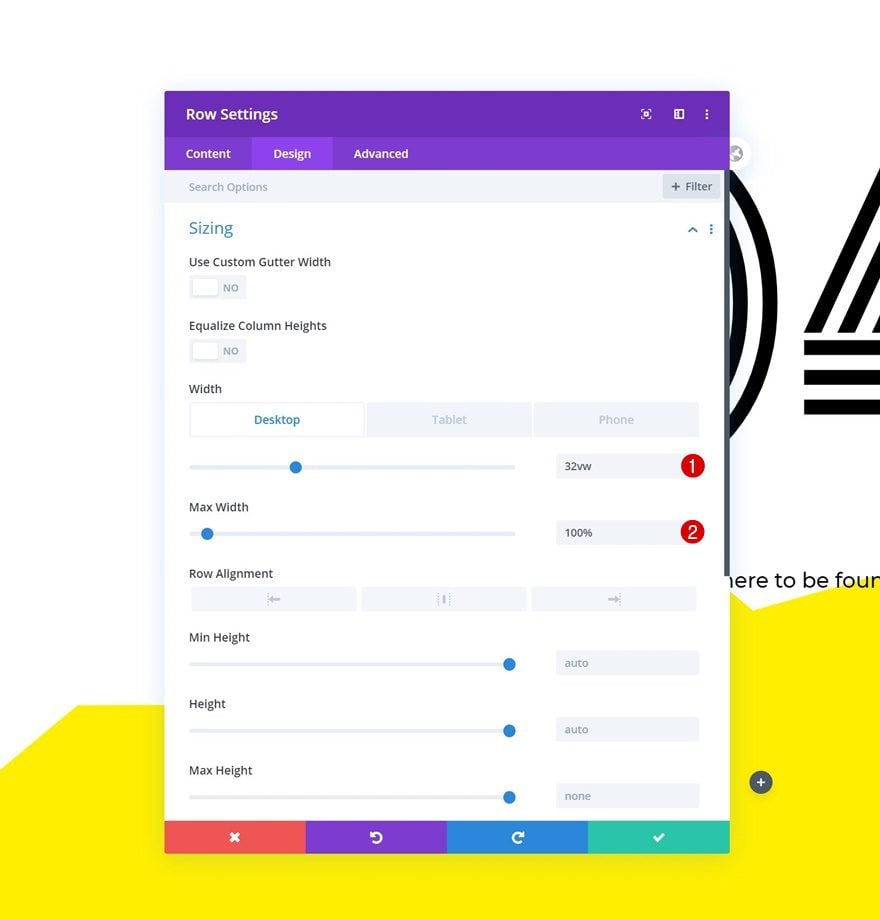
Sizing
Open the row settings and adjust the sizing settings as follows:
- Width: 32vw (Desktop), 50vw (Tablet & Phone)
- Max Width: 100%
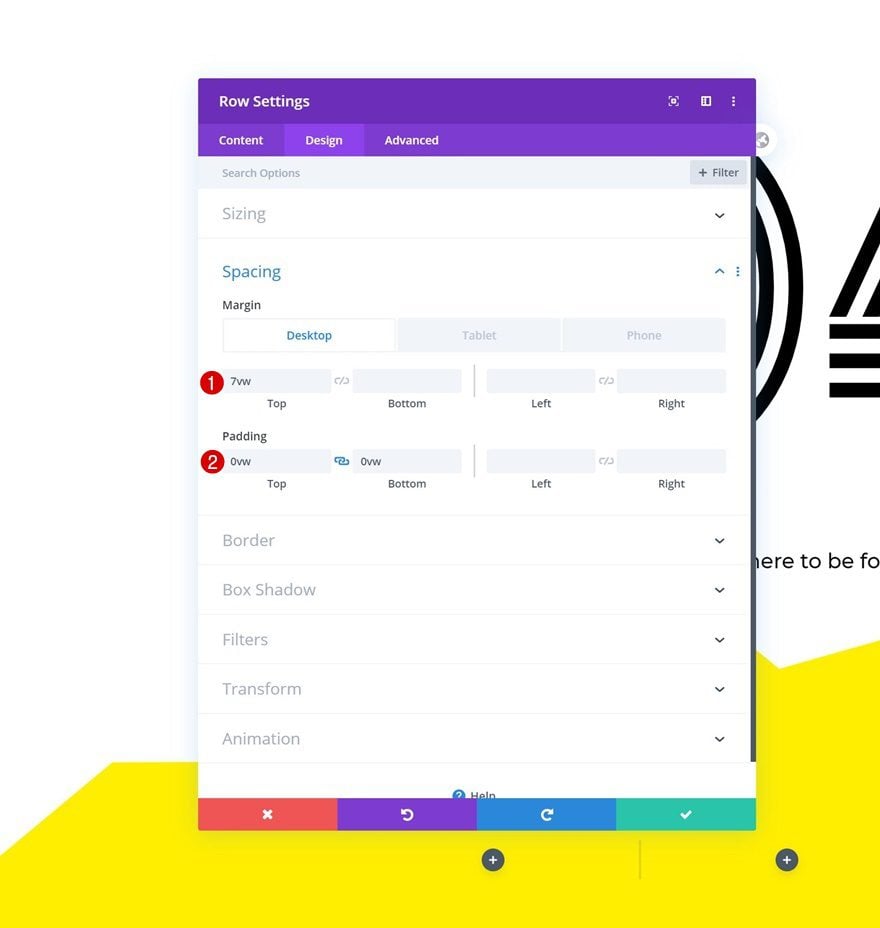
Spacing
Modify the spacing settings too.
- Top Margin: 7vw (Desktop), 22vw (Tablet), 59vw (Phone)
- Top Padding: 0vw
- Bottom Padding: 0vw
Column 1 & 2 Settings
Default Background Color
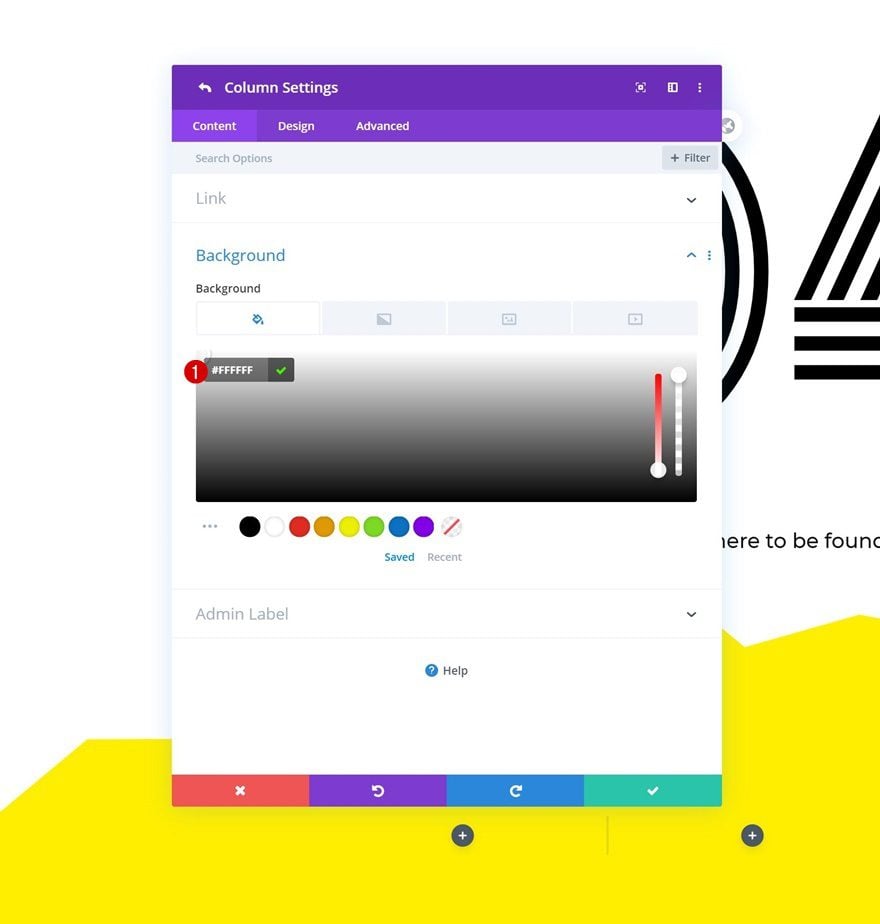
Once you’ve completed the general row settings, you can open each column individually and make some changes, starting with the background color.
- Background Color: #FFFFFF
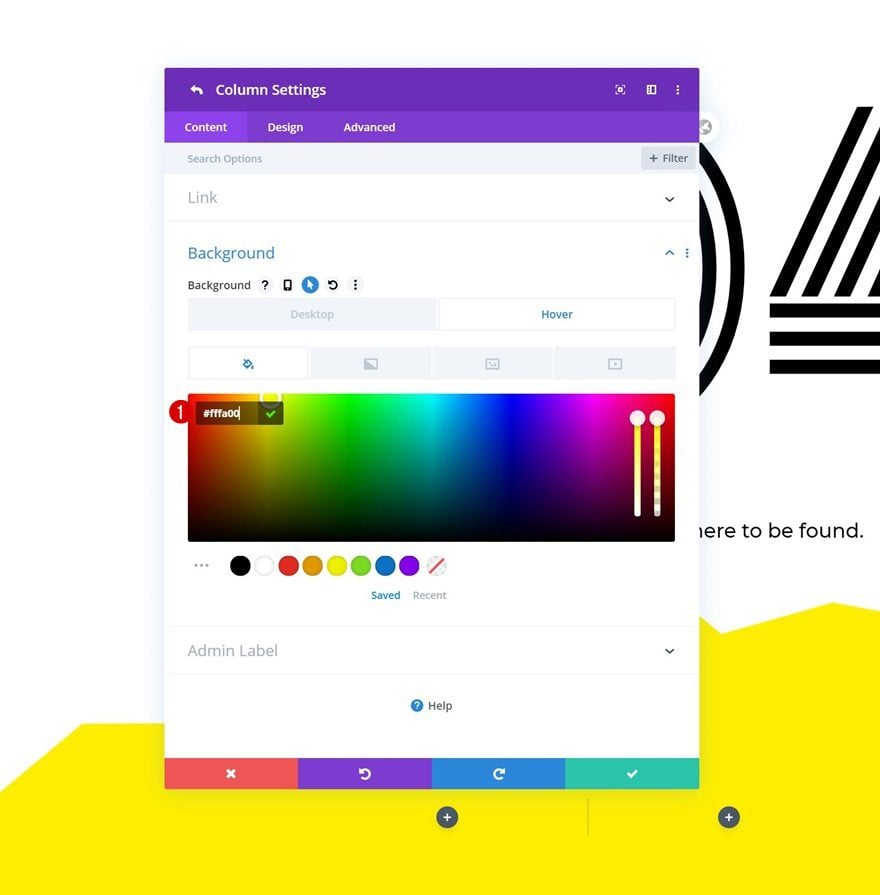
Hover Background Color
Modify the background color on hover.
- Background Color: #fffa00
Border
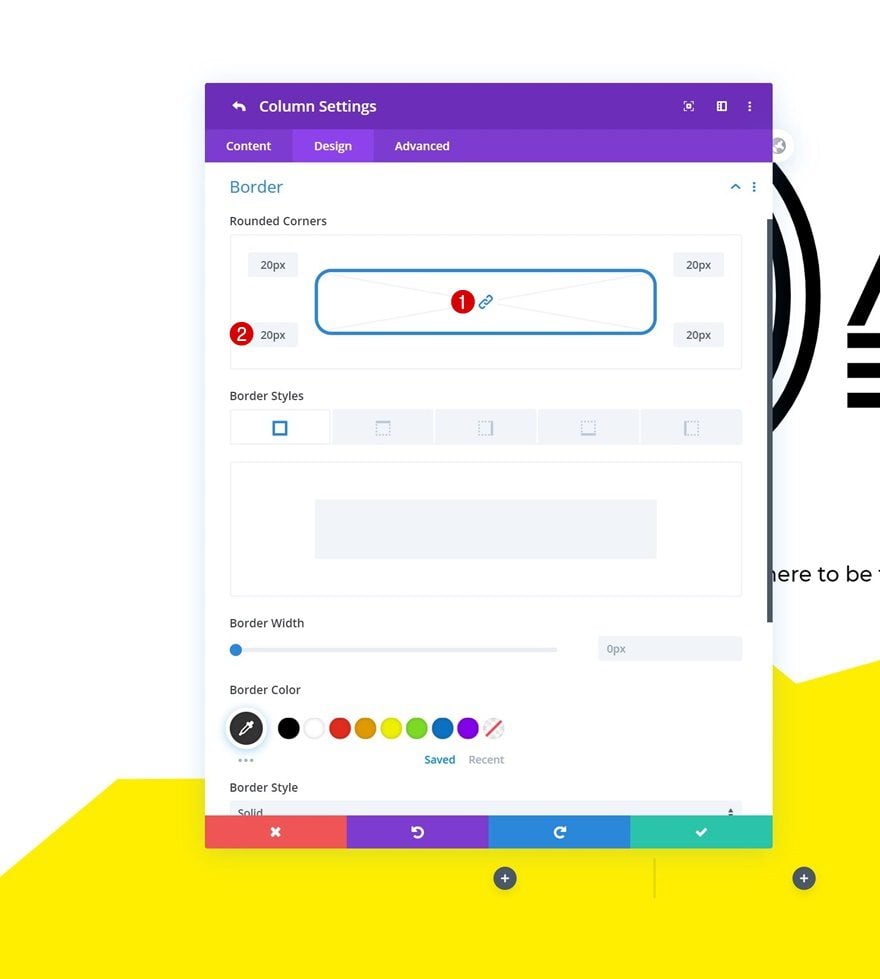
Add some rounded corners too.
- Rounded Corners: 20px (All Corners)
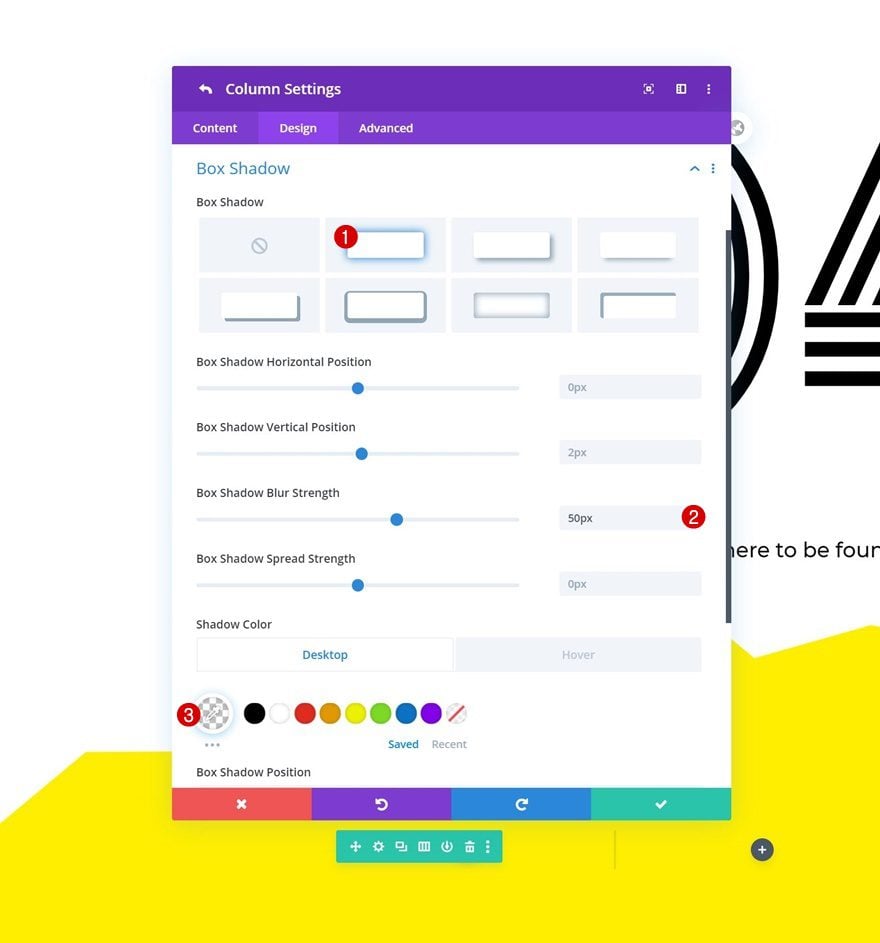
Default Box Shadow
Move on to the box shadow settings and apply the following changes:
- Box Shadow Blur Strength: 50px
- Shadow Color: rgba(0,0,0,0)
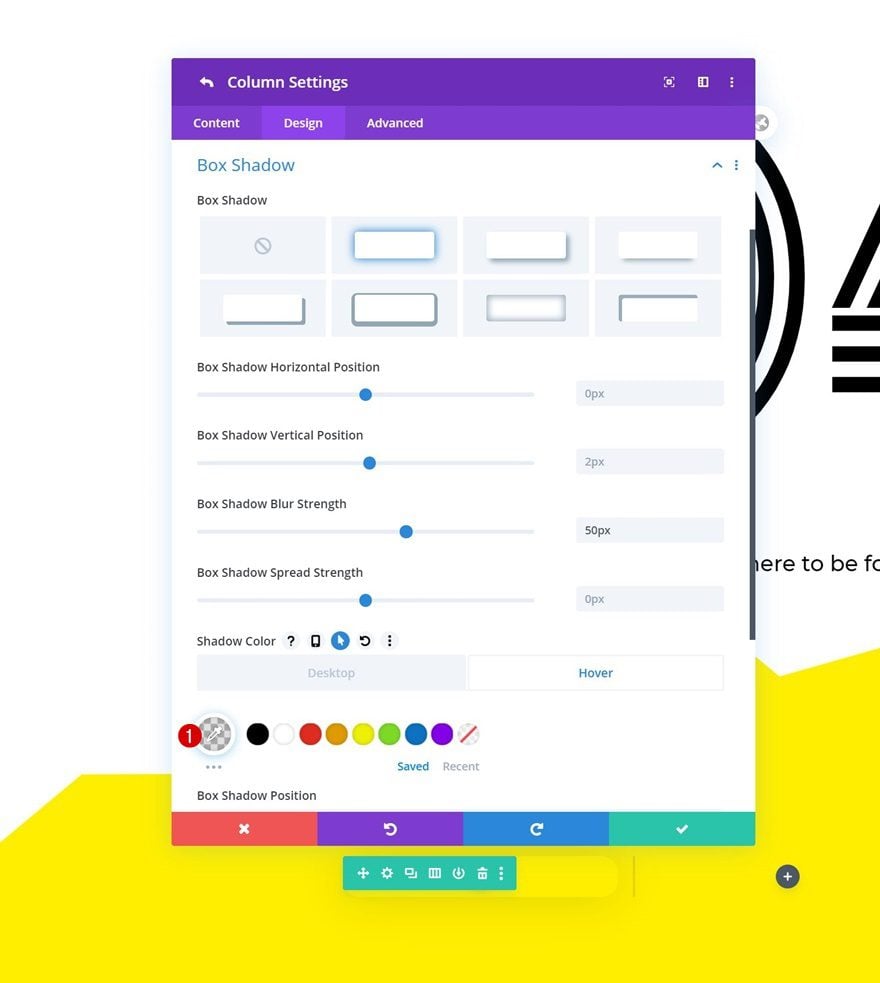
Hover Box Shadow
Modify the shadow color on hover.
- Shadow Color: rgba(0,0,0,0.12)
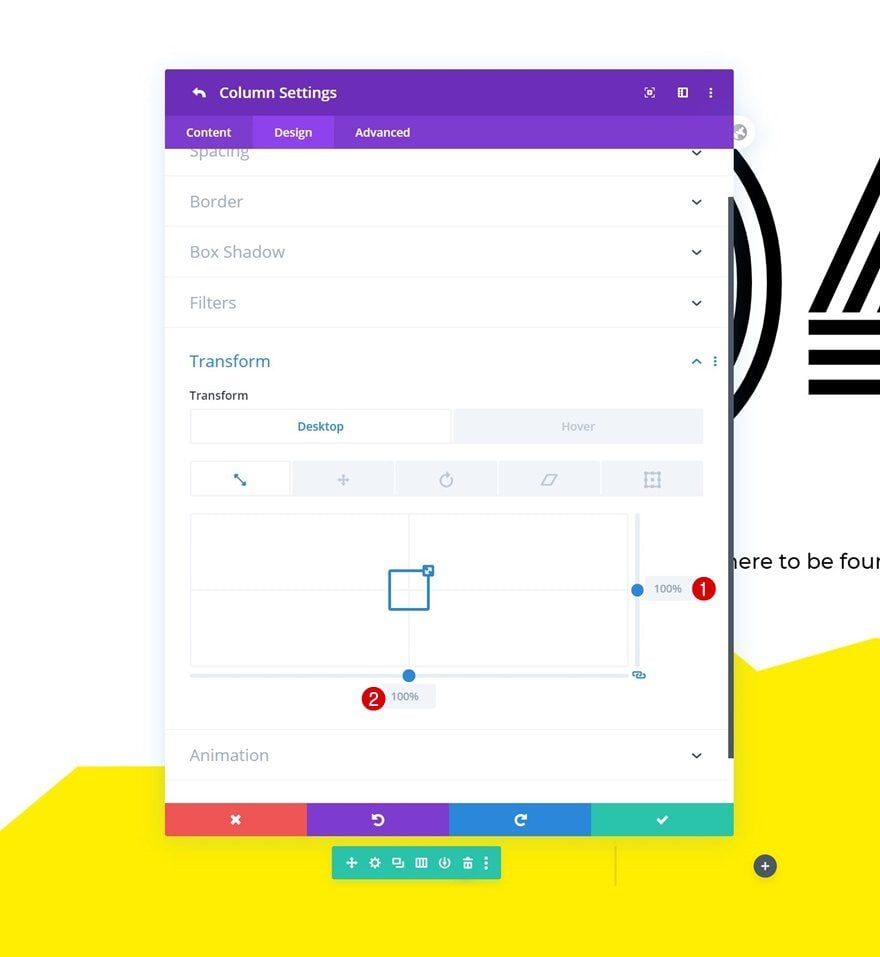
Default Transform Scale
Then, go to the transform scale settings and make sure the default values remain ‘100%’.
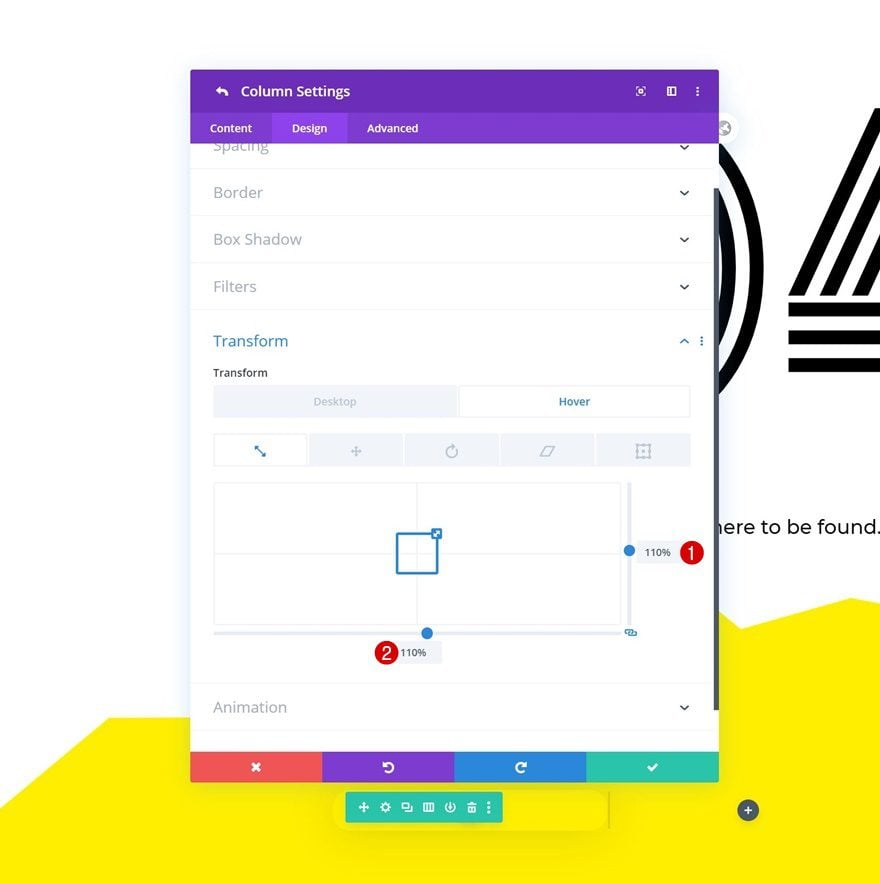
Hover Transform Scale
Change the transform scale values on hover:
Add Text Module to Column 1
Add Content
Once you’ve completed the row and column settings, add a Text Module to column 1 with some paragraph content of your choice.
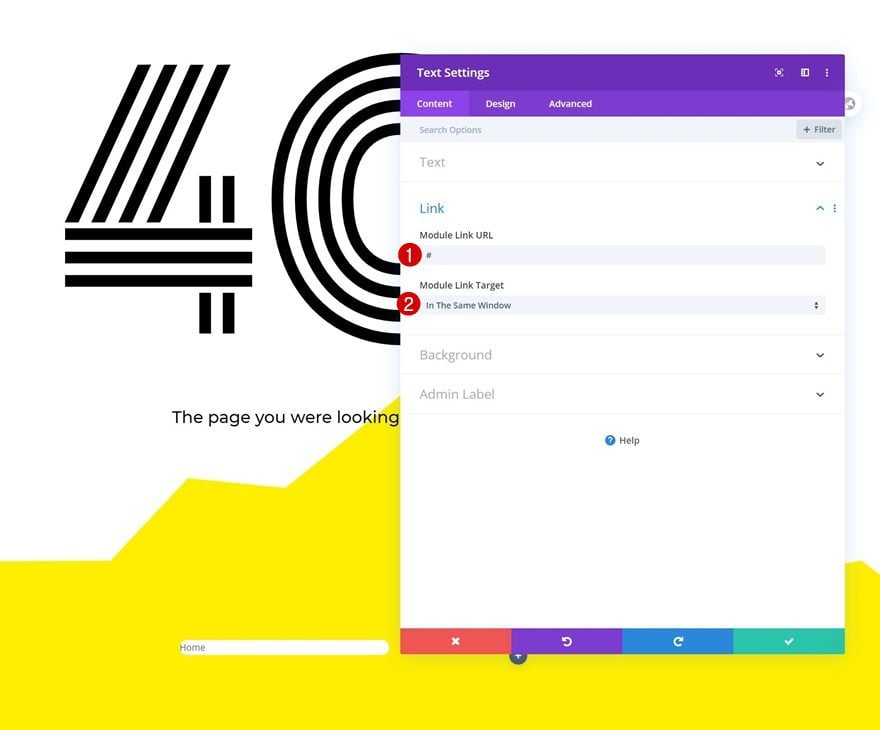
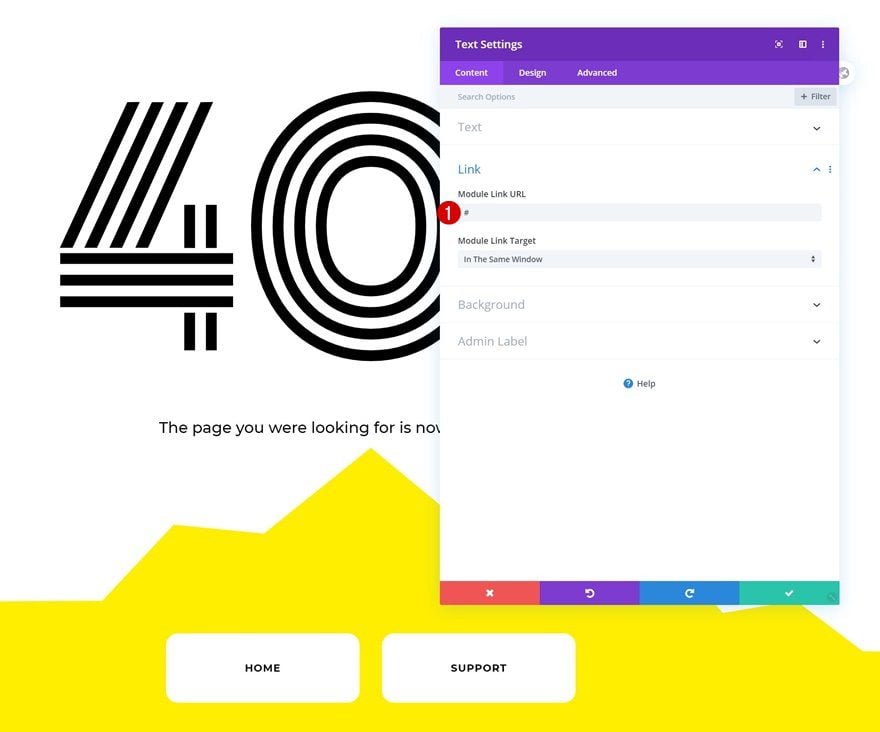
Add Link
Add a link to the module next.
- Module Link URL: #
- Module Link Target: In The Same Window
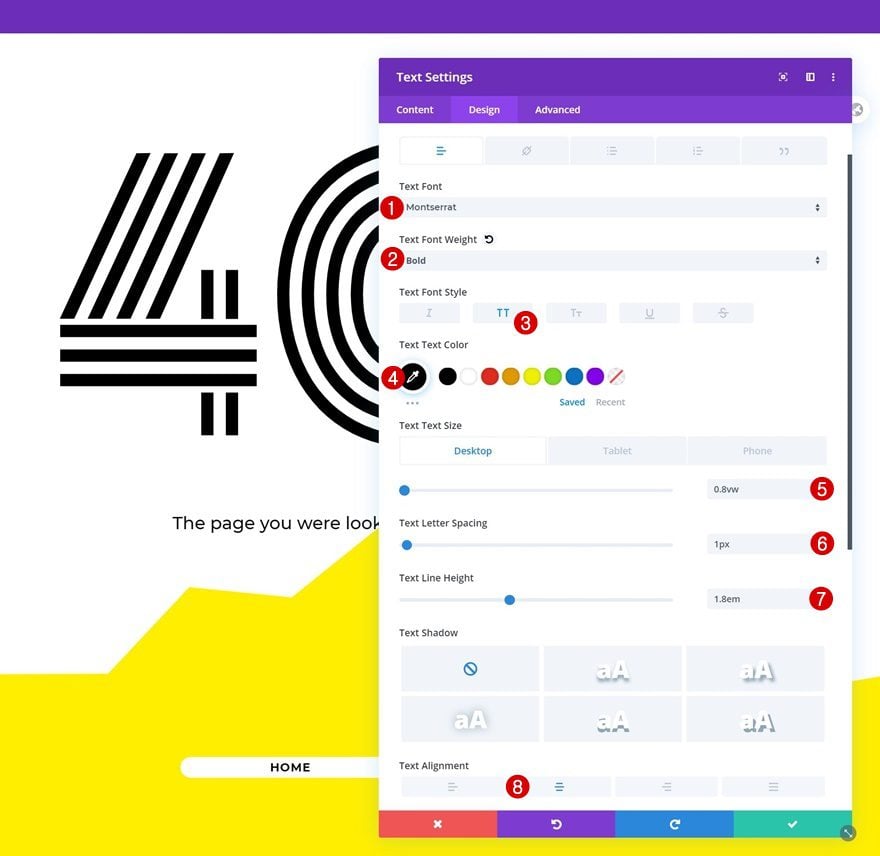
Text Settings
Move on to the module’s design tab and change the text settings as follows:
- Text Font: Montserrat
- Text Font Weight: Bold
- Text Font Style: Uppercase
- Text Color: #000000
- Text Size: 0.8vw (Desktop), 2vw (Tablet), 3vw (Phone)
- Text Letter Spacing: 1px
- Text Line Height: 1.8em
- Text Alignment: Center
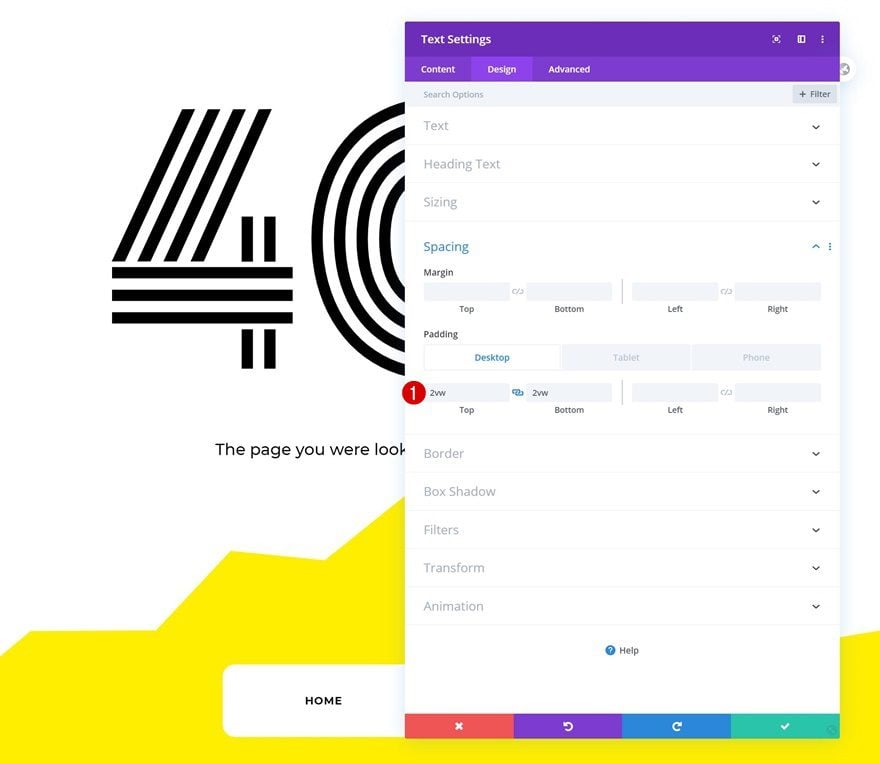
Spacing
Then, go to the spacing settings and apply some custom top and bottom padding values across different screen sizes.
- Top Padding: 2vw (Desktop), 3vw (Tablet), 4vw (Phone)
- Bottom Padding: 2vw (Desktop), 3vw (Tablet), 4vw (Phone)
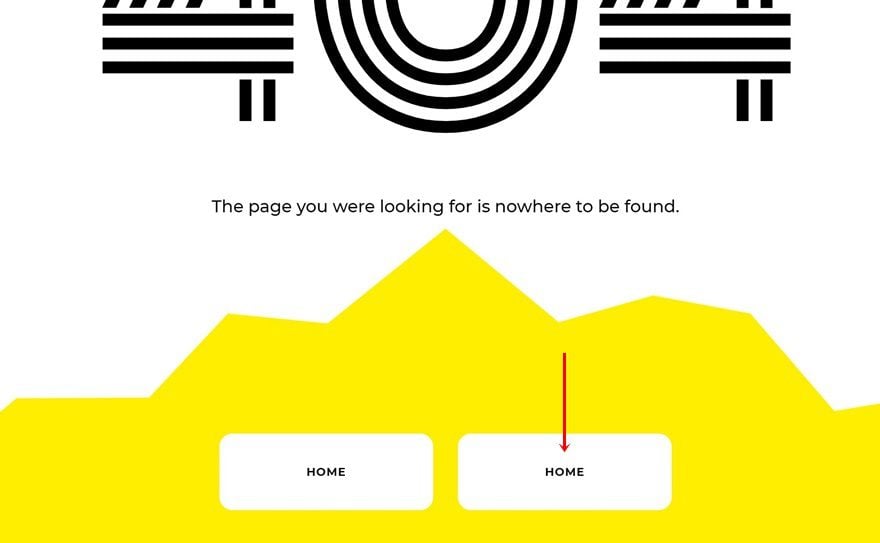
Clone Text Module & Place Duplicate in Column 2
Once you’ve completed the Text Module and all its settings, you can clone the entire module and place the duplicate in column 2.
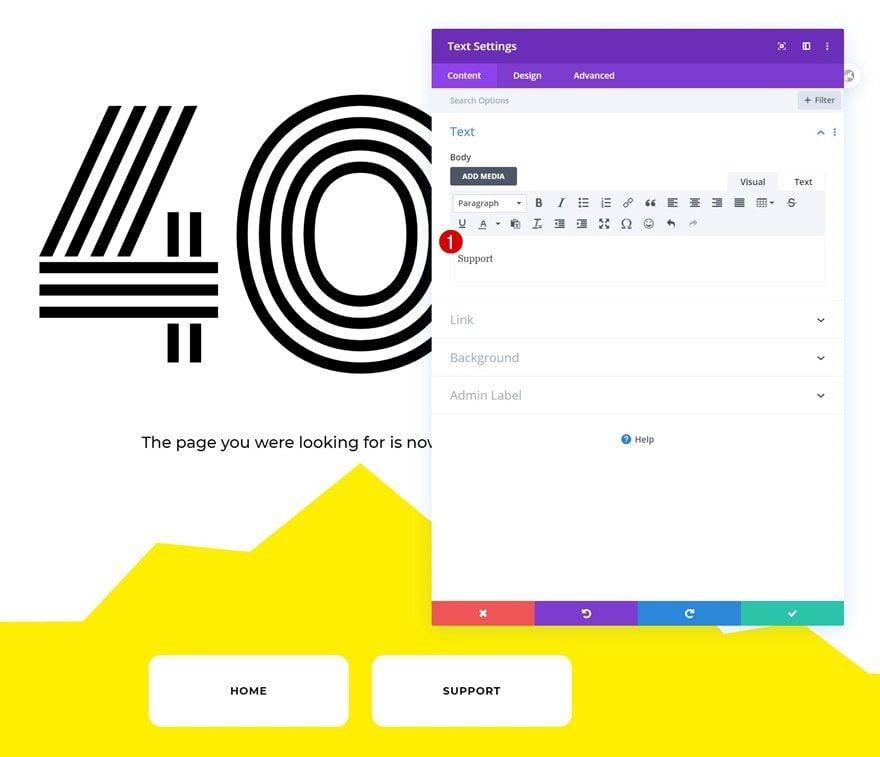
Change Content
Make sure you change the duplicate module’s content.
Change Link
Change the link too.
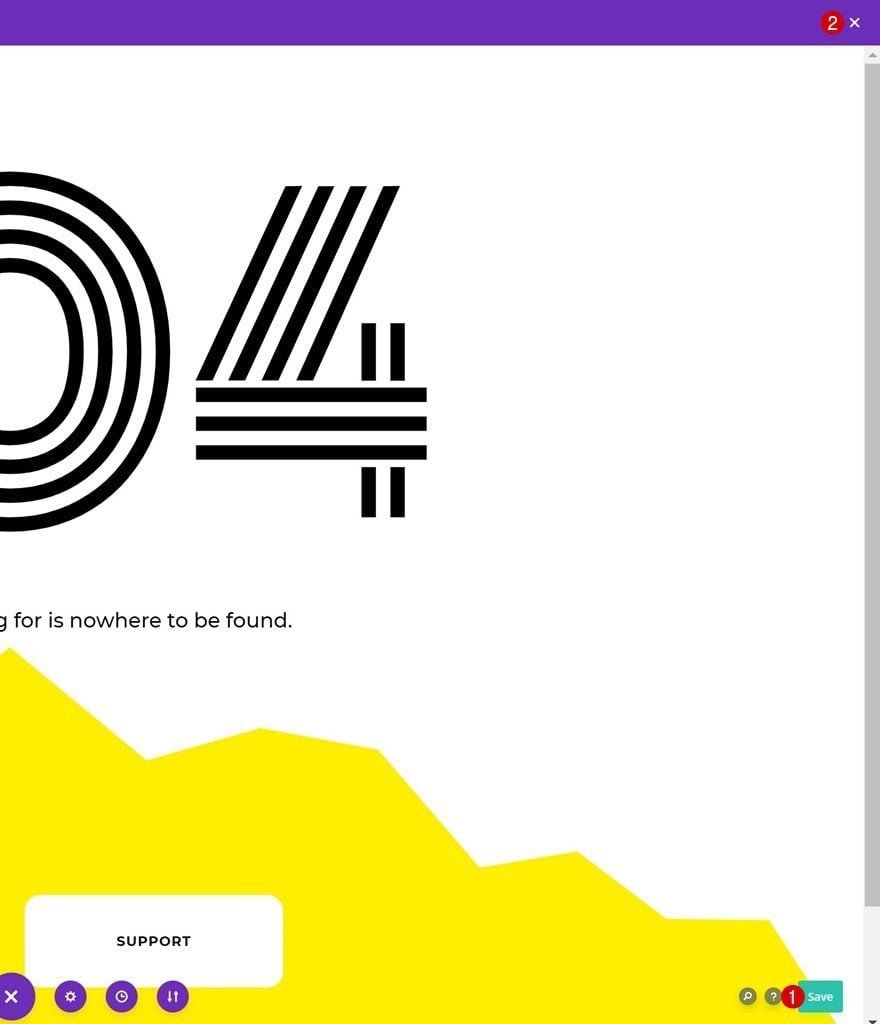
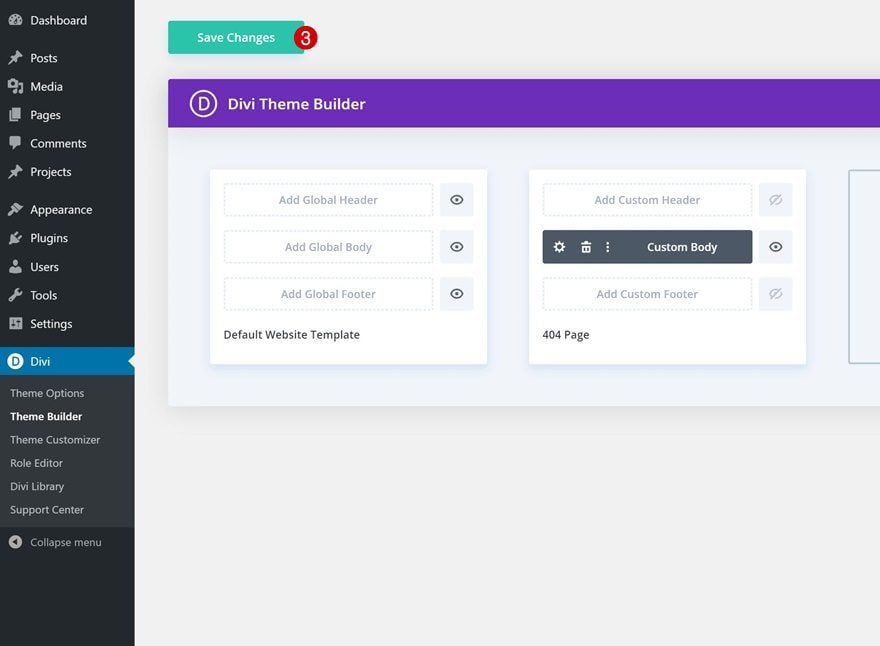
3. Save Theme Builder Changes
Once your design is done, you can save all the template’s settings. That’s it!
Preview
Now that we’ve gone through all the steps, let’s take a final look at the outcome across different screen sizes.
Desktop
Mobile
Final Thoughts
In this post, we’ve shown you how to set up and create a 404 page template. Divi’s theme builder and built-in design options allow you to touch every page of your website using customized templates. We hope you’re enjoying all the Divi Theme Builder tutorials! If you have any questions or suggestions, feel free to leave a comment in the comment section below.
If you’re eager to learn more about Divi and get more Divi freebies, make sure you subscribe to our email newsletter and YouTube channel so you’ll always be one of the first people to know and get benefits from this free content.
https://www.elegantthemes.com/blog/divi-resources/how-to-create-a-404-page-template-with-divis-theme-builder

