Adding a custom toggle for your video transcripts can bring a lot of benefits to your website. In fact, simply including a video transcript for each video on your website can improve user experience, accessibility, and SEO. Users will have the option of reading the content which is a great accessibility feature for those who are deaf, hard of hearing, or in a loud coffee shop. And you can read transcripts faster than watching the video (or video subtitles). Plus, the added content will likely include a significant amount of keywords that would improve SEO. Creating a custom toggle for a video transcript is also nice because it can keep that long-form content hidden until it is needed.
In this tutorial, we are going to create a custom (and compact) toggle for video transcripts in Divi. To do this we are going to customize Divi’s toggle module with a concise makeover so that it will fit nicely under any video. Then we are going to show you how to use Youtube’s auto-generated transcript as content for the toggle. All this without having to use a plugin.
Let’s get started!
Sneak Peek
Here is a quick look at the design we’ll build in this tutorial.
Download the Layout for FREE
To lay your hands on the designs from this tutorial, you will first need to download it using the button below. To gain access to the download you will need to subscribe to our Divi Daily email list by using the form below. As a new subscriber, you will receive even more Divi goodness and a free Divi Layout pack every Monday! If you’re already on the list, simply enter your email address below and click download. You will not be “resubscribed” or receive extra emails.
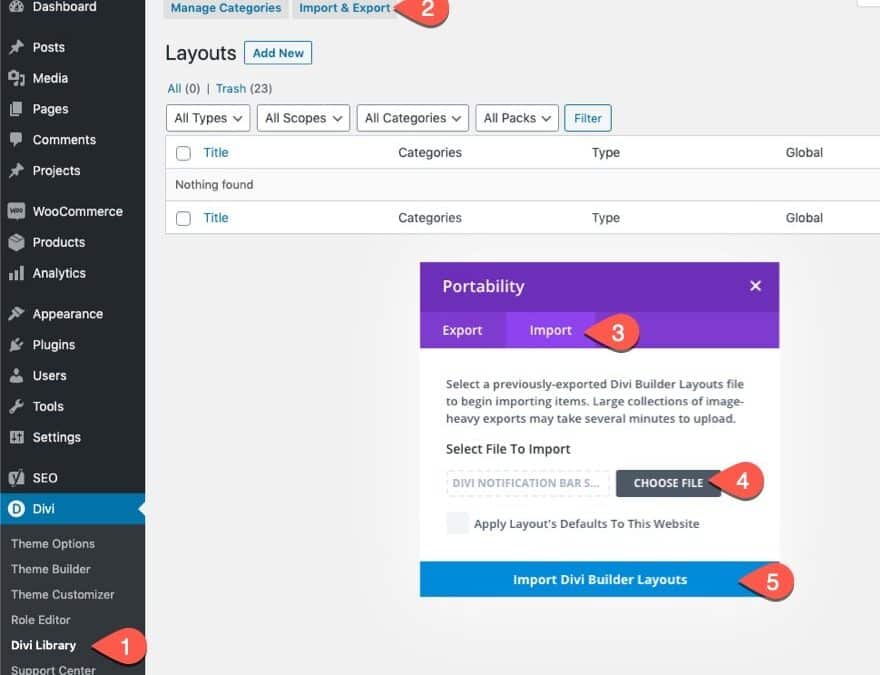
To import the section layout to your Divi Library, navigate to the Divi Library.
Click the Import button.
In the portability popup, select the import tab and choose the download file from your computer.
Then click the import button.
Once done, the section layout will be available in the Divi Builder.
Let’s get to the tutorial, shall we?
What You Need to Get Started
To get started, you will need to do the following:
- If you haven’t yet, install and activate the Divi Theme.
- Create a new page in WordPress and use the Divi Builder to edit the page on the front end (visual builder).
- Choose the option “Build From Scratch”.
After that, you will have a blank canvas to start designing in Divi.
Creating a Custom Toggle for Video Transcripts in Divi
Part 1: Adding a Youtube Video to the Page using a Divi Video Module
For the first part of our tutorial, we are going to add/embed a youtube video to a page using a video module in the Divi builder. This process is really quite simple.
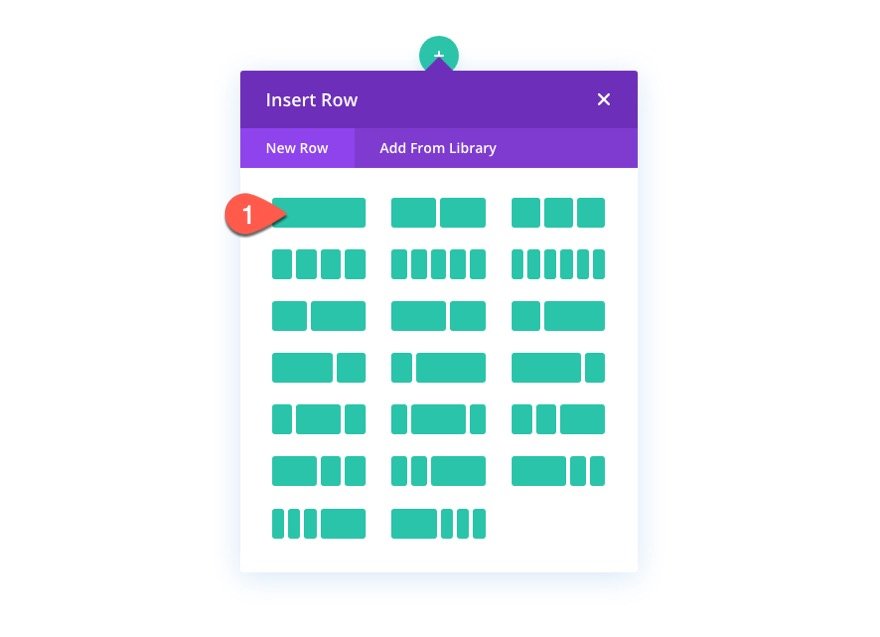
But before we add the video, let’s add a one-column row to the section.
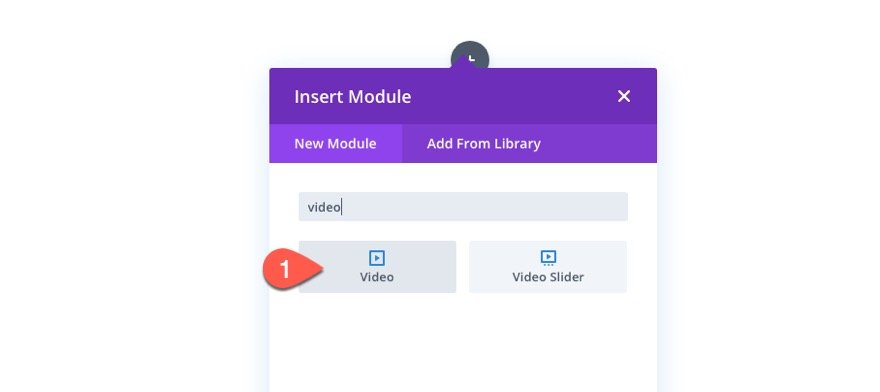
Next, add a video module to the row.
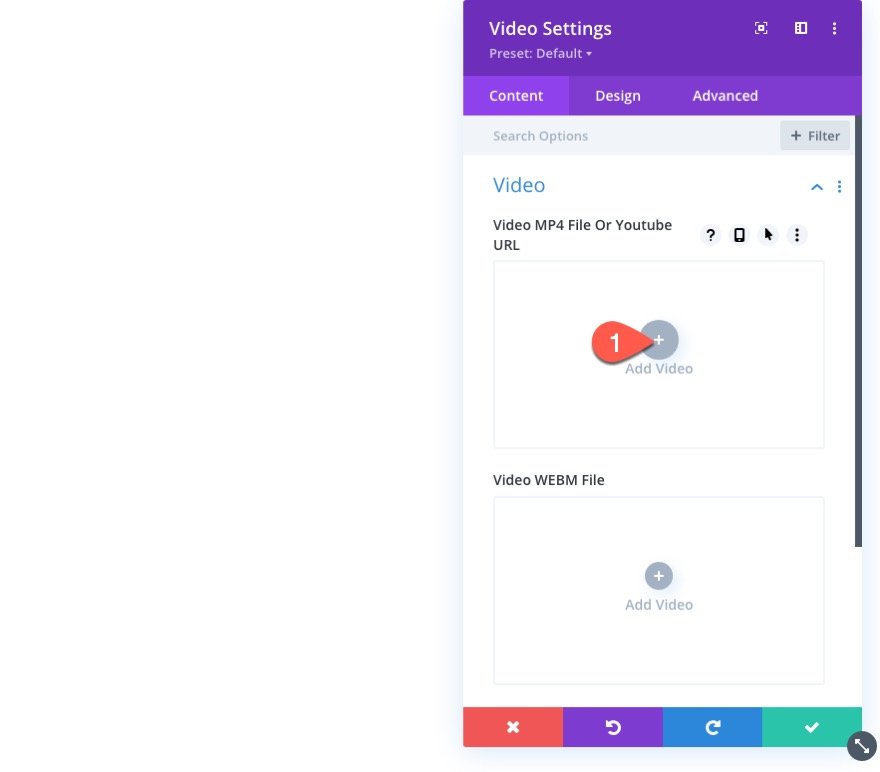
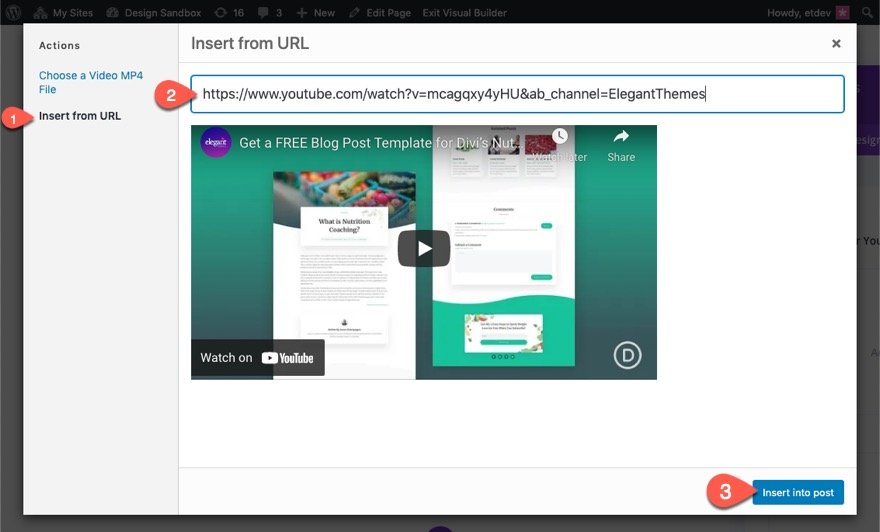
Click the add video plus icon under the option “Video MP4 File Or Youtube URL.
Then select the Insert from URL action on the left sidebar of the popup.
Paste in the URL for the YouTube video in the input box.
Then click the Insert into Post button.
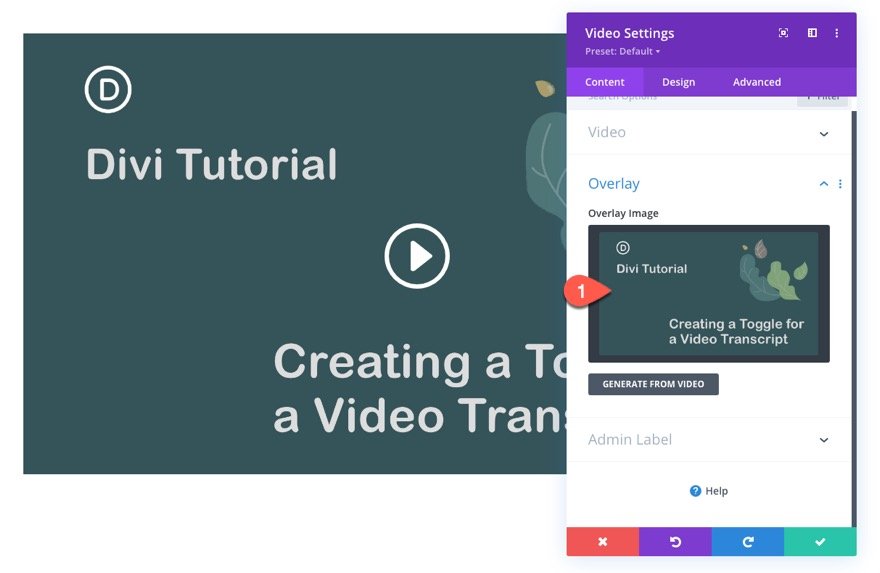
Once the video is added, you can add a custom overlay image to the video.
Part 1: Creating the Custom Toggle for the Transcript
Now that our video is in place, we can create the custom toggle that will hold our transcript content. To do this we are going to customize a toggle module.
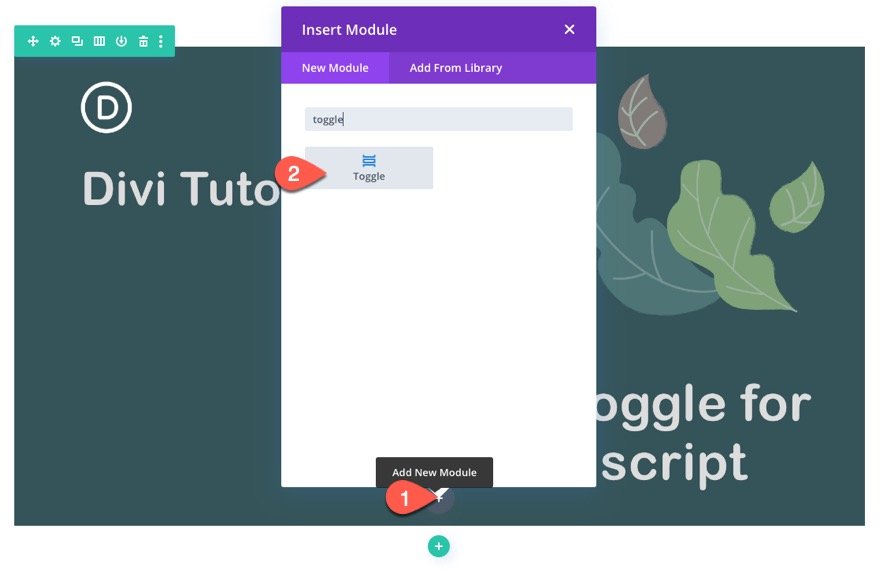
First, add a toggle module directly under the video.
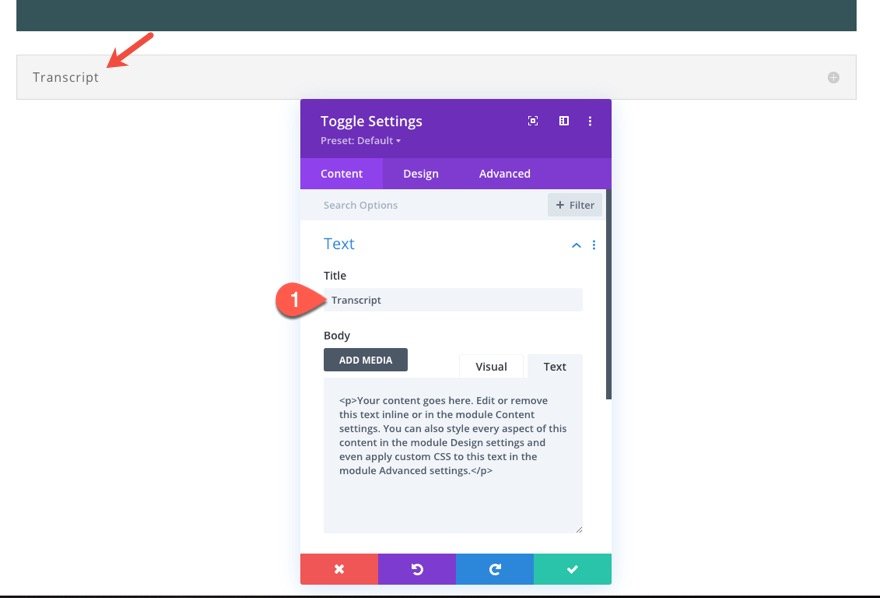
In the Toggle Settings, add the word “Transcript” for the Title text. (We’ll come back to the body content later to paste in our youtube video transcript content later)
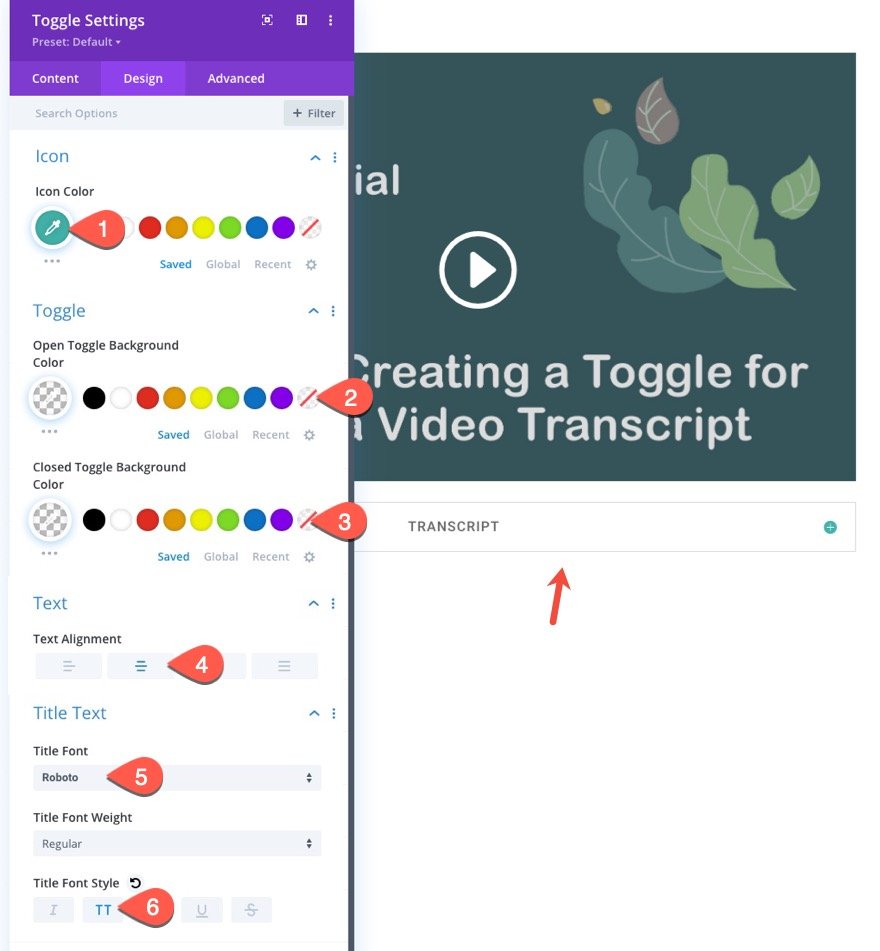
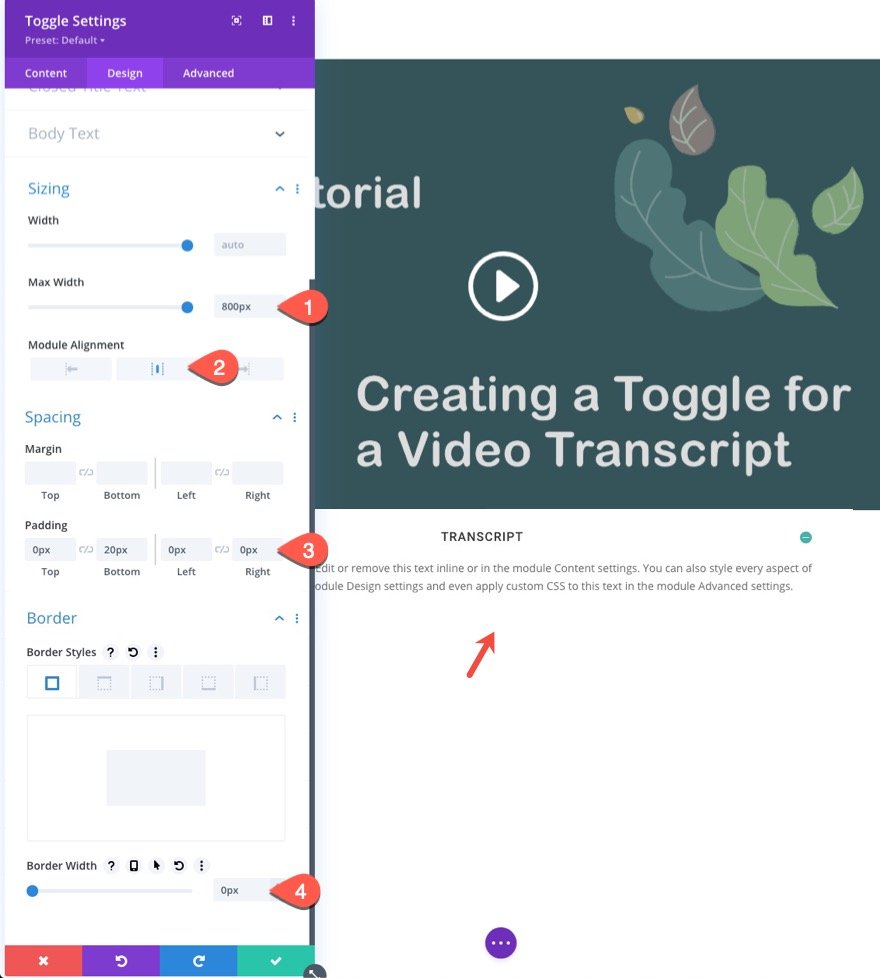
Under the design tab, update the following:
- Icon Color: #42b3a9
- Open Toggle Background Color: transparent
- Closed Toggle Background Color: transparent
- Text Alignment: Center
- Title Font: Roboto
- Title Font Style: TT
- Max Width: 800px
- Module Alignment: Center
- Padding: 0px top, 20px bottom, 0px left, 0px right
- Border Width: 0px
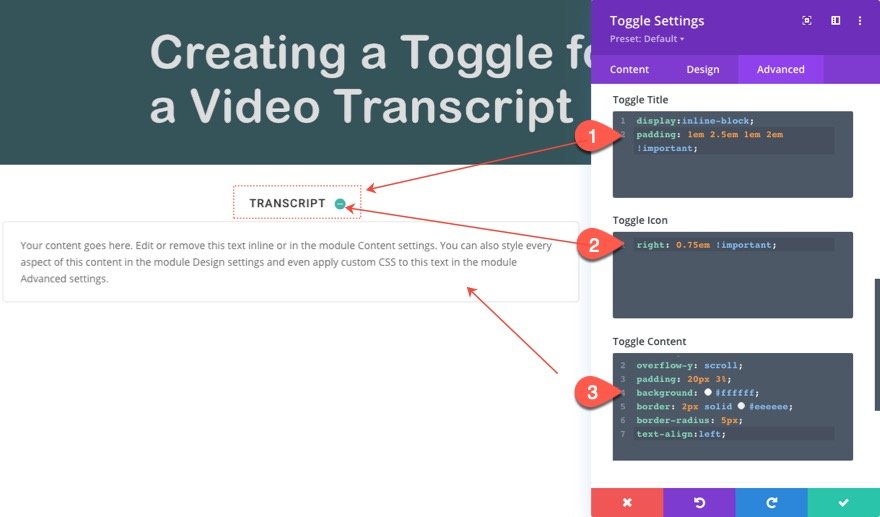
Under the Advanced Tab, we need to add a few CSS snippets to finalize the design of the toggle.
Add the following CSS to the Toggle Title:
display:inline-block;
padding: 1em 2.5em 1em 2em !important;
Add the following CSS to the Toggle Icon:
right: 0.75em !important;
Add the following CSS to the Toggle Content:
max-height: 30vh;
overflow-y: scroll;
padding: 20px 3%;
background: #ffffff;
border: 2px solid #eeeeee;
border-radius: 5px;
text-align:left;
Part 3: Getting the Transcript from Youtube and Adding it to the Toggle Content
Creating transcripts for videos can be a bit of a hassle to do manually. And there are services and plugins out there that can do it in a more professional manner (some at a premium cost). But for this tutorial, we are going to use a quick, easy, and free method. We are going to extract Youtube’s auto-generated transcript for a video and use it on our website.
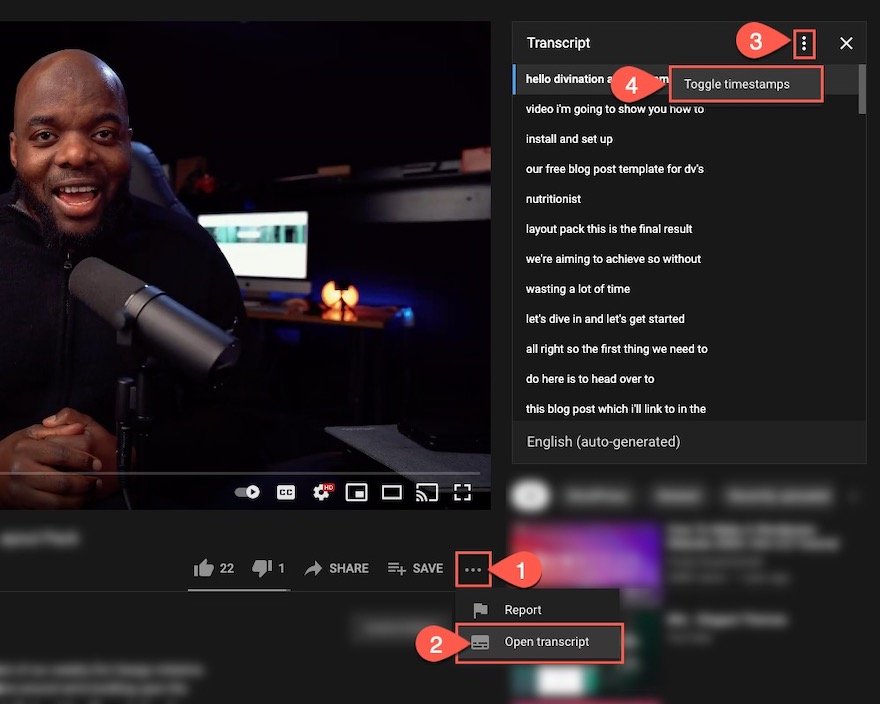
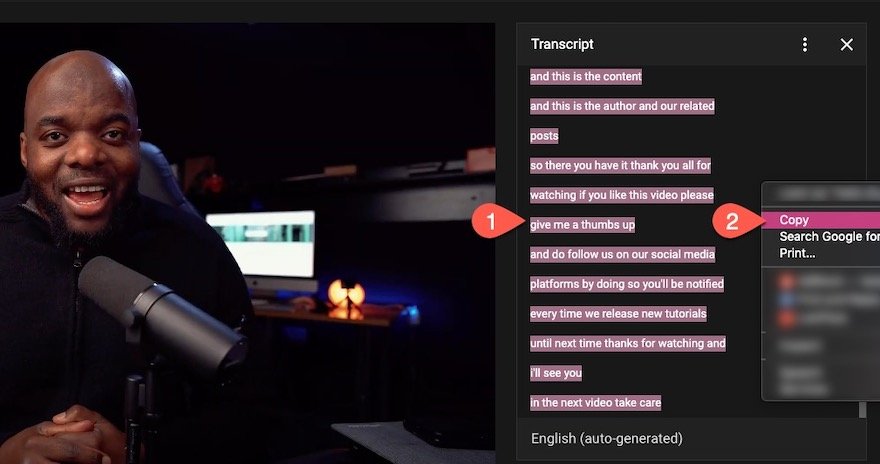
To do this, go to your video on Youtube and follow these steps:
- Open the More Actions dropdown menu (3 horizontal dots) next to the Save button under the video.
- Click Open Transcript from the list.
- At the top of the Transcript box, open the More Action dropdown menu (3 vertical dots).
- Click Toggle timestamps. This will hide the timestamps from showing on the left of each block of text.
Copy the entire transcript content within the box to your clipboard.
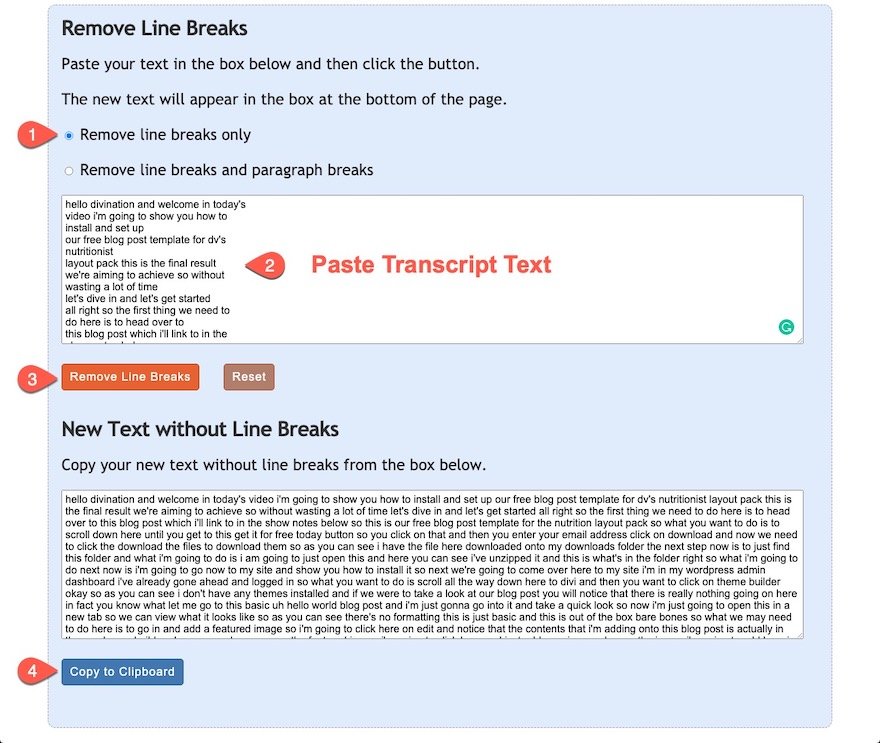
Right now the text is full of line breaks. To take those out, you can go to textfixer.com and use their free line break removal tool to remove line breaks from the text.
Under the section Remove Line Breaks, select “Remove line breaks only.”
Then paste the transcript text inside the box.
And click the Remove Line Breaks button.
Once the text is generated under the section titled New Text without Line Breaks, copy the text to the clipboard.
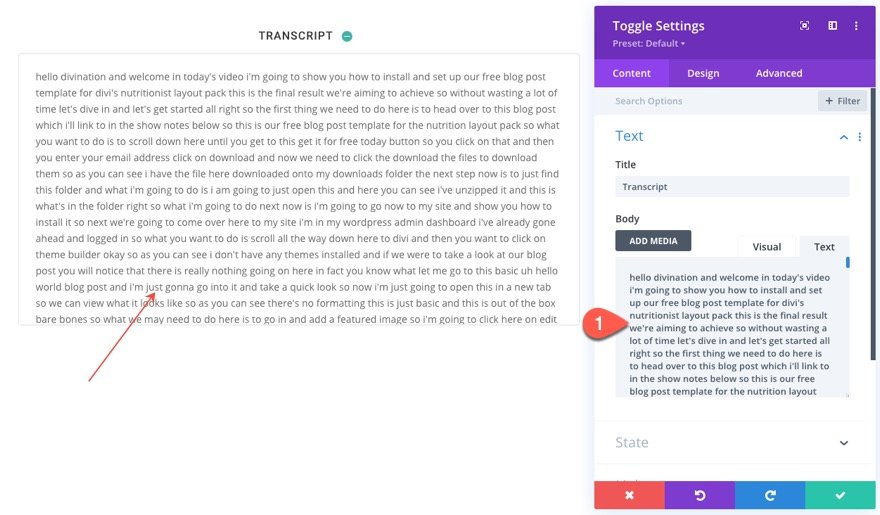
Go back to your site, open up the toggle settings, and paste the transcript content to the module.
Granted, the transcript text is lacking a bunch of capital letters, punctuation, paragraphs, etc. But, the content is there and readable. However, you may want to spend a few minutes cleaning the text up for your readers.
That’s it!
Final Result
Here is the final result of our custom toggle for a video transcript in Divi.
On Desktop…
On Tablet…
And on Phone…
Final Thoughts
In this tutorial, we showed you how to transform a Divi toggle module into a custom toggle for video transcripts in Divi. The uniquely concise design of the toggle alone has applications that extend beyond that of video transcripts. I mean you can literally put any text you want in there. But I think it fits nicely under a video. Also, using those auto-generated transcripts for a youtube video can definitely come in handy if you need a simple solution. But, feel free to explore other options for transcribing your video content and/or share some with us.
I look forward to hearing from you in the comments.
Cheers!

