With Divi’s condition options update, you have more control over how your content displays than ever. You can add conditions to sections, rows, and modules to show your content only when your set criteria are met. Today, we’re going to show you how to add a recurring promotional banner to your website using Divi and its date-and-time condition. That way you can set it and forget it, but your customers and clients are consistently reminded of it. Let’s get started!
How to Create a Recurring Promotional Banner
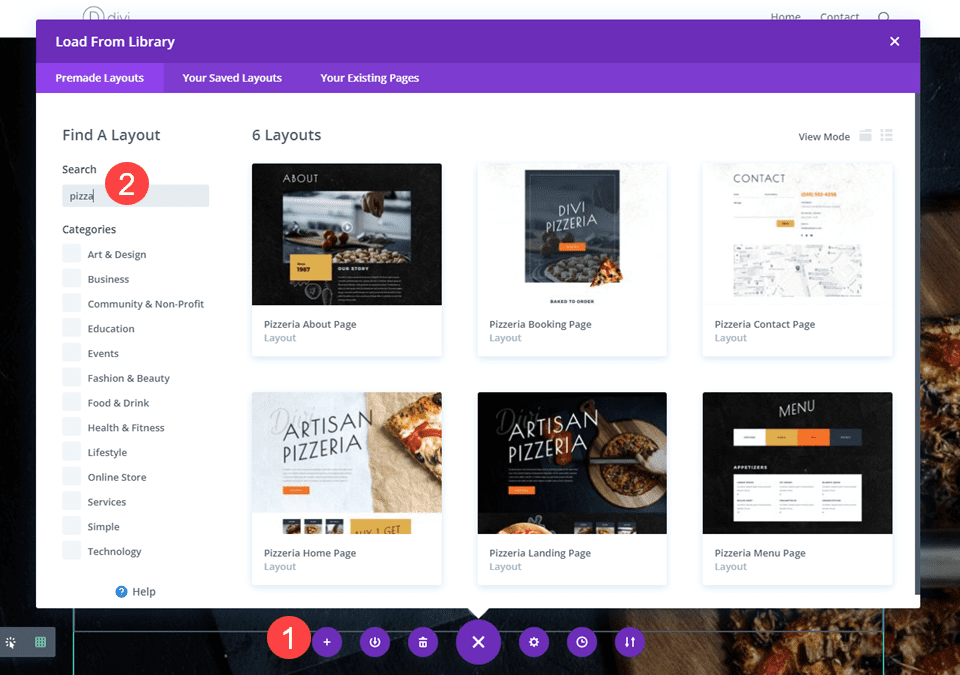
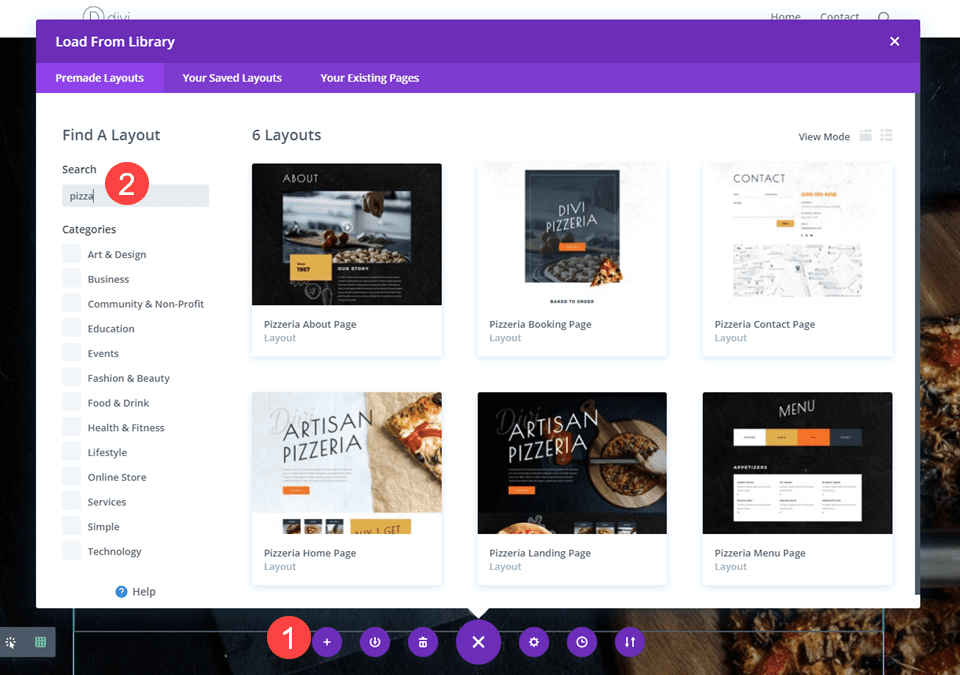
Your first step will need to be be deciding what page(s) you want the recurring banner on. For this example, we are going to be using a page loaded with the artisan pizzeria layout pack that you can find within the Divi builder. To use one of our premade layouts, select the purple + icon in the Divi Builder and find the layout you want.
You can follow these steps regardless of what layout you use.
Add a New Section
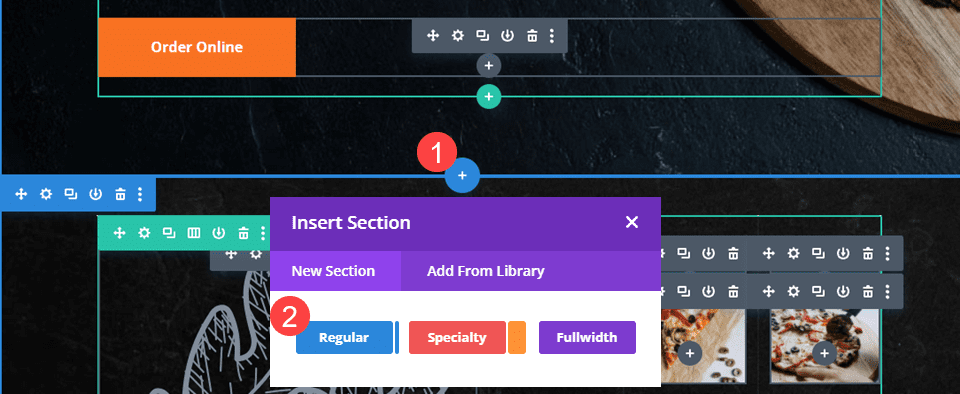
Because this banner will only show sometimes, you don’t want to add it to an existing element on the page. You will want an all-new section for it. Click the blue + icon to add a new section to the page. Select the Regular section type in the window that pops up.
This section is going to be your recurring banner.
Choose Your Column Layout
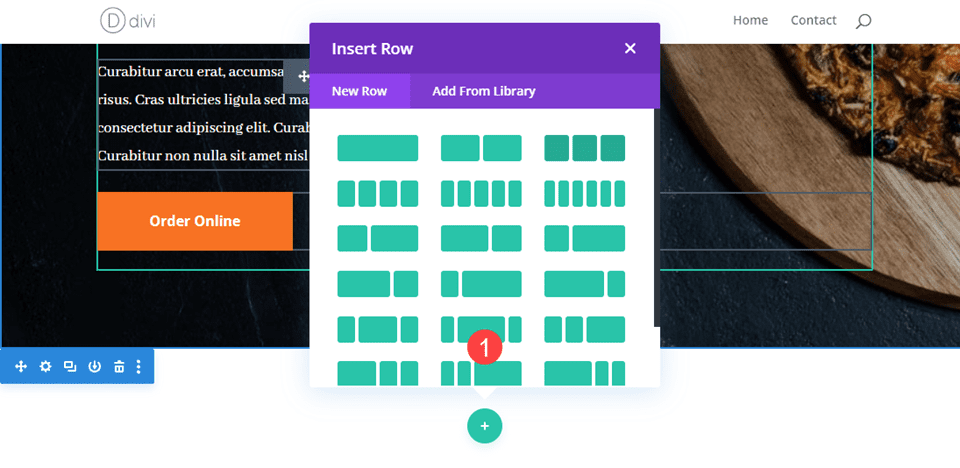
Again, whatever layout you want your banner to have is fine, but we are going with a 3-column layout with the center column being the largest for this example.
Design Your Banner
This is a promotional banner, so you will want to take the time to make it eye-catching. We are going to set the background to a stand-out color, use some noticeable fonts, and highlight how the customer can take advantage of the offer.
Choose a Background Color
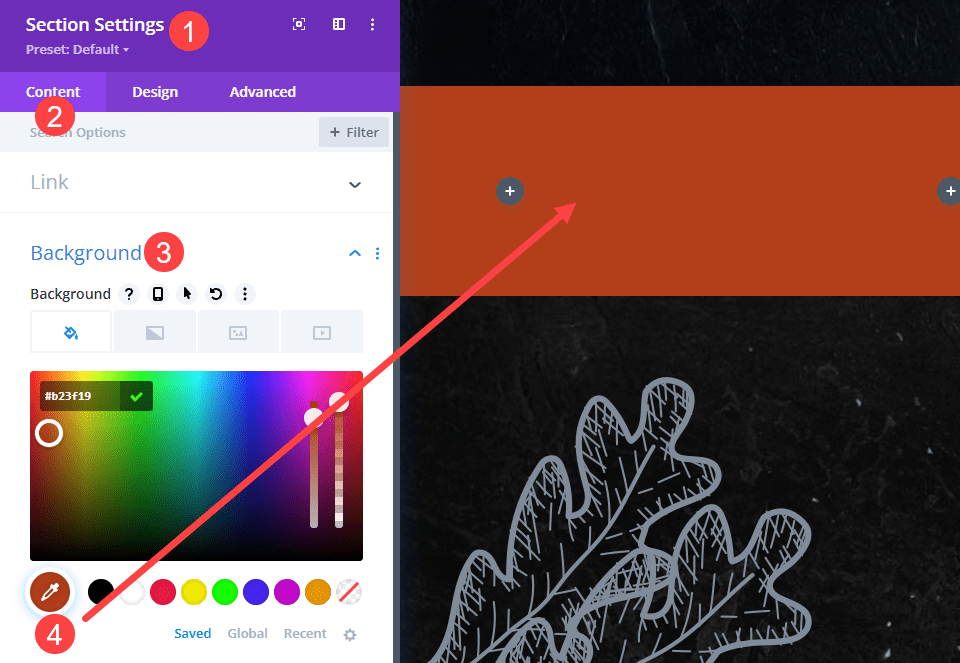
First, go into the Section settings and navigate to Background under the Content tab. We are using the color #B23F19 as a background.
Adjust Row Spacing
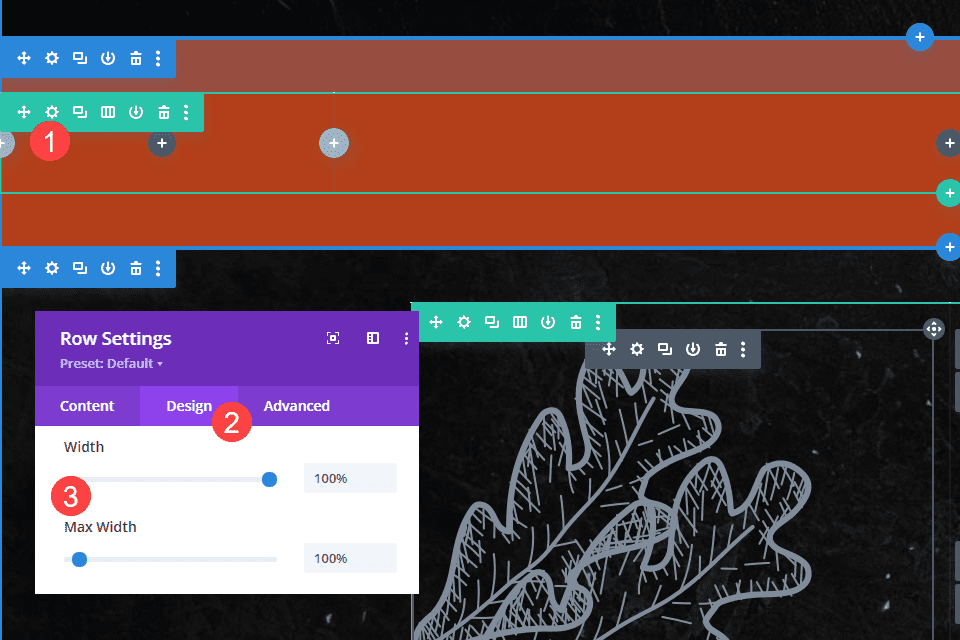
When you save that, go into the Row settings. From there, click into the Design tab and the Sizing options. Set the Width and Max Width to 100%. Doing so will stretch the row’s green border to the edge of the viewport.
Add and Style a Button Module
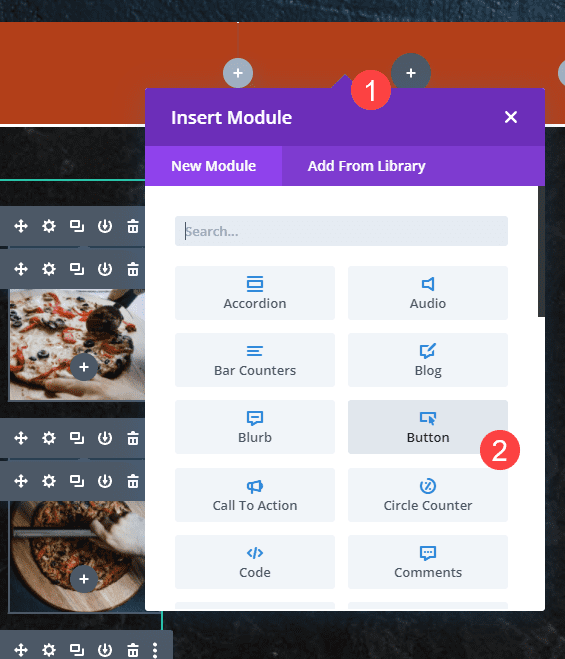
Next, click into third column and add a Button module using the black + icon.
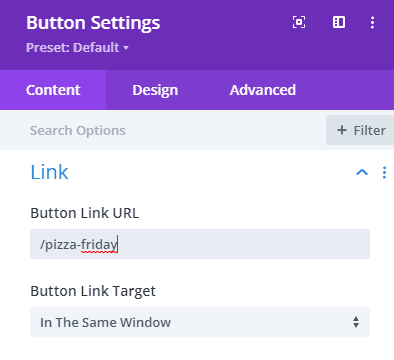
Then click into the Button settings and adjust the Button Link URL under the Content Tab. This should be where the customer will be able to redeem whatever promotion you will have on a recurring basis.
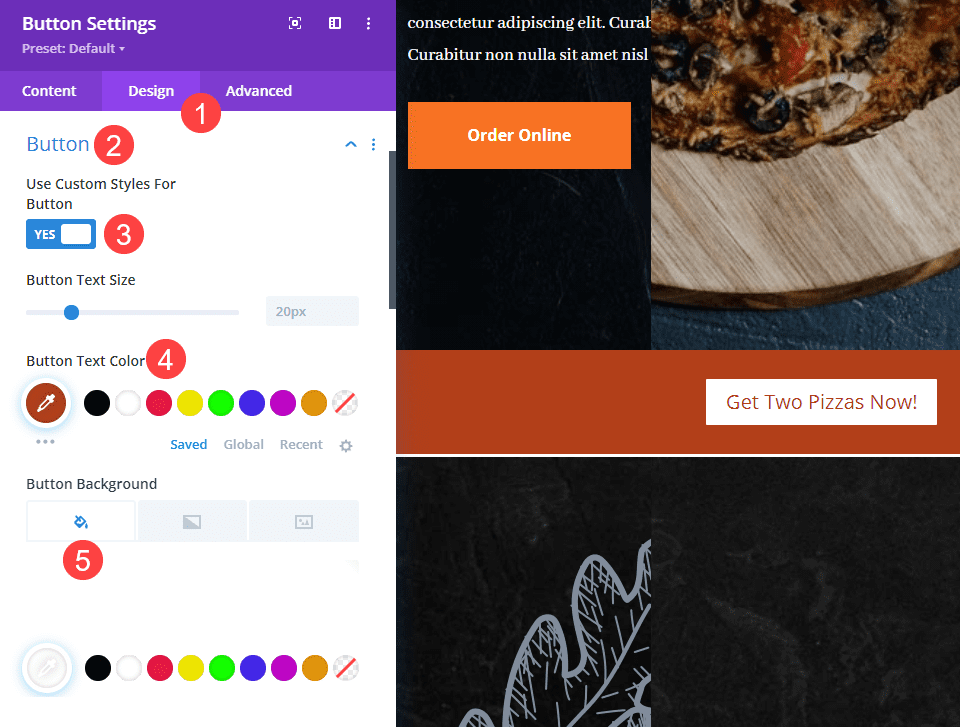
After that, go into the Design tab and choose to Use Custom Styles for Button. Your specifics may differ, but for this article we want to make the text use the same #B23F19 as the background above, and then we will set the background color to white.
Add Text to Other Columns
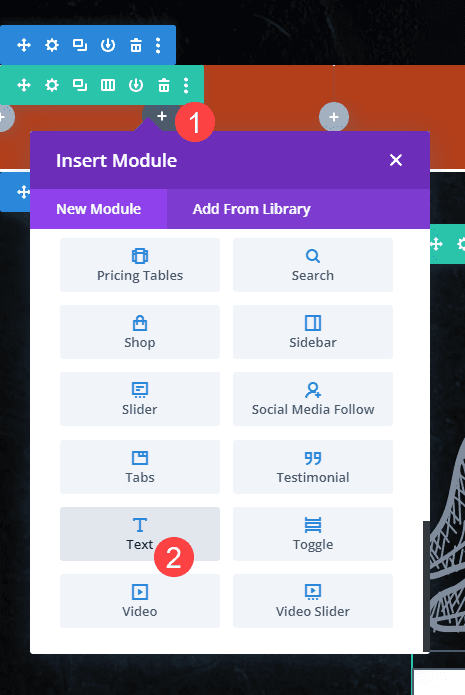
The other two columns in the design will be the promotional text for the recurring banner, and you will simply be using a standard text module to accomplish this.
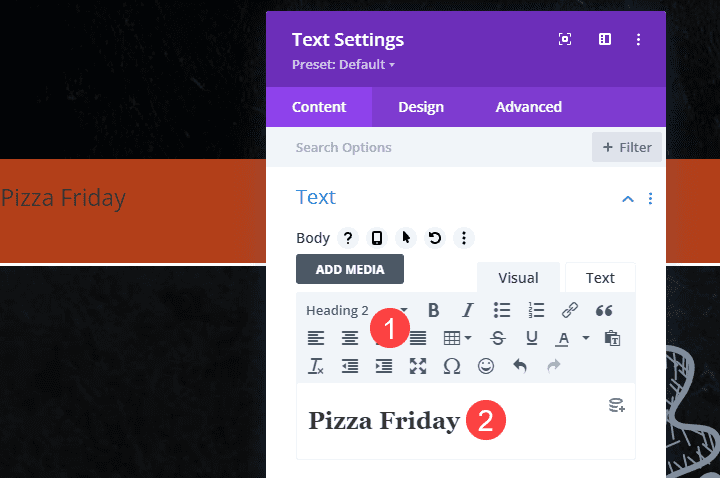
In the first column, you will add Header Text that indicates the name of the promotion. In this example case, Pizza Friday.
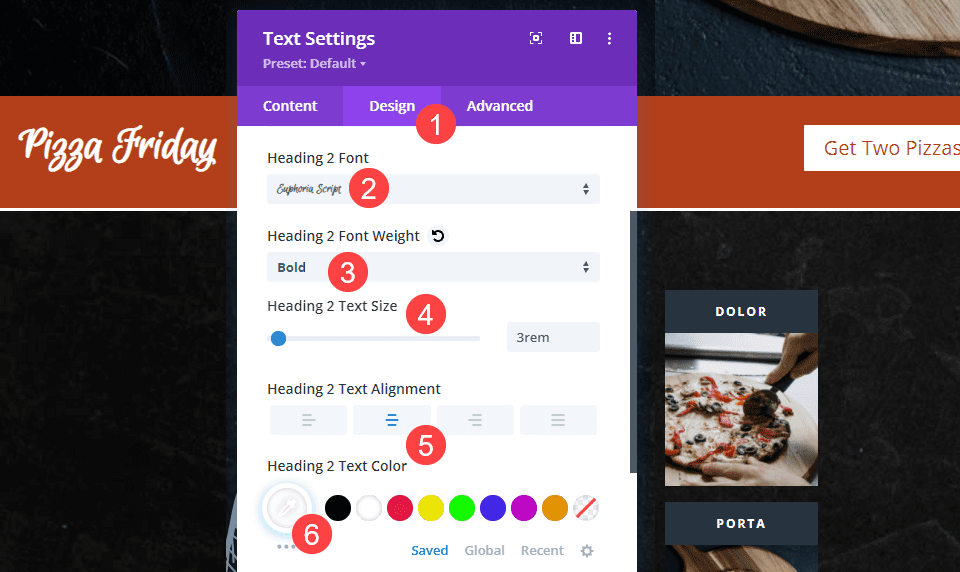
Then go into the Design tab. For this particular design, we chose Eudora Script as the heading font, Bold font weight, 3rem as the text size, and white text color with center alignment.
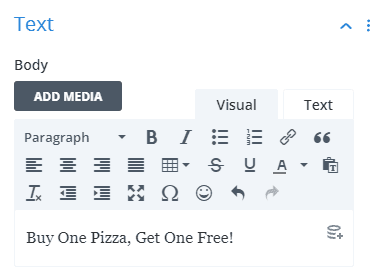
In the center column, repeat the same steps, only use normal body text for the content.
Then, adjust the settings for it, just like you did above. In this example, we chose Poppins as the body text font in 1.5rem font size, but set the others as the same as the promotional text.
Now that we have the promotional banner itself, let’s get to setting it to recur!
Add Fixed Position to Banner Section
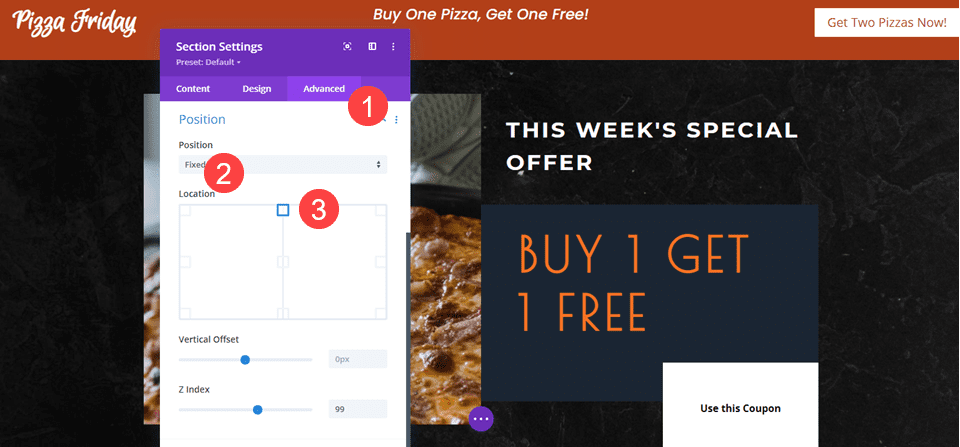
Because you want it to be noticed, you will want to fix the section to the top of the page. You can do so by going into the Advanced tab of the Section settings. Under Position, select Fixed, and then click the top-center square to indicate where Divi should affix the section. We also include a Z-index of 99 to help ensure the banner floats above other content on the page.
Note that the section will remain in place in the Divi Builder, rather than show on top. So when you edit the page, you can place the section wherever you want. However, the position options will always show it fixed on the live site.
Animate the Recurring Banner
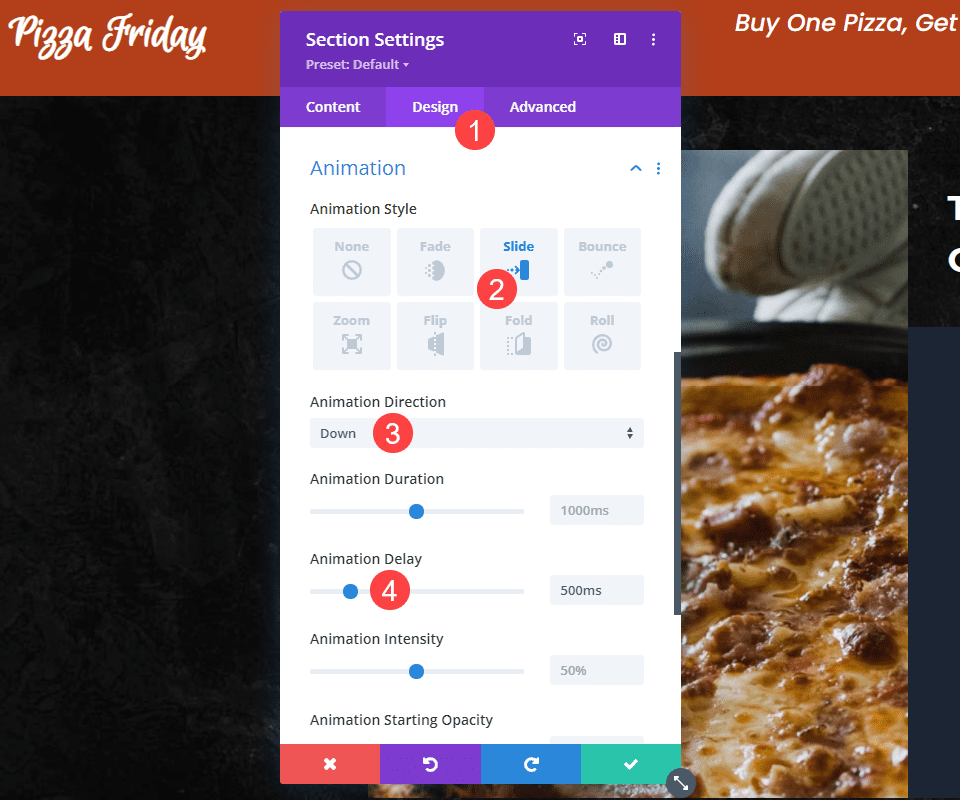
You can also gain the customer’s attention by using Divi’s built-in animation feature. Go to the Design tab and find the Animation options. For a recurring banner, you can do a lot with a simple slide-in effect. So select Slide under Animation Style, set the Animation Direction to Down, and then set the Animation Delay to 500ms (half a second) to keep it from appearing immediately like it was any other content. A delay shows the customer that it is special and to pay attention.
Set Conditional Logic
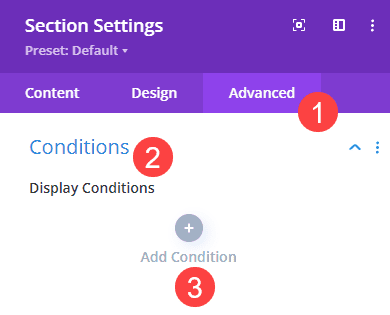
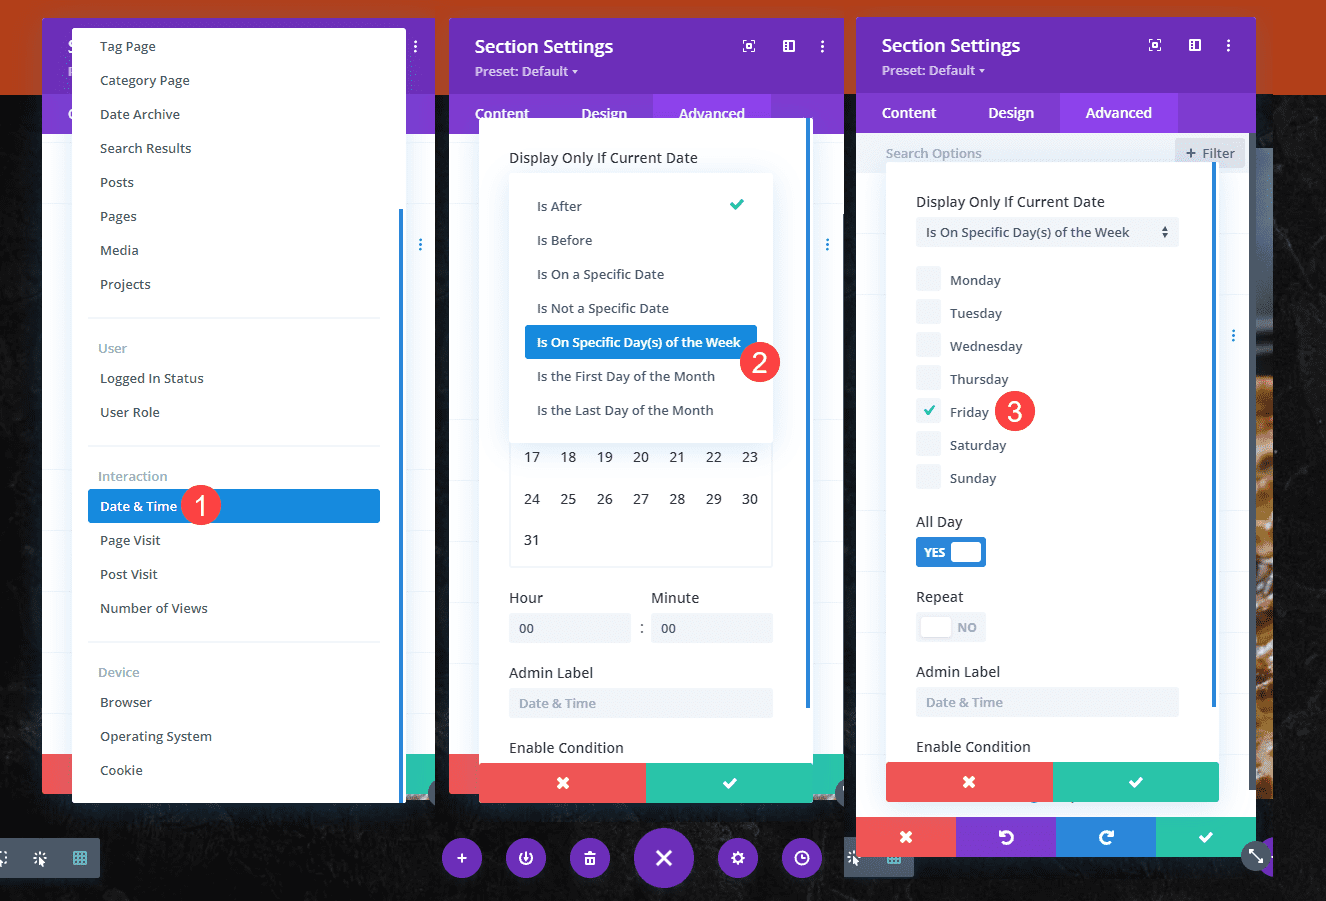
One you have the positioning and animation set, it’s time to use the Conditional Logic so the recurring promotional banner actually recurs. These options are found in the Section settings, under the Advanced tab, in the Conditions area. Click Add Condition to get started.
Scroll until you find Date and Time under the Interaction subheading. Then, choose to display On Specific Day(s) of the Week in the next dropdown. After just choose the day of the week the promotional banner will recur.
Save your changes, and your recurring promotional is done. You have now set it, so you can forget it. Easy as (pizza) pie!
Wrapping Up
Using Divi’s condition options, you can create recurring promotional banners that your site will only display under a set of circumstances you choose. It doesn’t have to be just date and time, like this example. It can be as robust as you can think of because the condition options allow for nested logic. But for a recurring promotional banner, you see how simple it can be to fix a section to the top of your site and then use Divi’s condition options to have it only display on one day a week. Once it’s set up, you don’t have to touch it again if you don’t want to.
What kind of promotions are you going to run using Divi’s condition options and a recurring banner?
Article featured image by Killroy79 / shutterstock.com

