Do you want to create a thank you page for your WordPress website?
Showing a customized thank you page can help you build a strong relationship with your audience. You can keep people engaged, bring them back to your site, and boost sales.
In this article, we will show you how to create a thank you page in WordPress, step by step. Plus, we’ll also show you when to display your thank you page such as after someone submits a form, makes a purchase on your site, and more.
Why Create a Thank You Page in WordPress?
A thank you page is a web page you can show to your users when they perform an action or complete a task on your WordPress website.
For example, you can show a custom thank you page on your online store after a customer purchases a product. This allows you to cross-sell and upsell your best products and offer exclusive discounts on subsequent purchases.
Similarly, a thank you page can help build an email list and grow your social audience. You can show social sharing buttons to promote your Facebook, Twitter, LinkedIn, and other social media channels.
Another situation where a thank you page is helpful is when a user submits a form or leaves a comment on your site. You can show your most popular posts on the thank you page and drive more traffic to your important blog posts.
That said, let’s look at how you can easily create a thank you page in WordPress and how to trigger it in different situations.
Simply click the links below to jump ahead to your preferred section:
Creating a Thank You Page in WordPress
The best way to create a thank you page in WordPress is by using SeedProd. It is the best website builder and landing page builder plugin for WordPress.
The plugin offers drag-and-drop functionality and lots of customization options. Plus, you get to choose from pre-built templates to edit the thank you page according to your liking.
For this tutorial, we will use the SeedProd Pro version because it offers pre-built templates, email integrations, WooCommerce blocks, and more. You can also use the SeedProd Lite version for free.
First, you’ll need to install and activate the SeedProd plugin. If you need help, then please see our guide on how to install a WordPress plugin.
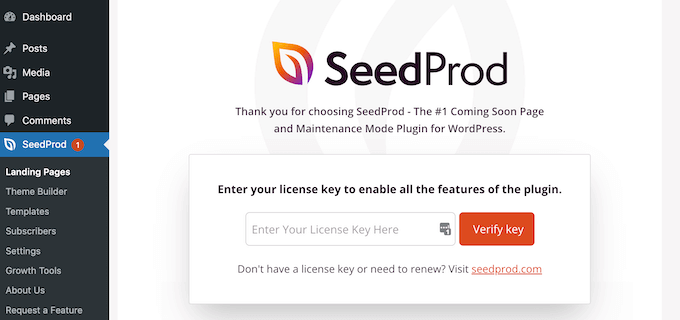
Upon activation, you can go to SeedProd » Settings from your WordPress admin panel. From here, enter the license key and click the ‘Verify key’ button.
You can find the license key in your SeedProd account area.
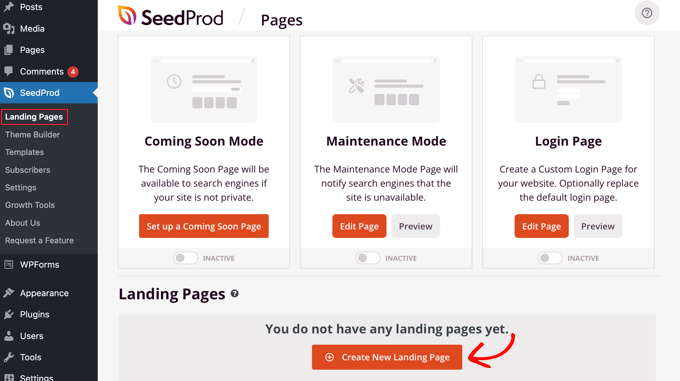
After the verification, you’ll need to head to SeedProd » Landing Pages from the WordPress dashboard and click the ‘Create New Landing Page’ button.
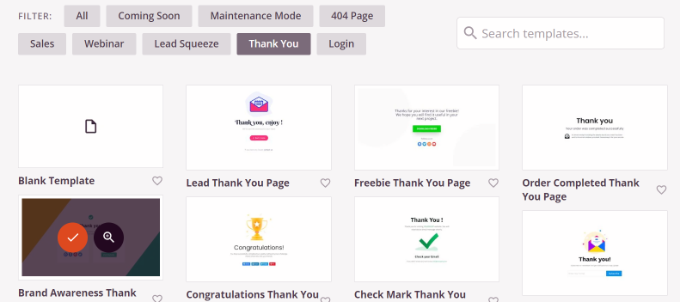
Next, SeedProd will show you different page templates.
You can filter them from the top to view thank you page templates. From here, simply hover over a design you’d like to use and click the orange tick button.
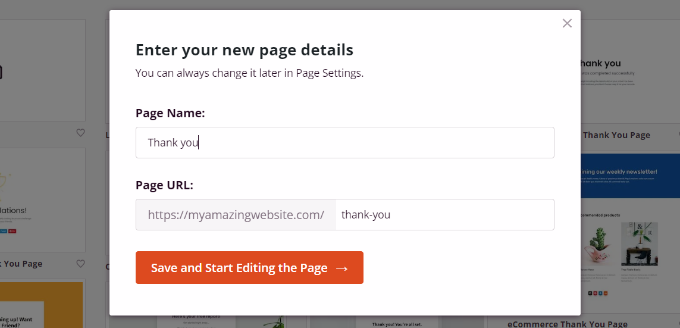
A popup window will now open. Go ahead and enter a name and URL for your thank you page.
Once that’s done, you can click the ‘Save and Start Editing the Page’ button.
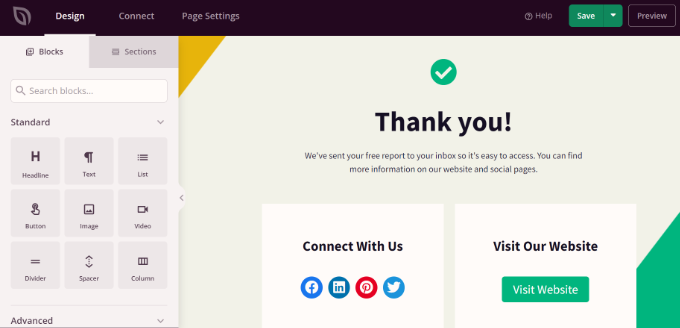
This will launch the SeedProd drag-and-drop page builder.
You can now customize your thank you page by adding new blocks from the menu on the left or rearranging the existing blocks.
For instance, there are blocks for images, text, headlines, videos, contact forms, social profiles, and more.
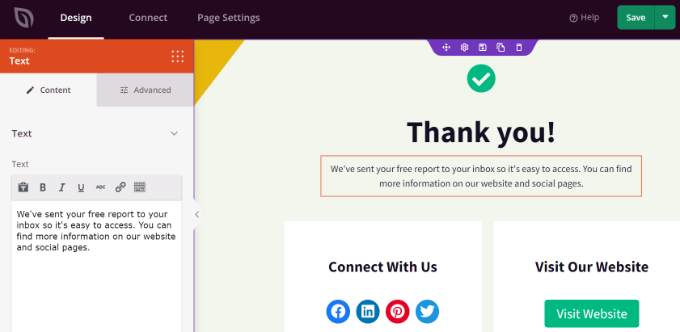
If you click on a block in the template, then you’ll see more options for customization.
For example, you can edit the text, changing its font, size, spacing, color, and more.
When you’ve made the changes, don’t forget to click the ‘Save’ button at the top.
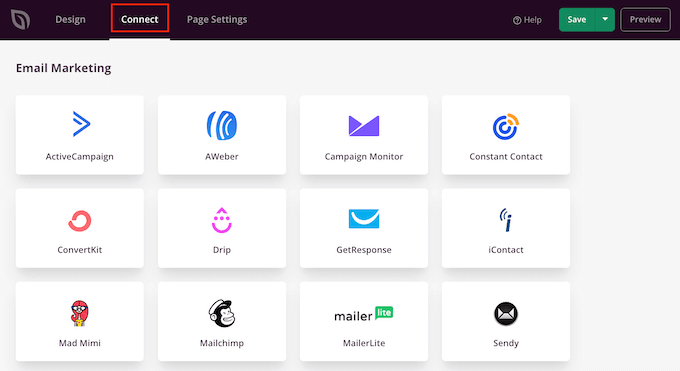
Next, you can click the ‘Connect’ tab and integrate email marketing services. This is useful if you’ve added a contact form to your thank you and would like to collect leads from customers.
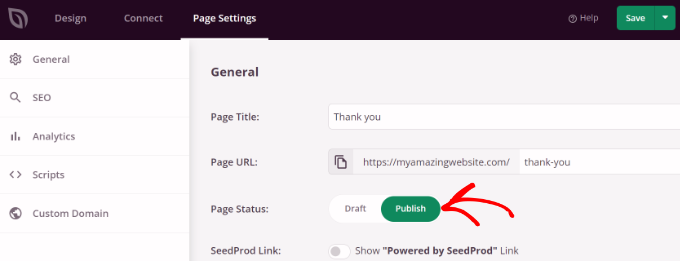
After that, you’ll need to head to the ‘Page Settings’ tab at the top.
Here, click the Page Status toggle to change it from ‘Draft’ to ‘Publish.’
Don’t forget to click the ‘Save’ button at the top when you’re done.
You can now visit your website to see the thank you page in action.
Now, let’s look at different situations when you can trigger the thank you page so that your visitors see it.
Show a Thank You Page After Form Submission in WordPress
After creating a custom thank you page, you can display it when a user submits a form.
For example, you can show social media icons when a visitor signs up for an email newsletter using a form. This way, they can also follow you on different social platforms and help grow your followers.
Similarly, if a user fills out a feedback form, then you can show useful guides, videos, or promote your best content on the thank you page.
With WPForms, you can easily create all types of forms on your website and show a custom thank you page. It is the best WordPress contact form plugin that offers pre-built templates and lots of customization options.
For more details, please see our guide on how to create a contact form in WordPress.
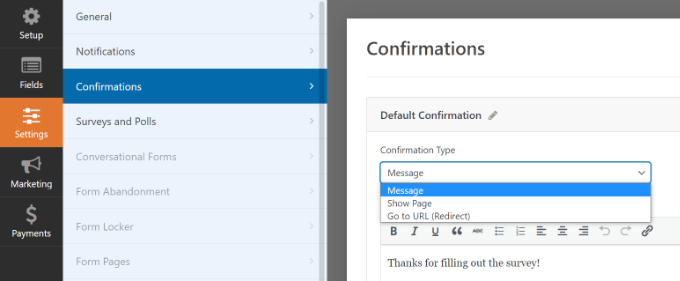
To display your custom thank you page, go ahead and edit a form in WPForms. When you’re in the form builder, simply go to the Settings » Confirmations tab.
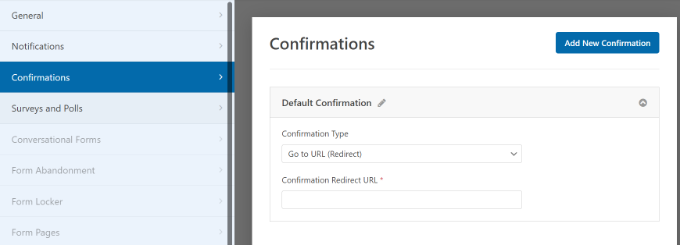
Under the Confirmation Type dropdown menu, simply select the ‘Go to URL (Redirect)’ option.
After that, enter the URL for your thank you page in the ‘Confirmation Redirect URL’ field.
Whenever a user fills out and submits a form on your website, they’ll see the custom thank you page you created.
Show a Thank You Page Upon Product Purchase in WooCommerce
If you have a WooCommerce store, then you can show your custom thank you page when a customer purchases your product.
WooCommerce has a default thank you page, but it’s not optimized for conversions. However, you can replace it with your own to get more sales.
For example, you can upsell products on a thank you page, offer exclusive discounts, display the latest promotional campaigns, and more.
We have a full guide on how to easily create custom WooCommerce thank you pages that will walk you through the entire process, step-by-step.
Show a Custom Thank You Page on Your Membership Site
You can also display your thank you page on a membership website when someone purchases a subscription to access exclusive content or enrolls in an online course.
With MemberPress, you can easily set up a membership site. It is the best WordPress membership plugin, and you can use it to sell premium content, subscriptions, digital downloads, and more.
You can learn more by following our ultimate guide to creating a WordPress membership site.
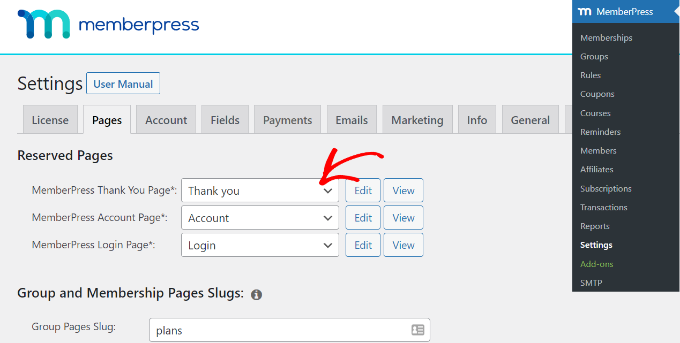
Once you’ve set up memberships, all you have to do is head to MemberPress » Settings from your WordPress dashboard and select the ‘Pages’ tab.
From here, you can click the ‘MemberPress Thank You Page’ dropdown menu and select the custom thank you page.
This way, customers will be redirected to your thank you page whenever they complete the registration or subscription process.
Another situation where displaying a custom thank you page is beneficial is after comment submission.
When a visitor submits a comment on your WordPress blog, you can take this opportunity to show your most popular articles or evergreen content through a thank you page.
First, you’ll need to install and activate the Yoast Comment Hacks plugin. For more details, please see our guide on how to install a WordPress plugin.
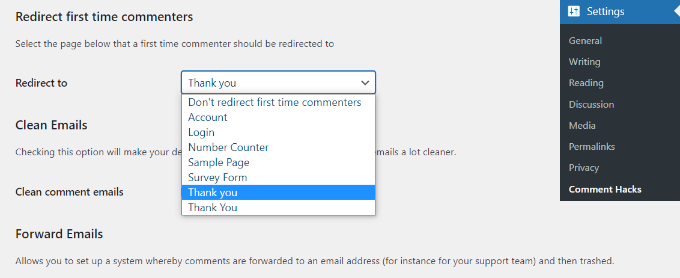
Upon activation, you can go to Settings » Comment Hacks from your WordPress dashboard.
Next, scroll down to the ‘Redirect first time commenters’ section. Now, click the ‘Redirect to’ dropdown menu and select your custom thank you page.
Save your settings, and the thank you page that you selected will appear any time a visitor leaves a comment for the first time.
You can see our detailed guide on how to redirect users after form submissions in WordPress for more information.
We hope this article helped you learn how to create a thank you page in WordPress. You may also want to see our ultimate WordPress SEO guide for beginners and the must-have WordPress plugins for business websites.
If you liked this article, then please subscribe to our YouTube Channel for WordPress video tutorials. You can also find us on Twitter and Facebook.


