There are several reasons you may need to create a redirect on your WordPress website. You may want to change your permalink structure, remove an old post or page, or create a new blog post to replace an old one. Whatever your reason, the best practice in these instances is to create a redirect so that your visitors won’t get a 404 page error when trying to view your content at the old link. If this is the first time you’re hearing of this best practice then it might be a good idea to use Google’s Search Console to see if your site already has 404 errors in need of fixing. The good news is that whether you’ve got 404 errors to fix already or you just want to avoid them in the future, this post will teach you how to create WordPress redirects in three different ways so you can choose the best solution for your needs.
What is a WordPress Redirect?
Technically, it’s not just a WordPress redirect, but a web redirect that tells browsers that X URL isn’t available anymore and that it should go to Y URL instead. Whether your site is on Wix, on Drupal, or just a plain-old HTML site, URL redirection can be done pretty much the same way. No matter what platform you use.
There are many different kinds of redirects, each with a different numerical code, so let’s break those down first. The two most common are the 301 and 302, which is what we will focus on today.
- 301 – A permanent redirect. You use these when you change URLs or site structures for good. All of the old link’s SEO power and ranking are transferred to the new one. For all intents and purposes, the old URL just turns into the new one.
- 302 – A temporary redirect. You use these when you need a short-term change. Maybe a site redesign or quick-fix for a bug or glitch. No link-juice or ranking is transferred.
There are also 300, 303, 304, 307, and 308 redirects. But those are reserved for incredibly special cases that involve specific uses of POST and GET, which 95% of us don’t need. If you’re interested in the topic, the Mozilla Developer Network has some fantastic documentation on the different kinds of redirects. But in terms of your WordPress redirect, you’ll use mostly 301 with the occasional 302.
How To Create Redirects With WordPress
Subscribe To Our Youtube Channel
Creating a WordPress Redirect Using .htaccess
One of the most important files to a website is the .htaccess file. Standing for hyptertext access, it stands to reason that you can approve, deny, or redirect access to your site through it. While it may seem intimidating because of how utterly important it is that you don’t do anything wrong, the actual editing of the file to redirect is as simple as can be.
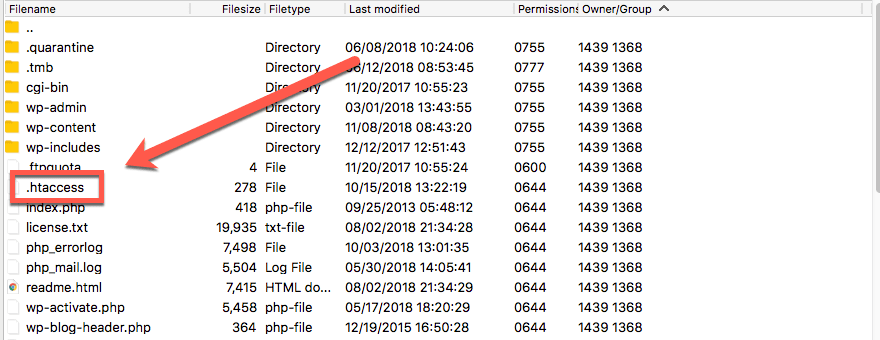
Use your favorite FTP program (likely FileZilla) to get into the root directory of your WordPress installation. Just under the core folders, you should see .htaccess.
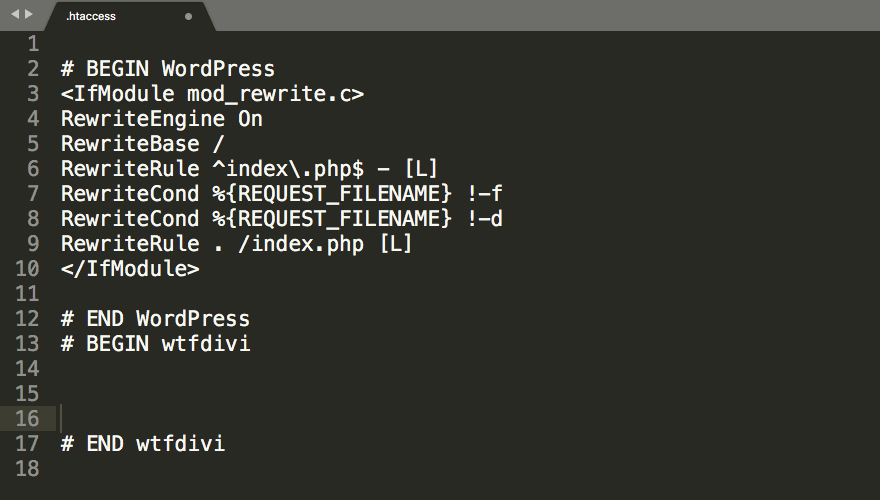
Open this in your text or code editor (I personally use Sublime Text).
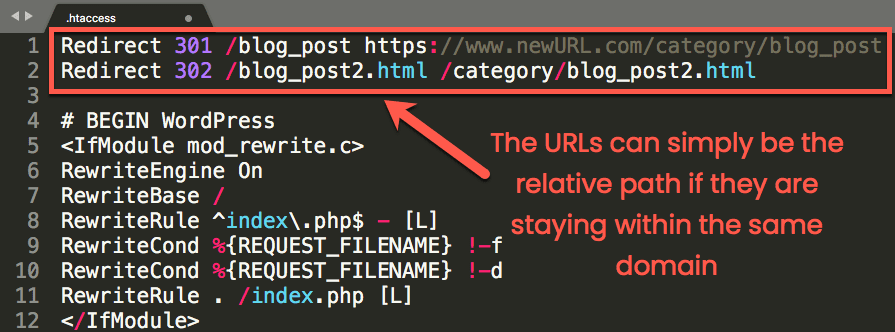
All you have to do for a WordPress redirect is add in a simple line of code just above the line that reads # BEGIN WordPress.
Redirect 301 / https://www.elegantthemes.com/
or
Redirect 302 / https://www.elegantthemes.com/
Note that either of these lines of code will redirect your entire site to the URL specified. If you want to redirect a specific page, post, or URL within your site, you will need to provide it as well as the destination URL. Both can be the relative path (if you’re staying on the same domain) and separated by a single space.
Redirect 301 /blog_post https://www.elegantthemes.com/category/blog_post
or
Redirect 302 /blog_post2.html /category/blog_post2.html
Additionally, you can use conditional logic with regex, too, if you need something more complex. Here is a really awesome list of special redirects you can use that way.
Regardless of which route you choose to enter the redirects, you need to save your .htaccess file as plaintext before you re-upload it to the server.
Creating a WordPress Redirect with a Plugin
If you’re not comfortable editing the .htaccess file for a WordPress redirect, don’t worry. You don’t have to. Because you’re using WordPress, there’s a plugin for that. Because WordPress. One of the top is called Quick Page/Post Redirect, and it works like a charm right out of the box.
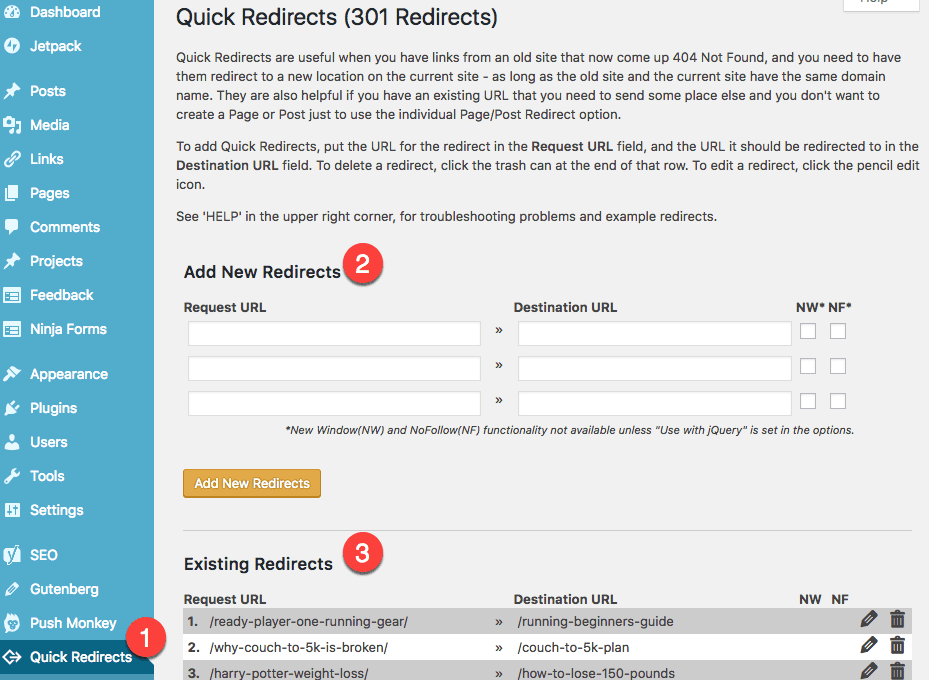
Setting up your redirects is as easy as can be. Once activated, Quick Redirects adds a new item to your admin dashboard called Quick Redirects. The default type of WordPress redirect is a 301 (they are the most common, after all), and you set them up simply by typing the origin and destination URLs into a couple of fields. Hit the save button, and you’re golden.
Additionally, you will see a list of your existing redirects (note in the image above how the ones I’ve used are all relative paths, not to a new domain, but that’s possible, too). If you don’t need the redirect anymore, you can trash it with a click, or you can edit the redirect for any number of reasons. For me, it’s when I sausage-finger an indecipherable typo.
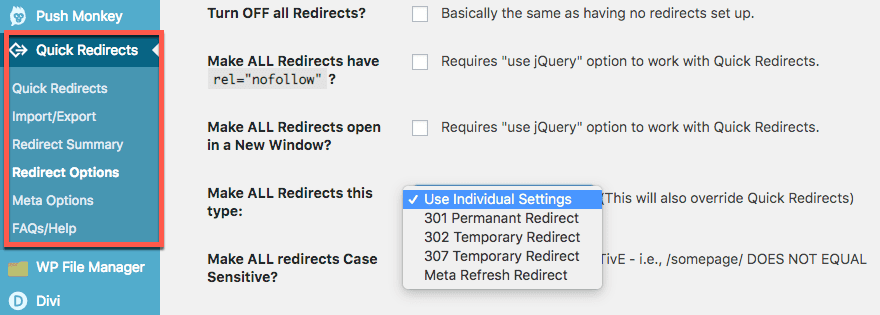
And finally, if you look into the Redirect Options, you will see an absurd number of choices that you can make, either creating rules that apply for all of your redirects or enabling settings that work with custom post types and meta boxes and so forth. It’s a lot to fiddle with.
Another Option
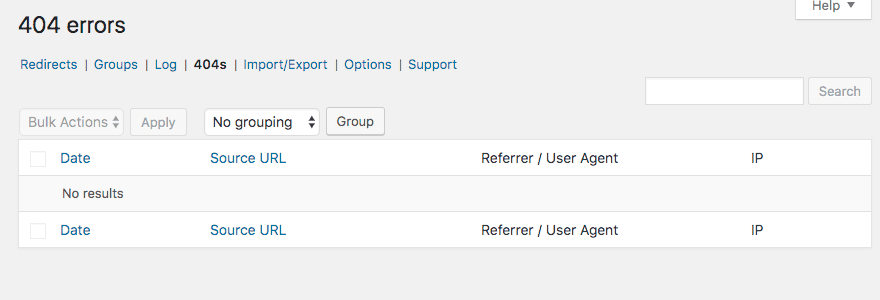
I have also used the Redirection plugin in the past before switching over to Quick Redirects because Redirection also allows for 404 page monitoring. You can see which pages are missing and set up a WordPress redirect rule so that anyone who visits there gets sent to an actually useful page.
I swapped to the other plugin because I started monitoring 404 errors through the Google Search Console and decided to go with a simpler solution. If you want both in your dashboard, Redirection isn’t a bad way to go.
Conclusion
Whether your site has moved to a new location, you’re changing your permalink structure, or somehow a WP update broke everything about your installation and you’re starting fresh…having a working knowledge of how to set up a WordPress redirect is pretty handy.
It doesn’t matter if you like digging into Core files or prefer to use plugins. Both are effective and achieve the same results in the end. So don’t be scared. Start playing around and see what works best for you. You might even find a way to improve rankings and SEO with just a few clicks.
What is your preferred method of setting up redirects for your websites?
Article featured image by Vectorpocket / shutterstock.com


