Weak passwords are some of the biggest security threats to WordPress websites. Once hackers have a password, they can gain access to the site and wreak havoc. That’s why it’s critical to enforce strong password security using a WordPress password policy plugin.
In this post, we’ll discuss why these WordPress security tools are essential. Then we’ll show you how to set up and use the Password Policy Manager plugin, exploring both the free and premium versions. Let’s jump in!
The Importance of Using a WordPress Password Policy Plugin
A WordPress password policy plugin is a tool that helps to enforce password rules on your WordPress site. These policies can boost your site’s security by making it harder for hackers to guess or brute force their way into user accounts.
Password policy plugins can also help reduce users’ chances of accidentally sharing their passwords with others. These tools can help establish a variety of password policies and best practices.
For example, one common policy is to require strong passwords. This setting helps ensure that users create complex and difficult-to-guess passwords.
Password plugins often also include auto password expirations to force users to periodically change their passwords. You may also want to use a password manager so your site admins can change user passwords as necessary.
There is no one-size-fits-all solution for WordPress password policies. However, when choosing a plugin for your site, you’ll need to consider your specific needs. Then you can select a tool that offers the level of security you require.
How to Secure WordPress With a Password Policy Plugin
Now that we understand why a WordPress password policy plugin can be so helpful, it’s time to learn how to set up and use one.
1. Use the Password Policy Manager Plugin
For this tutorial, we’ll be using the free version of Password Policy Manager Plugin.
This freemium tool can help you manage and enforce password policies on your WordPress site. It provides a simple interface for creating and implementing password policies, as well as managing user accounts and passwords.
With the WordPress Password Policy Manager plugin, you can:
- Set minimum and maximum password length requirements.
- Require passwords to contain a minimum number of uppercase, lowercase, and numeric characters.
- Set a password expiration policy.
- Force users to change their passwords after a set period.
- Manage user accounts and passwords.
Later in the post, we’ll briefly cover what you can expect from the paid version. But for now, let’s get the plugin up and running.
2. Download and Install Password Policy Manager
The WordPress Password Policy Manager plugin is free from the WordPress.org plugin repository. To get started, first download the Password Policy Manager plugin.
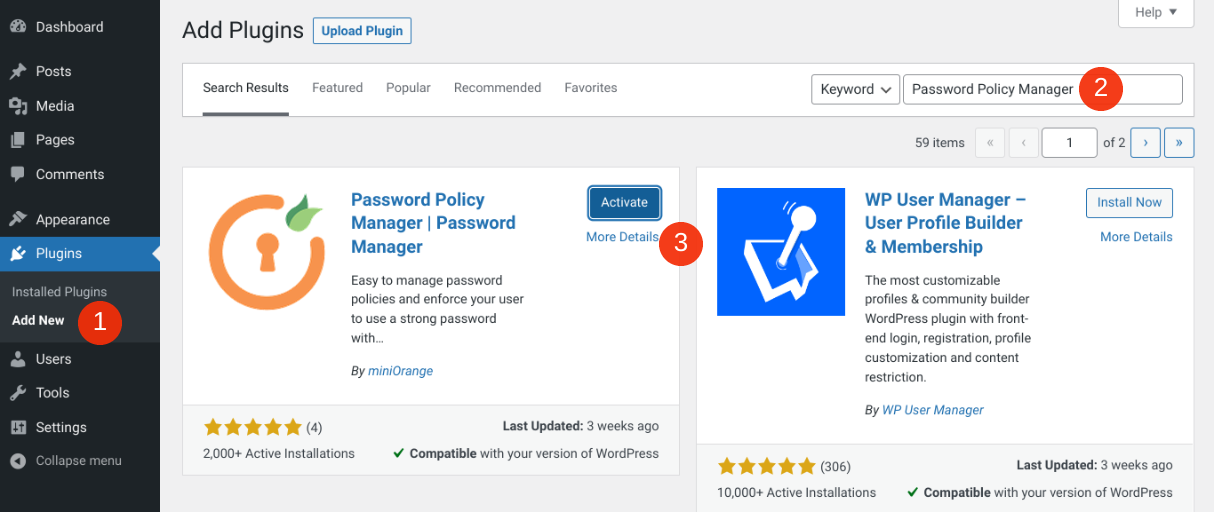
To install it, navigate to your WordPress Plugins screen and click on Add New (1), search for “Password Policy Manager” (2), then select the Install Now and Activate buttons (3):
Once activated on your site, the plugin will add a miniOrange Password Policy menu item to your admin area.
Step 2: Configure the Plugin Settings
After installing and activating the WordPress Password Policy Manager plugin, navigate to miniOrange Password Policy to begin configuring the plugin settings. There are a handful of pages and setting options you can go through here, so we’ll cover each in detail below.
Enable and Configure Password Policy Settings
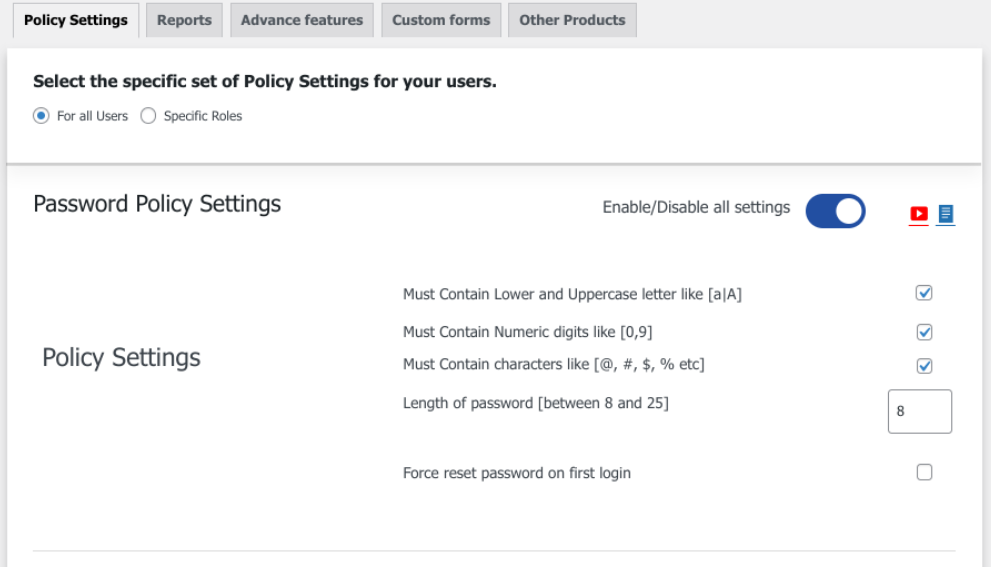
On the miniOrange Password Policy page, toggle the first option to enable the Password Policy Settings. Next, under Policy Settings, you can select all of the boxes to turn them on:
This setting will ensure that all passwords must contain:
- Lower and uppercase letters
- Numeric digits
- Characters
It will also let you determine a password length between 8 and 25 characters. By default, it will be set to “8”. You also have the option to Force reset password on login.
Enable Password Expiration Time
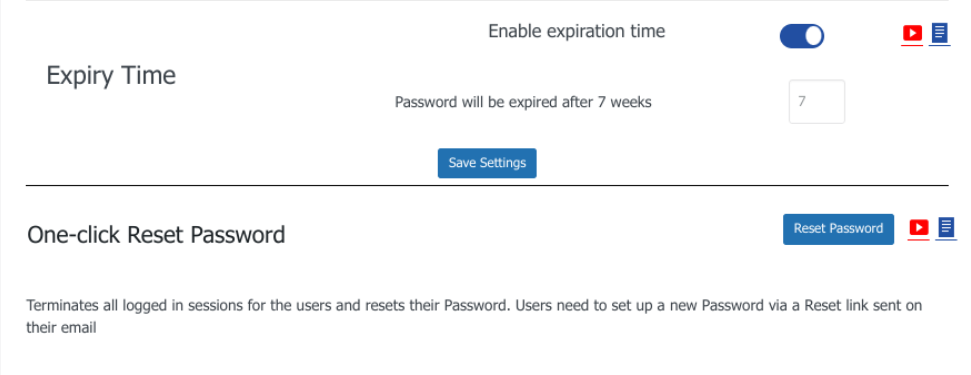
On the same page, you can set a password expiration policy. To turn on this feature, toggle the switch next to Enable expiration time under Expiry Time:
The expiration value is seven weeks by default, but you can change this. When you’re done, click on the Save Settings button.
Enable One-Click Password Reset
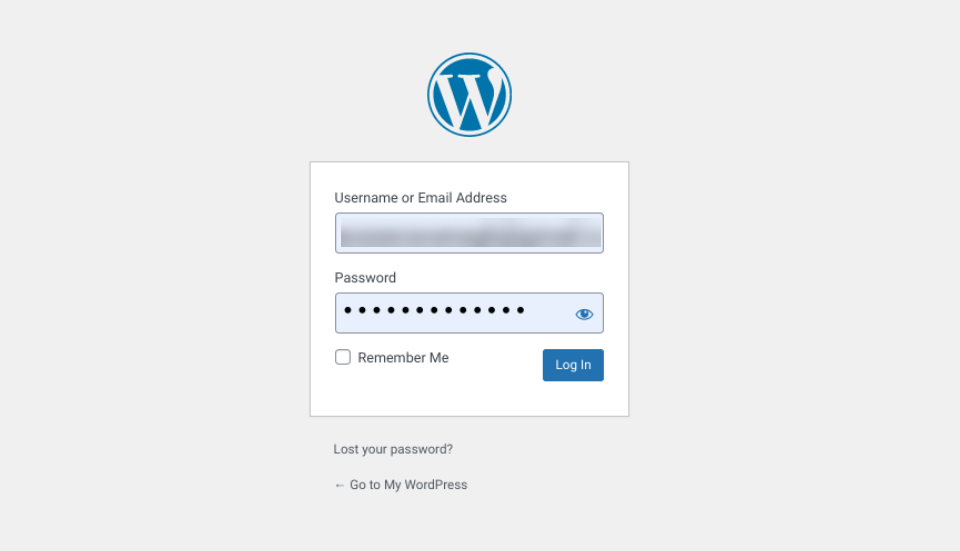
After saving your password policy, you can enable the one-click password reset option by selecting Reset Password. Now, when a user attempts to log in to your site, they will see a password reset page. Enter your credentials, then select Log In:
After logging in, you’ll be redirected to the Password Reset page. Your users will also receive an email with a link to reset their passwords:
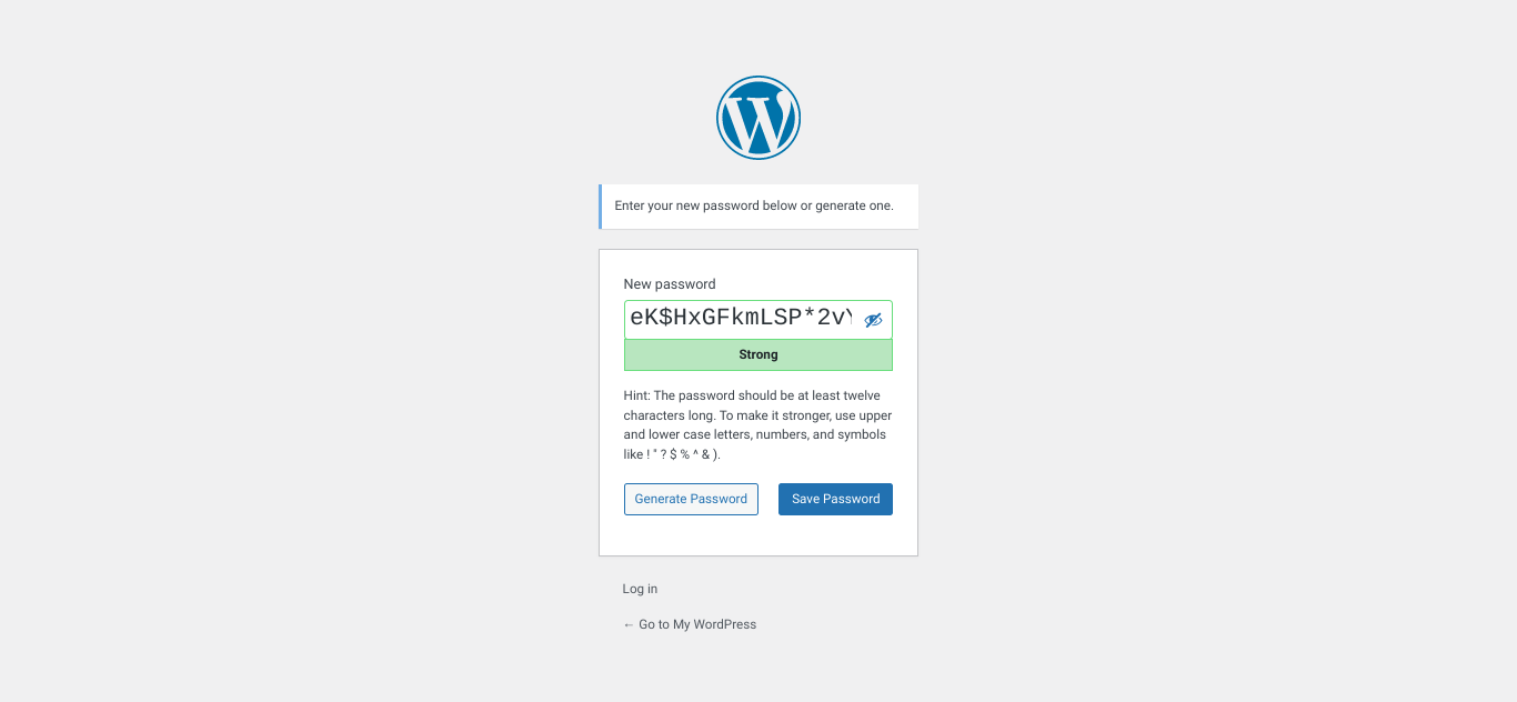
Users can create their own passwords (so long as they adhere to the password policy requirements) or select Generate Password to generate one automatically. Then they can click on the Save Password button.
Access Your Password Manager Reports
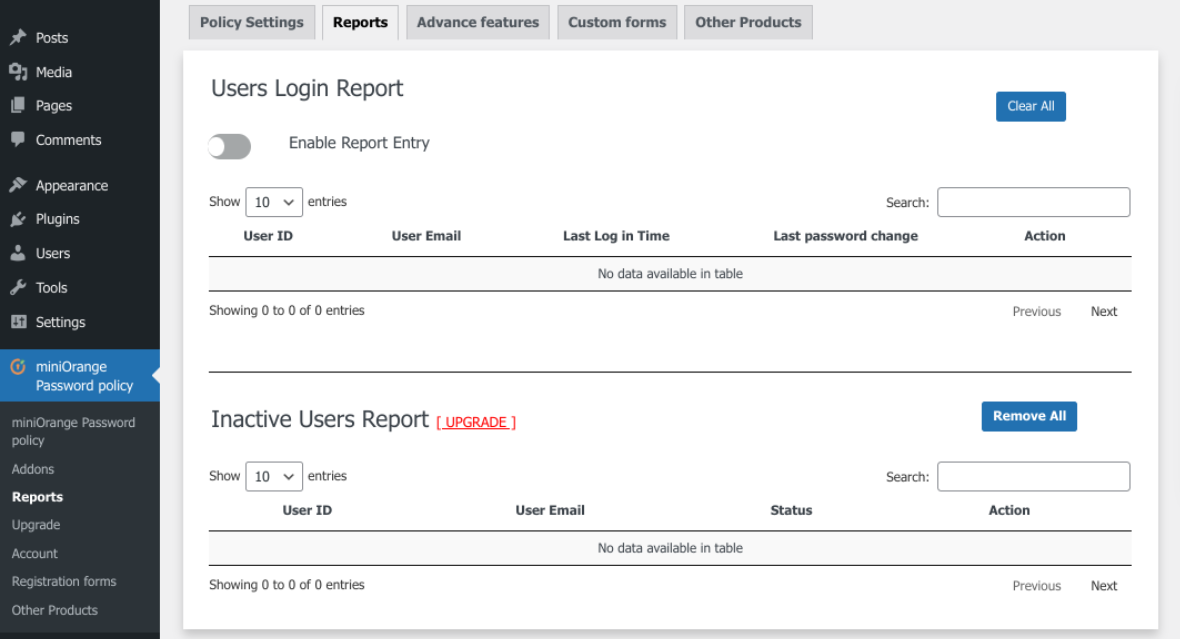
Password Policy Manager also lets you access and view reports for your users’ logins. You can access this data by navigating to miniOrange password policy > Reports:
Here you can view a range of information. This includes the user ID and email, the last time they logged in, and a history of their password changes. To activate the feature, just toggle the Enable report entry setting at the top of the screen.
Note that the free plugin only makes this feature available for active users. To view reports for inactive users, you’ll need the upgraded version.
What to Expect from the Premium Password Policy Manager
So far, we’ve covered the benefits and use cases of the free Password Policy Manager plugin. However, there is also a premium upgrade available.
The Password Policy Manager Pro plugin is an extension of the free WordPress Password Policy Manager plugin. It adds several additional features and settings.
Role-Based Password Policies
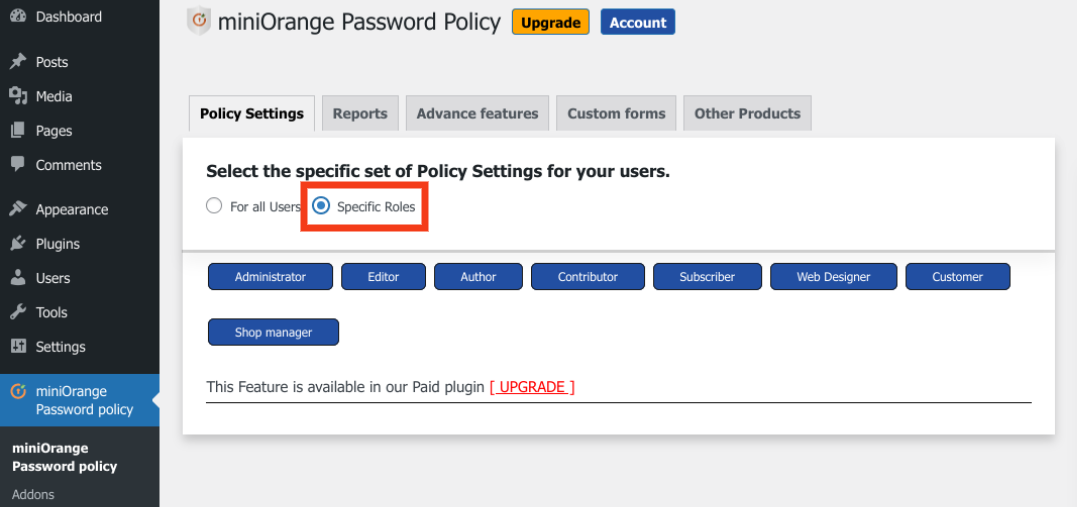
Firstly, you can manage password policies based on user roles. By default, this WordPress password policy plugin automatically applies your settings to all users. However, with the premium version, you can also customize the password policies by role.
To do so, select Specific Roles at the top of the Password Policy screen:
Next, click on a user role to specify its policy settings. You can adjust each role’s password policy, expiration, and one-click reset.
Advance Features
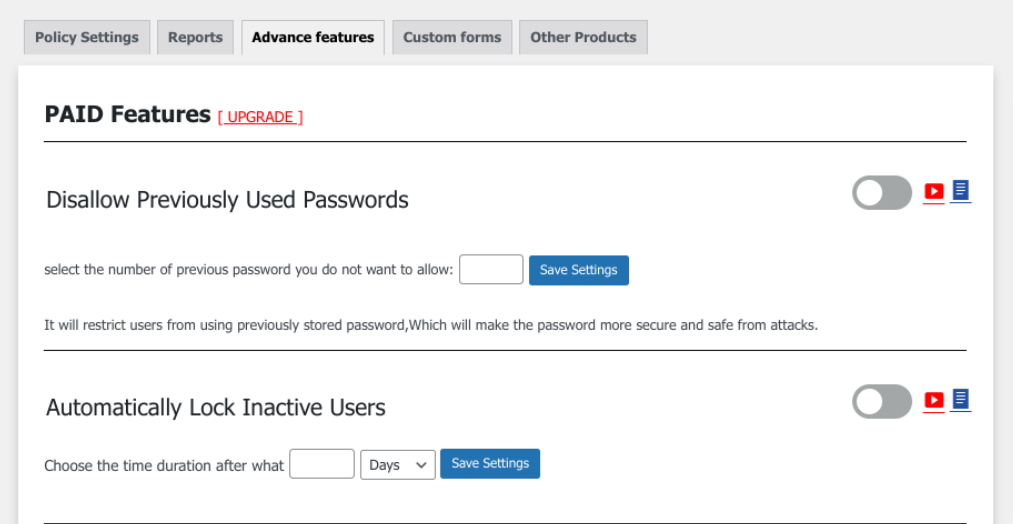
If you upgrade to the premium version, you can also find a handful of additional options under the Advance features tab:
These settings let you:
- Restrict users from using previously-stored passwords.
- Automatically lock inactive users after a certain period.
- Hide the reset password link from the WordPress login page.
- Generate a random and strong password according to the set policy on the password reset window.
- Add a password strength checker or score.
The Password Policy Manager Pro plugin is available for $79 for a single site license.
Conclusion
Weak password management can introduce a variety of security risks and vulnerabilities to your WordPress site. To heighten your website’s protection, we recommend using a WordPress password policy plugin such as Password Policy Manager.
As we discussed in this post, this freemium tool comes with a handful of helpful features that establish and enforce password policies. These include setting specific criteria for password creation, adding password expirations, and generating one-click password resets. While the free plan has these standard features, you can upgrade to the premium version for more advanced controls.
Do you have any questions about using a WordPress password policy plugin? Let us know in the comments section below!
Featured Image via Saxarinka/ shutterstock


