Are you looking to use FOMO and social proof notifications on your WordPress site?
FOMO, short for fear of missing out, is basically a marketing technique used to create anticipation and excitement for a product. It uses a basic psychology principle to help customers make a buying decision faster.
In this article, we will show you how to properly use FOMO on your WordPress website to increase conversions and sales.
What is FOMO and How Does it help with Conversions?
FOMO or ‘fear of missing out’ is a psychological term that describes anxiety about missing out on something exciting and trendy.
As a WordPress website owner, you can take advantage of this human behavior in your marketing strategy and improve your conversions.
The concept of FOMO is not new. It’s actually been used by marketers even before the arrival of the internet. However, with online marketing, FOMO has become far easier to implement and much more effective.
For example, if you run an online store, then you can create anticipation about an upcoming sale and limited-time offers by adding social proof to your landing pages.
You can also use it to build your email list, run affiliate marketing campaigns, boost app downloads, and more.
With that said, let’s take a look at how to easily add FOMO to your WordPress site. We will show you two techniques that we have successfully used on our own websites with incredible results.
Method 1: Adding FOMO with Social Proof by Using TrustPulse
People feel more comfortable with their buying decision when they know others have also bought the same product or service and had a good experience with it.
This is why smart business owners use social proof in their marketing.
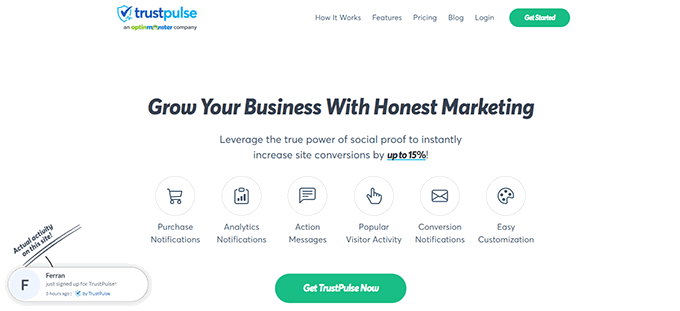
The best way to add social proof to your website is by using TrustPulse. It is one of the best social proof plugins for WordPress on the market.
TrustPulse allows you to display real-time user activity notifications on your website, such as products purchased, forms submitted, etc.
To get started, you’ll need to install and activate the TrustPulse plugin on your website. For more details, see our step-by-step guide on how to install a WordPress plugin.
The plugin helps you connect your WordPress site to the TrustPulse app.
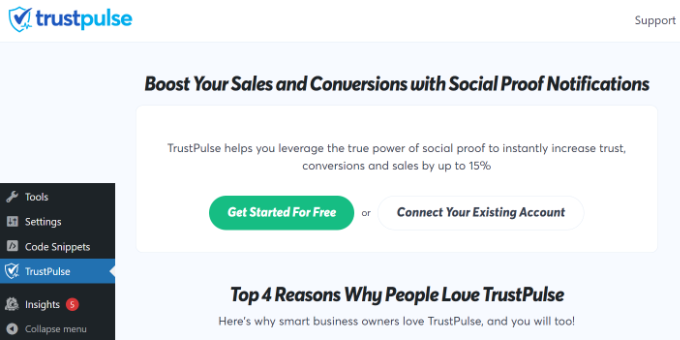
Upon activation, click on the TrustPulse menu from the WordPress admin sidebar and click the ‘Get started for free’ button to continue.
This will take you to the TrustPulse website, where you can sign up for a free account. The free plan is good for up to 500 sessions per month.
Once you sign up, you are ready to create your first campaign. Simply click on the ‘Create Campaign’ button to start your first FOMO campaign.
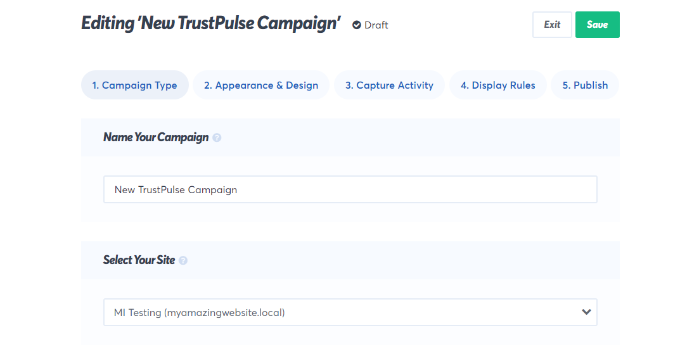
Next, you will need to provide a title for your campaign and select your website.
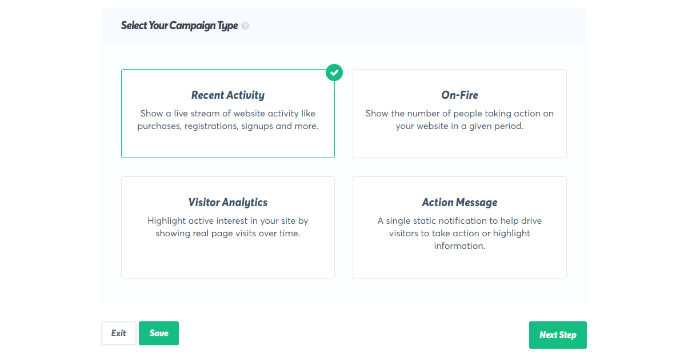
If you scroll down, then you can choose a campaign type.
TrustPulse offers 4 different campaign types to choose from.
These include showing recent activities, the number of people taking action, visitor analytics, or a static notification with helpful information.
After selecting a campaign type, don’t forget to click the ‘Next Step’ button.
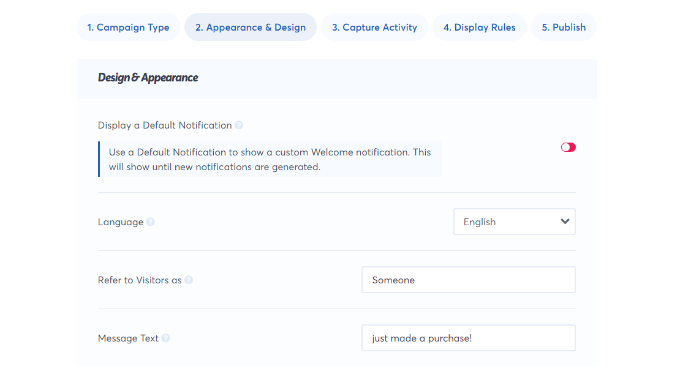
You can now head to the ‘Appearance & Design’ tab and choose language and appearance options for your campaign. You can change the position, badge image, style, and more.
Once done, click on the next step to continue.
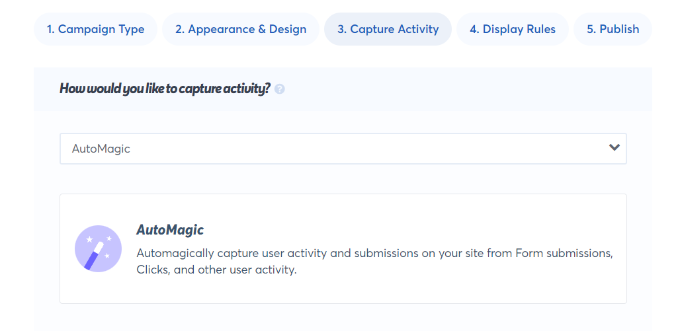
Next, you need to choose how you want to capture the activity.
We recommend using ‘AutoMagic,’ which allows you to select the activity that matches different conditions. For example, you can select your checkout page to automatically capture eCommerce activity.
You can also use Zapier to capture activities from 1000+ integrations.
Once done, click on the next step button to continue.
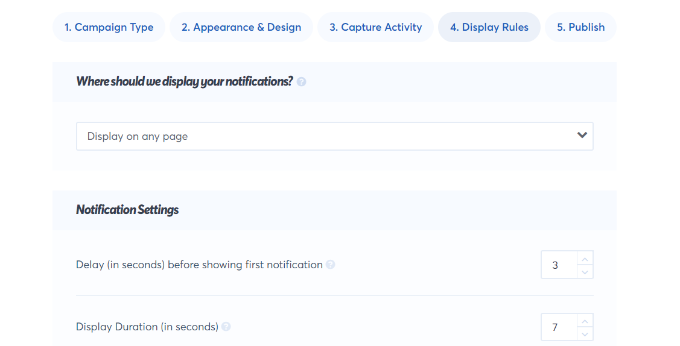
Next, you need to set up the display rules. You can display the badge on all pages or specific pages on your site. You can also choose the delay between notifications, run them as a loop, and enable mobile notifications.
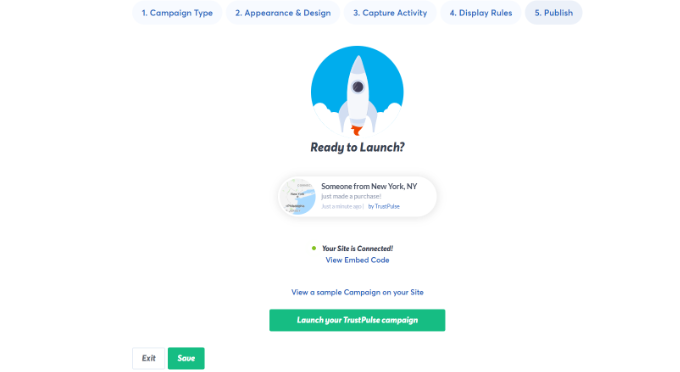
After that, click on the ‘Publish’ tab at the top.
In the next step, simply click the ‘Launch your TrustPulse campaigns’ button.
Don’t forget to click the ‘Save’ button to store your changes and then exit the campaign builder.
You can now visit your website to see your FOMO campaign in action.
Method 2: Adding FOMO Countdown Timers with OptinMonster
We have all seen marketers using ‘Urgency’ to get customers’ attention. Whether it is your local grocery store or a big name-brand website, it is one of the oldest marketing techniques, which works just as effectively online.
Basically, you show users an offer with a sense of urgency, which triggers the fear of missing out on a valuable deal and helps users make a purchasing decision.
Urgency hacks can be used with limited-time offers, seasonal sale campaigns, one-time discounts, and more. To learn more, see this article on using urgency to hack conversion rates with proven methods.
The best way to add urgency timers in WordPress or WooCommerce is by using OptinMonster. It is the most popular conversion optimization and lead generation software that helps businesses turn potentially abandoning website visitors into subscribers and customers.
First, you will need to sign up for an OptinMonster account. It is a paid tool, and you will need at least the ‘Basic’ plan to use their Floating bar campaigns.
After signing up for an account, you will need to install and activate the OptinMonster plugin. For more details, see our step-by-step guide on how to install a WordPress plugin.
This plugin is a connector between your WordPress site and the OptinMonster application.
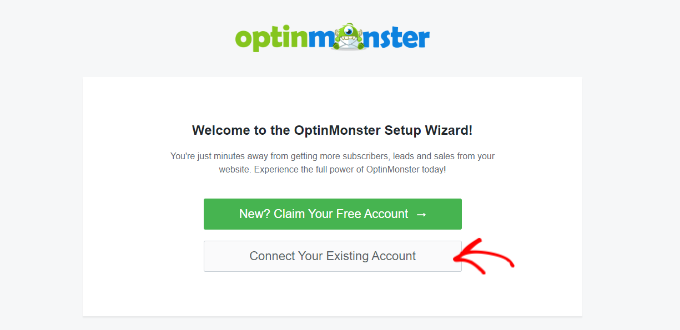
Upon activation, click on the ‘Connect Your Existing Account’ button on the OptinMonster welcome screen.
Next, you should see a new window open where you’ll be asked to connect your website.
Go ahead and click the ‘Connect to WordPress’ button.
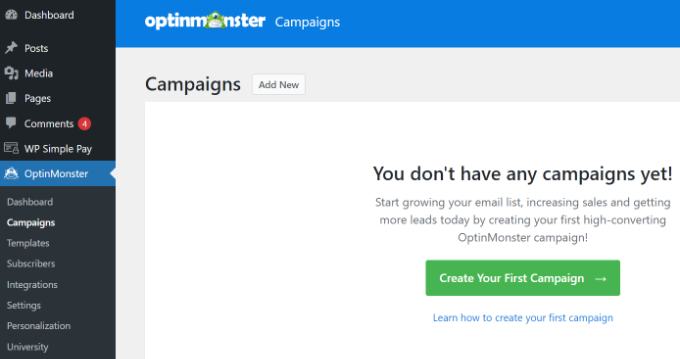
After connecting your website, you will need to go to OptinMonster » Campaigns from your WordPress dashboard.
From here, click on the ‘Create Your First Campaign’ button to continue.
This will launch the OptinMonster campaign builder.
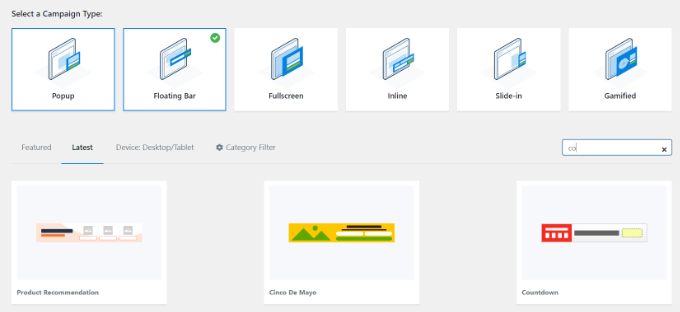
First, you will need to select an optin type and then select a theme. We will use a ‘Floating bar’ campaign with the ‘Countdown’ theme.
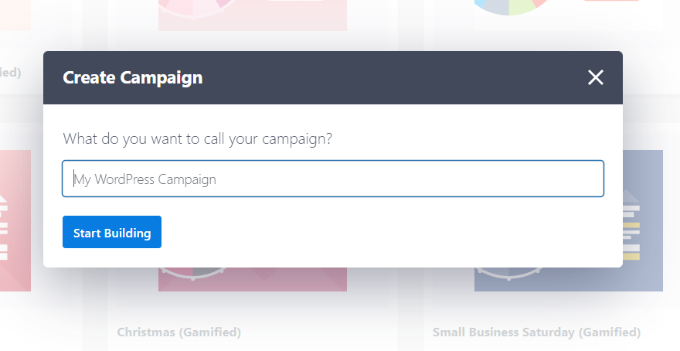
Next, you will be asked to choose a name for your campaign.
Once that’s done, simply click the ‘Start Building’ button.
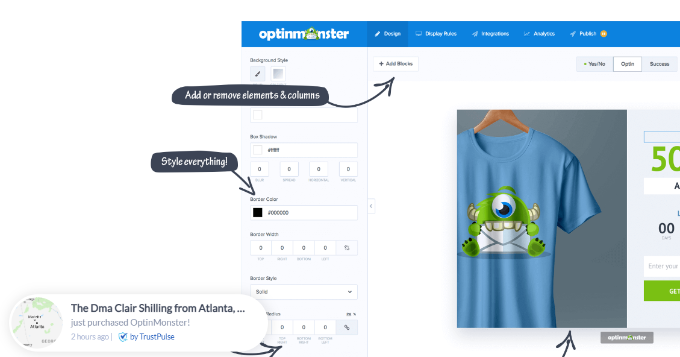
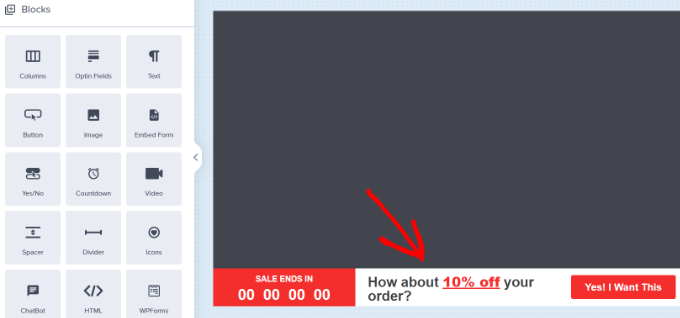
On the next screen, you’ll see the drag-and-drop tool, where you can simply point and click to design your campaign.
You’ll see a live preview of your campaign in the right panel and a bunch of customization blocks and options in the left panel.
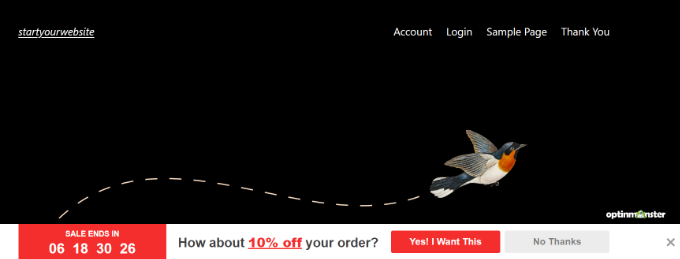
With the floating bar countdown campaign, the preview will appear near the bottom of the screen for you, just as it does for the users.
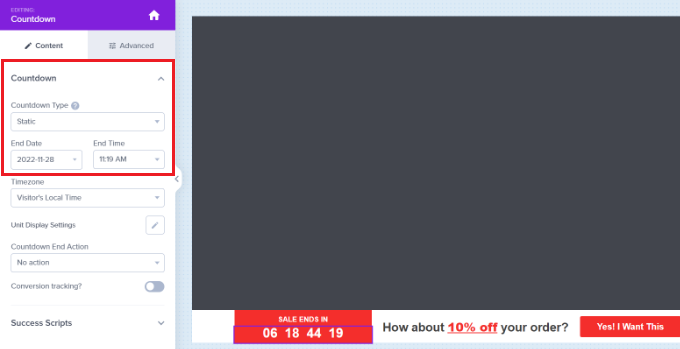
Go ahead and click on the countdown timer in the live preview to set the countdown style and end date. You can use two types of countdown timers: Static and Dynamic.
The static timer remains the same for all your users, while the Dynamic timer changes based on user behavior on your website.
For this tutorial, we will be using the static timer. Since we are using a floating bar with a countdown theme, we can move the floating bar to the bottom or the top.
You can just point and click to edit the text in your floating bar. You can add a coupon code, add links to special offers, and style it any way you want.
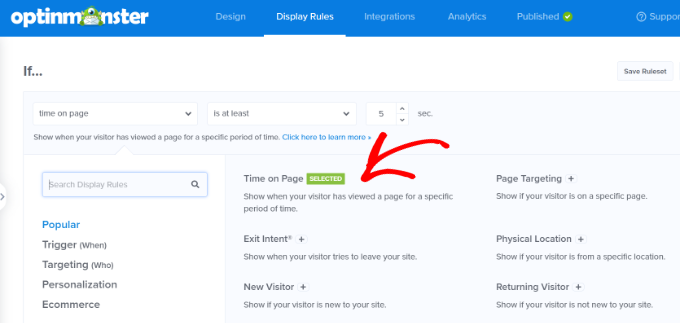
Next, you can go to the ‘Display Rule’ tab at the top. Here, you’ll see different options for showing your campaign.
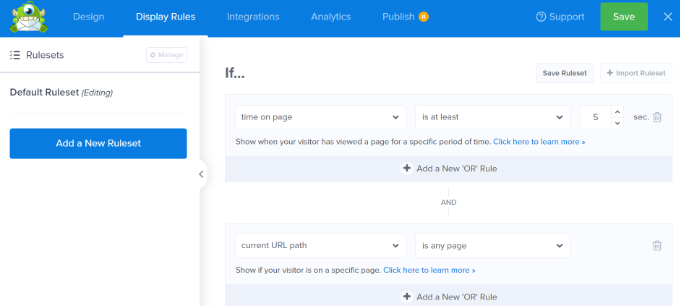
For instance, you can select the ‘Time on Page’ option and show the floating bar after a user spends at least 5 seconds on your website.
Below that, you also get to select the location for your campaign. We’ll use the default setting where the countdown timer floating bar will appear on all the pages on your website.
Once you are satisfied, don’t forget to click on the ‘Save’ button at the top.
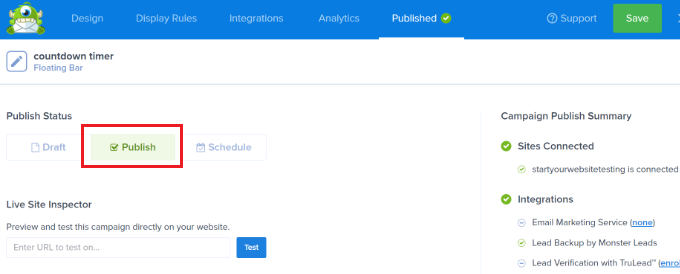
After that, head to the ‘Publish’ tab. Now, change the Publish Status from Draft to Publish.
Don’t forget to click the ‘Save’ button and close the campaign builder.
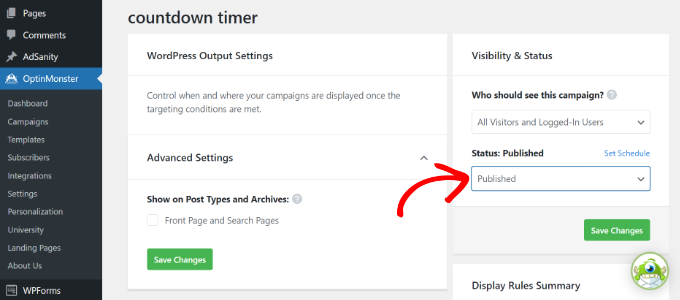
You will now see the WordPress Output settings for your recently created campaign.
By default, your campaign will be disabled, and you just have to click on the Status dropdown menu to change it from Pending to Published.
Once that’s done, click the ‘Save Changes’ button.
You can now visit your website to see your countdown timer FOMO campaign in action.
Tracking Your Conversions in WordPress
FOMO techniques work really well for conversions, but how do you keep track of their performance? Without tracking, you wouldn’t know how many sales or leads were generated because of these campaigns.
All expert marketers use Google Analytics. It not only helps you see where your users are coming from but also allows you to track user engagement on your website.
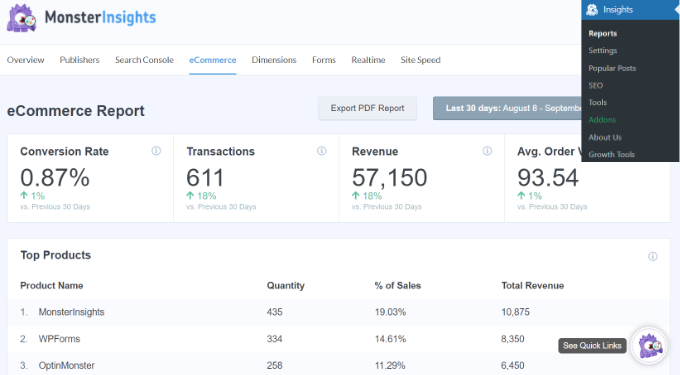
The easiest way to use Google Analytics in WordPress is through MonsterInsights. It is the best Google Analytics plugin for WordPress and makes it super easy to track conversions on your website.
For instance, it has an eCommerce addon, which helps you track your eCommerce performance without leaving the WordPress dashboard. Plus, you can also track form conversions, link clicks, and more with MonsterInsights.
For more details, please see our guide on WordPress conversion tracking make simple.
We hope this article helped you learn how to add FOMO to your WordPress website and boost conversions. You may also want to see our list of must-have WordPress plugins for business websites and how to start a WordPress blog.
If you liked this article, then please subscribe to our YouTube Channel for WordPress video tutorials. You can also find us on Twitter and Facebook.


