[ad_1]
When running an online store, it’s important to make sure shoppers have an easy way to find what they’re looking for and learn whether specific products are available. One of the most efficient ways to do this is to use the Filter Products by Stock WooCommerce block. This element lets visitors see what’s in or out of stock, as well as what’s on backorder.
In this post, we’ll explain how to add the Filter Products by Stock WooCommerce block to your posts and pages, and explore its various settings. Then we’ll provide you with some tips on how to use it effectively, and wrap up with some frequently asked questions.
Let’s get started!
How to Add the Filter Products by Stock WooCommerce Block to Your Page or Post
The Filter Products by Stock WooCommerce block lets users filter products based on inventory status. For example, they can sort through your store by what’s in stock, out of stock, or on backorder.
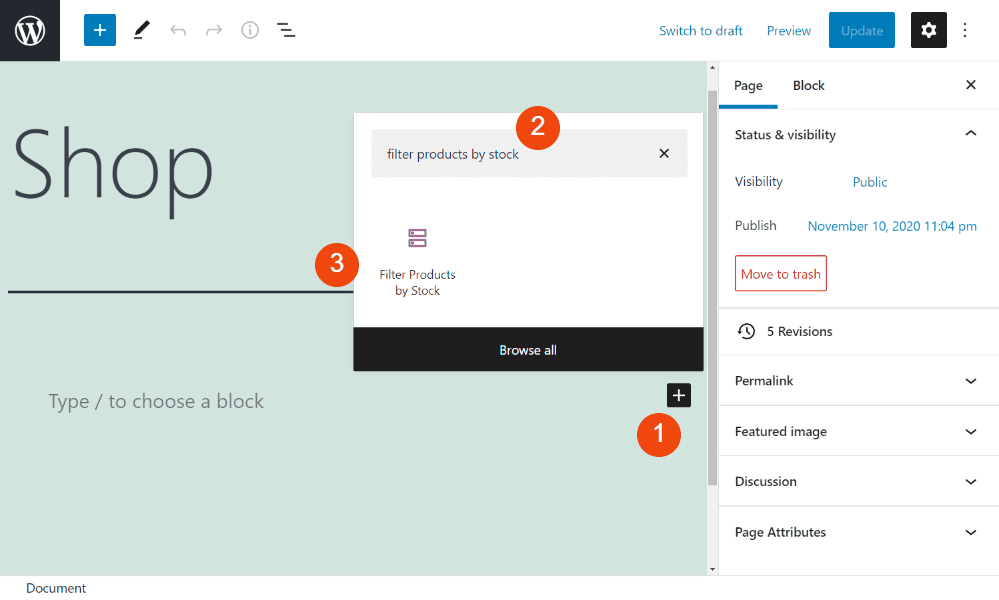
Placing this block in your posts and pages is quick and easy. To get started, navigate to where you want to insert it (such as your Products page). Next, click on the Add Block button (1), search for “filter products by stock” (2), and select the first option (3):
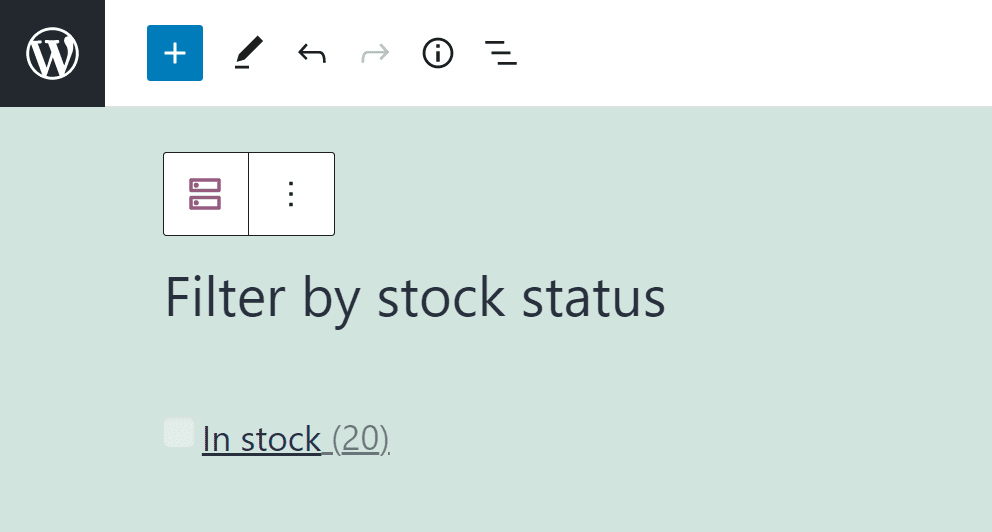
Alternatively, you can find the block by typing “/filter products by stock” into the paragraph block of the WordPress editor and hitting your Enter key. When you place the block, it shows you a header and a product count of your current inventory:
If you want to change the block’s heading, you can simply click within the “Filter by stock status” text box to modify it. There are also various other ways for you to customize this block.
Filter Products by Stock WooCommerce Block Settings and Options
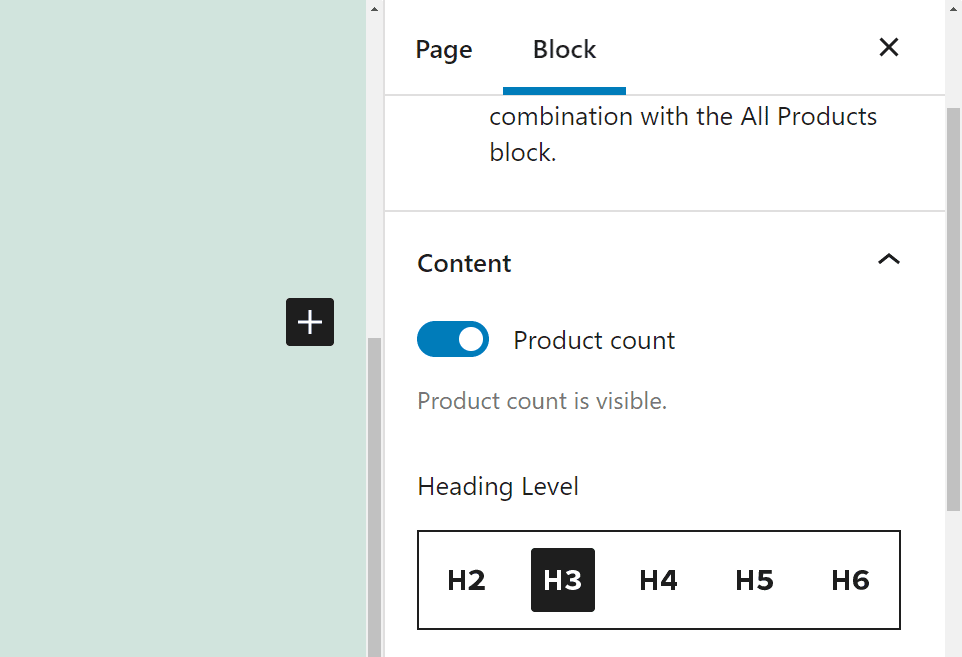
The Filter Products by Stock WooCommerce block lets you show how many products there are for each inventory category, choose the heading level you want to use (H2, H3, H4, etc.), and add an optional button. Let’s take a closer look at each of these options.
Under the Content section, you can choose whether or not to display the total product count, an option that is turned on by default. Under Heading Level, you can select which level to set for the “Filter by stock status” heading:
Other than that, the Filter Products by Stock WooCommerce block doesn’t give you many options for customizing it. However, you can add a Filter button. If enabled, this will add a button labeled “Go” next to the filter on the front end of your store.
This is an excellent element to use with other WooCommerce blocks, such as the All Products block. It can be also be used alongside other filter-related elements, which we’ll discuss next.
Tips and Best Practices for Using the Filter Products by Stock WooCommerce Block Effectively
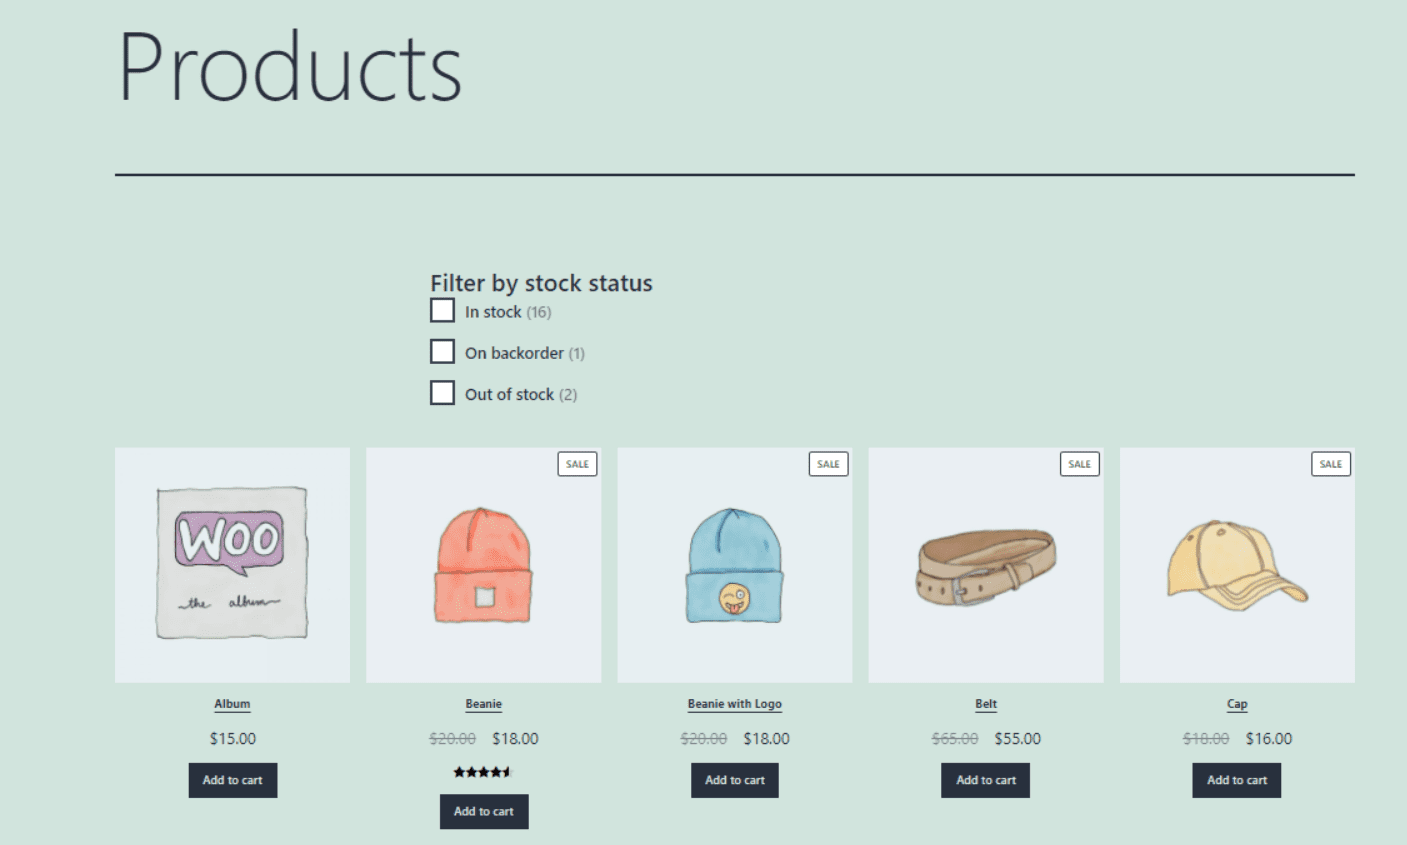
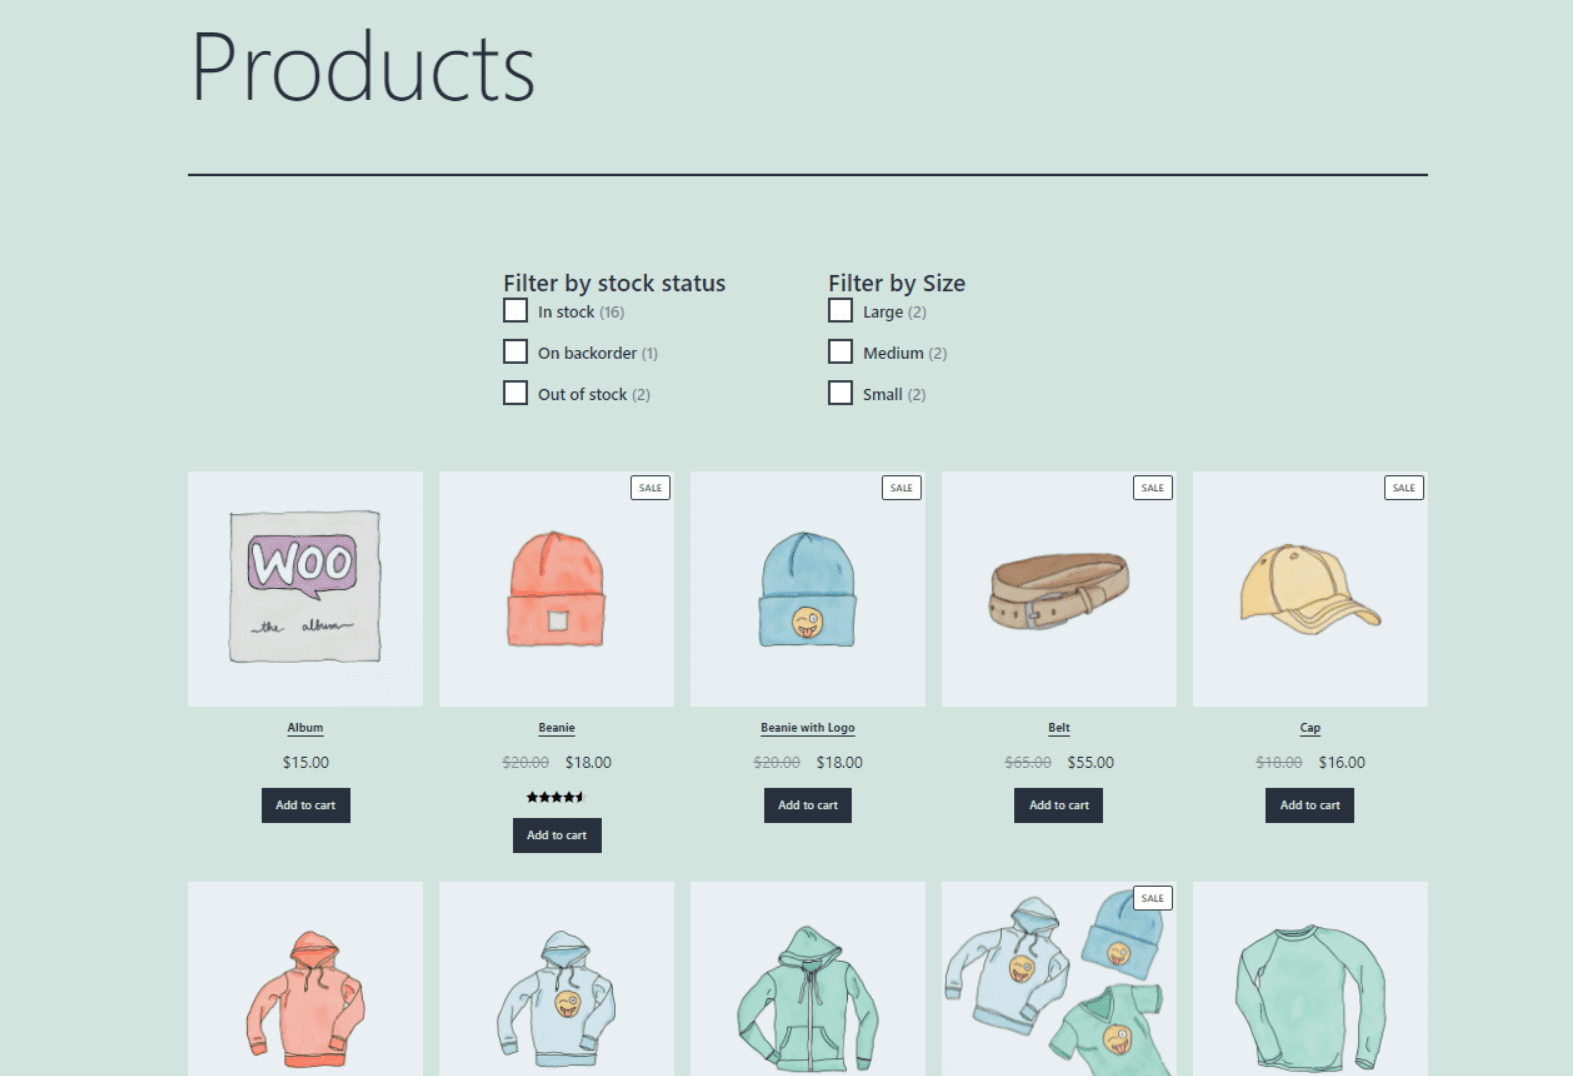
When you preview your block on the front end, it will look something like this:
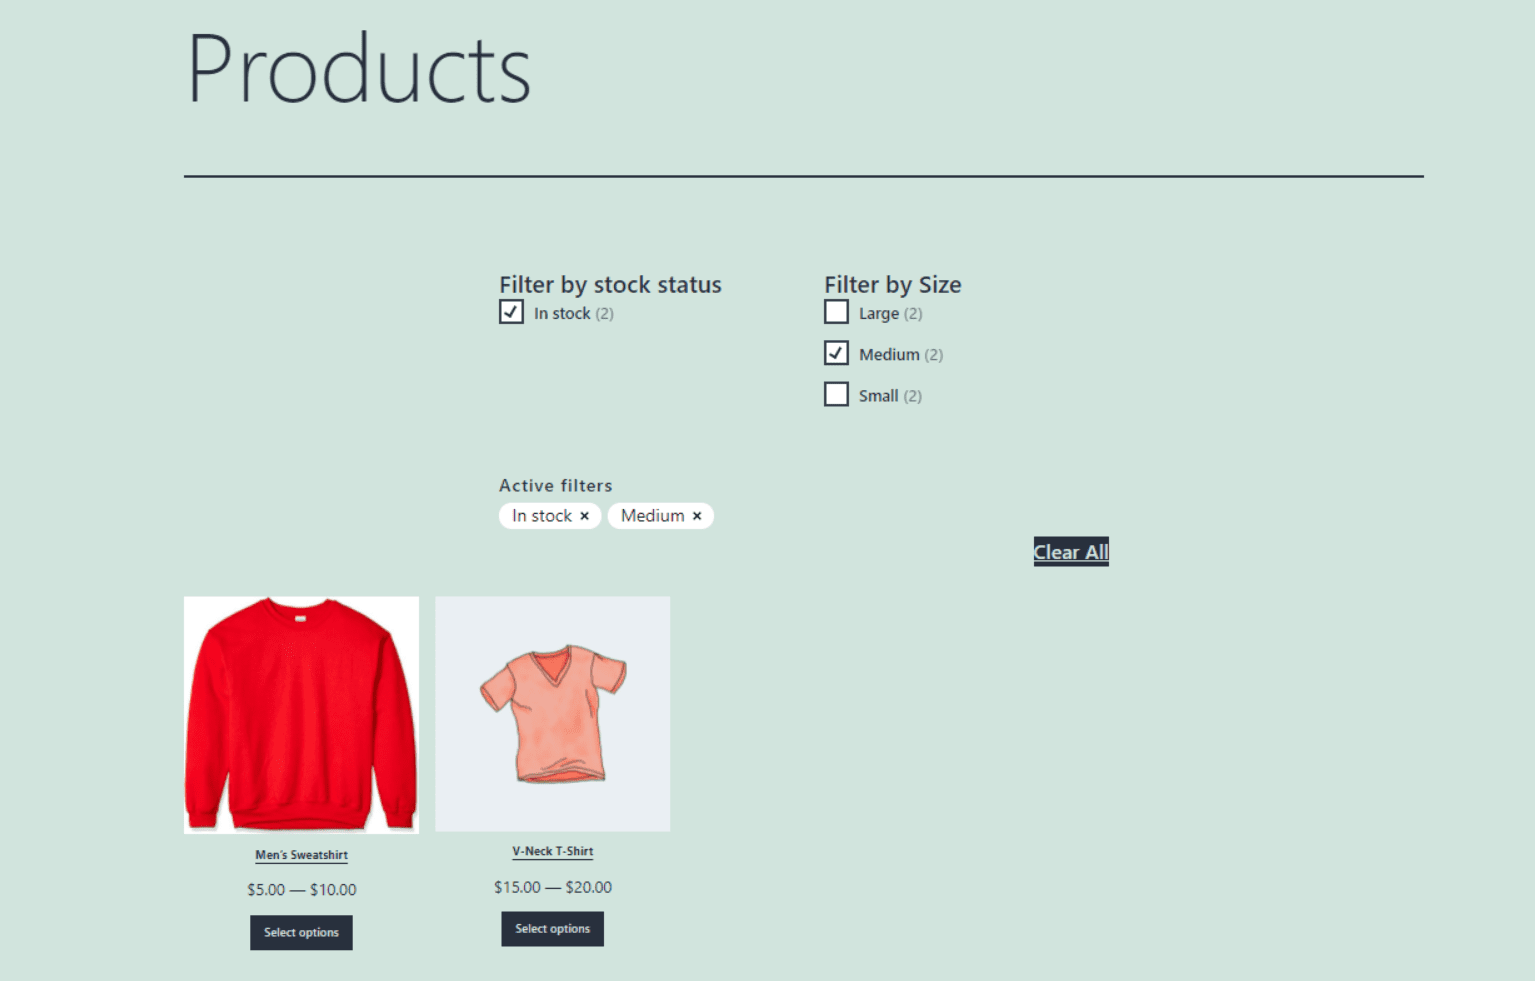
Note that to use the Active Product Filters block, you need to add either the Filter Products by Status, Filter Products by Attribute, or Filter Products by Size block as well. You can combine the Filter Products by Status block with the others to give your customers the most specific search experience possible.
For example, instead of only letting visitors filter products by what’s in stock, you can also let them search for an item that is both in stock and of a certain size:
When adding multiple filter blocks to your shop page, it’s best to place them near the top. You can also organize them horizontally into columns via the Columns block. Arranged this way, they won’t push your products too far down on the page.
Also, we recommend adding the Active Products block below the other filter elements:
If you’re trying to decide whether you should display the product count next to the stock status, consider how much of each inventory you have on hand. For example, if shoppers can see that you have more items out of stock and on backorder than you do available, it might be discouraging.
Frequently Asked Questions About the Filter Products by Stock WooCommerce Block
We’ve discussed just about everything there is to know about the Filter Products by Stock WooCommerce block. However, to make sure we’ve covered all the essential points, let’s answer some frequently asked questions.
What Other Blocks Can I Use to Filter Products on My Site?
You can also use the Filter Products by Attribute and Filter Products by Price blocks. The Attributes block lets you filter products based on elements such as color and size. With the Filter by Price block, you can sort products based on price ranges.
Where Should I Place the Filter Products by Stock Block?
You can use the Filter Products by Stock block on any of your WordPress posts and pages. You can also add it as a WordPress widget. Naturally, you’ll want to add it to your main shop page. However, you can also use it with the All Products block elsewhere on your site.
How Do I Update the Inventory Status of Products?
Giving your shoppers the option to browse your store using the stock filter isn’t very helpful if the inventory statuses aren’t updated. To modify the availability of an item, you can navigate to Products > All Products in your WordPress dashboard.
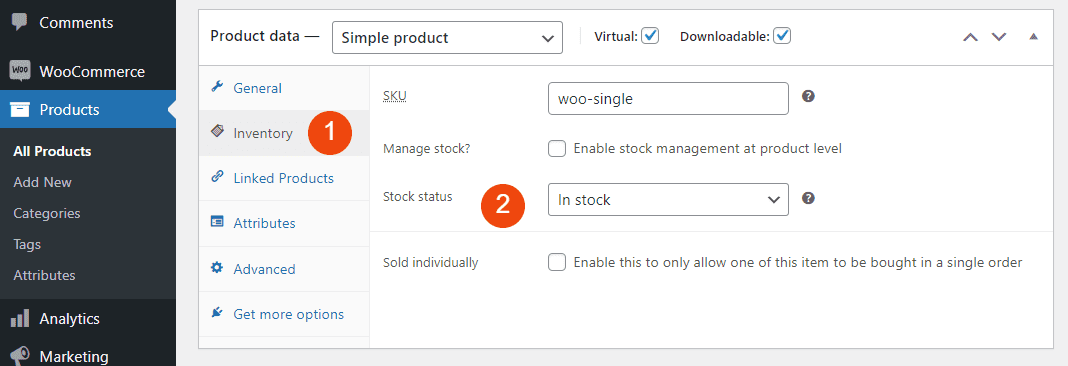
Locate the product’s name that you want to update, and then click on Edit. Beneath the editor, under the Product data section, select the Inventory tab (1):
Next, you can click on the Stock status drop-down menu to change it (2). Click on the Update button to save your changes when you’re done.
Conclusion
Adding filters to your online store can help enhance the shopping experience for your customers. It enables them to find what they’re looking for quickly. There are a handful of blocks you can use, depending on how you want them to be able to sort your offerings. If you want to let users see what is (and isn’t) available, you can use the Filter Products by Status WooCommerce block.
You can use this block to show your inventory, including what’s backordered. It also lets you display a product count next to each category. To give your customers a complete filtering experience, we recommend using this element alongside the Active Filters, Filter Products by Price, and Filter Products by Attribute blocks.
Do you have any questions about using the Filter Products by Stock WooCommerce block? Let us know in the comments section below!
Featured Image via TarikVision/shutterstock
[ad_2]
Source link

