SMTP can be a lot more reliable than the typical mail function in WordPress. There may come a time where the standard PHP mail function in WordPress stops working properly, causing you to run into problems with getting emails to send and receive emails correctly. You’ll want to connect your site to an SMTP server if this is the case.
You need to use your email provider’s server, which means retrieving the SMTP settings in most cases. We’ll go over how to set up these types of settings using the Easy WP SMTP and WP Mail SMTP plugins in the first section. Instructions on how to connect your site to Gmail’s servers are in the second section.
So let’s get right to it!
How to Use SMTP with Most Email Providers
These instructions will work with most email providers, including the branded emails you created with your host inside of cPanel. These instructions used to work for Gmail SMTP integration with WordPress, but you’re likely to run to issues these days due to the security changes Google has made in regards to SMTP. Continue to the next section to find more reliable instructions on how to set up SMTP with Gmail inside of WordPress.
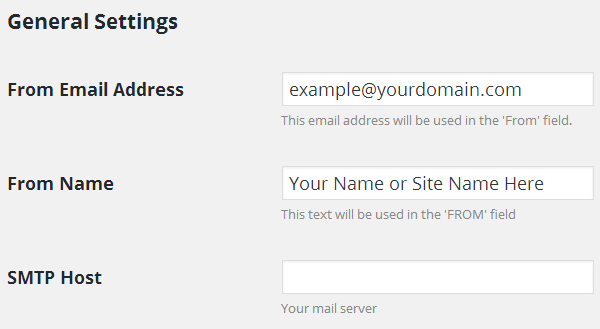
Install and activate the Easy WP SMTP plugin in WordPress, and open its settings to get started. You can also use the WP Mail SMTP plugin.
How to Configure These Plugins
Enter the email address and name you’d like your emails to be sent from in the From Email Address and From Name fields. Set the SMTP Authentication setting to Yes if the plugin hasn’t done that for you already. Enter the email address and password you use to log into your email account in the SMTP Username and SMTP Password fields. Click Save Changes
The SMTP Host, Type of Encryption and SMTP Port settings are dependent on the email host you use.
Finding Your SMTP Settings in cPanel
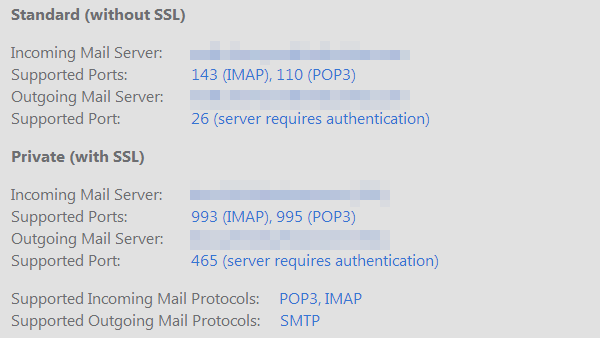
If you’re using your host to create branded emails, open cPanel, scroll down to the Email section, and select Email Accounts or Email Manager.
If there’s a dropdown menu for each individual email account, open the dropdown menu for the email you wish to use, and select Configure Email Client. If you’re using a different version of cPanel, click Email Configuration in the menu on the right-hand side of the Email Manager section, and select the email account you’d like to use.
Use the Outgoing Mail Server and the Supported Port underneath it in the settings in Easy WP SMTP. If you’re using the SSL settings, copy the Outgoing Mail Server URL, and paste it in the Host field in Easy WP SMTP. Select SSL as your Type of Encryption, and enter the Supported Port number in the Port field.
If you’re using the non-SSL settings, follow the same steps, but set the Type of Encryption to TLS.
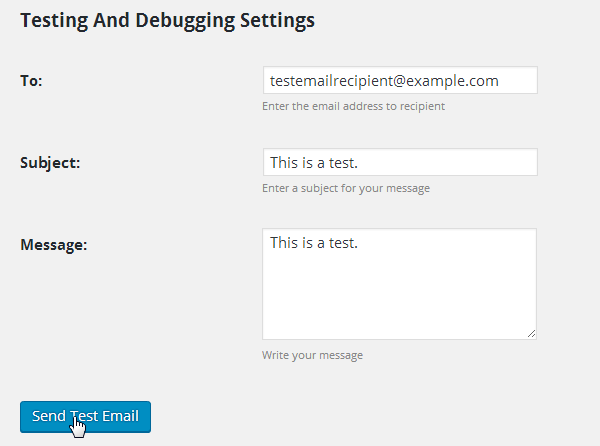
Click Save Changes once you’re done, and send a test email in the Testing and Debugging Settings section. You can also run a test by leaving a random comment on one of your blog posts if you have the Email Me Whenever Anyone Posts a Comment setting selected in the Discussion settings.
Asking Your Email Provider for Help
Some email providers display their SMTP settings in the support sections of their websites while others simply don’t. If you’re having trouble finding the specific settings your email provider uses, you may need to contact them directly.
Make sure you get all of this information:
- The server
- The port number
- Type of Encryption Needed – None, SSL or TLS
- Authentication Needed – Yes or No
Make sure you also tell them why you need the information and who’s hosting your website. Some web hosts block certain servers, which causes errors when sending and receiving emails.
If nothing seems to be working and you’ve only tried one of the plugins mentioned above, uninstall it, and try the other plugin.
How to Use SMTP with Gmail
Gmail is one of the most popular email providers on the web, meaning your emails are less likely to be marked as spam if you send them using Gmail’s servers. You can create your own branded emails with Google Apps for Work. These instructions will work for both branded email addresses and regular @gmail.com email addresses.
Using the Correct Plugin
Using Gmail’s servers to send email from WordPress used to be as simple as configuring a few settings in the WP Mail SMTP and Easy WP SMTP plugins, but this is no longer the case. Google has made a few security changes that make these plugins more difficult to configure, so your best bet is to use the Postman SMTP Mailer/Email Log plugin instead.
Once you install and activate the plugin, open its settings by selecting it from the Settings menu in the WordPress admin area. Click the Show All Settings link under the large Start the Wizard button.
Select Gmail API for Type under the Transport settings. Your Authorized JavaScript Origins and Authorized Redirect URL fields are already filled in. You’ll need these details later.
You’re required to create a Client ID inside of the Google Developers Console in order to fill in the Client ID and Client Secret fields.
Creating a Client ID with Google Developers Console
Make sure you’re signed into the Gmail account you’d like to use to send emails from WordPress, then open the Google Developers Console.
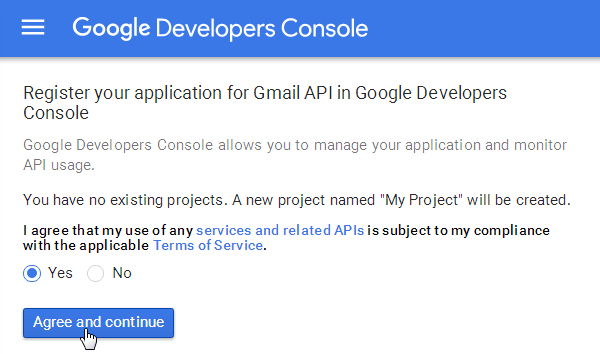
Select the Google Account you’d like to use to send your emails. You’ll be asked whether or not you’d like to register your application for the Gmail API in Google Developers Console. Select Yes, and click Agree and Continue.
Click Go to Credentials once the API is enabled.
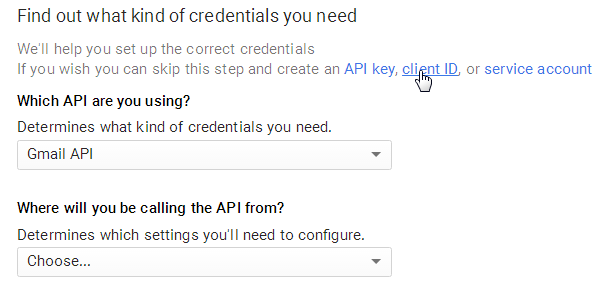
Once you’re on the Credentials screen, find the text underneath the Find Out What Credentials You Need section that says, “If you wish you can skip this step and create an…” Select Client ID.
Click the Configure Consent Screen button. You’ll be taken to the OAuth Consent Screen tab. Your email address should already be selected for you. Select it if it isn’t. Type “Postman SMTP” in the Product Name Shown to Users field. Click Save at the bottom of the page.
Now you can create a Client ID. Select Web Application as your Application Type. Now you’ll need the information that was filled in for you inside of the Settings screen of the Postman SMTP plugin.
Copy your URL from the Authorized JavaScript Origins field on the Settings page of the Postman SMTP plugin, and paste it in the Authorized JavaScript Origins field in the Google Developers Console. Do the same with the Authorized Redirect URL fields, and click Create at the bottom of the page in Google Developers Console.
You now have a Client ID and Client Secret.
Configuring the Postman SMTP Plugin
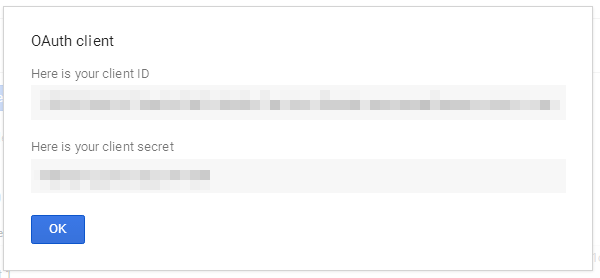
A pop-up box that contains your OAuth Client information should appear after you create your Client ID. Copy the Client ID, and paste it in the Client ID field on the Postman SMTP settings page. Copy the Client Secret from the OAuth Client, and paste it in the Client Secret field in Postman SMTP.
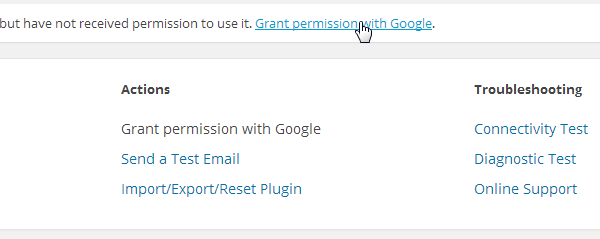
Click the Save Changes button on the Postman SMTP Settings page. You should see a notice at the top of the page that states you need permission from Google. Click the Grant Permission with Google link.
You’ll be taken to a page that says “Postman SMTP would like to view and manage your mail.” Click Allow.
Now Postman SMTP is ready to send emails for you, but there’s one final step. Click the Message tab on the Settings page. Enter the email address and name you’d like your emails to appear to be sent from in their respective fields. Click Save Changes at the bottom of the page.
Sending a Test Email
Click Send a Test Email under the Actions heading. Enter a recipient, and click Next. The message should send without failure. Go over these steps, and make sure you didn’t miss anything if the message fails to send. Make sure you granted permission with Google.
You can also leave a random comment on one of your blog posts to test if things are working correctly, but this depends on whether or not you’ve asked WordPress to send you an email whenever someone leaves a comment in the Discussion settings.
Final Thoughts
SMTP servers can cut down on the amount of issues you encounter with sending and receiving emails through your WordPress site, but they can also be a pain to set up. If you’re having trouble figuring our your email provider’s settings, don’t hesitate to contact them directly for help.
If you have trouble using your email provider’s settings, consider setting up a Google Apps for Work Gmail account or a standard Gmail account specifically for this function, and use the Postman SMTP plugin to set everything up. SMTP settings aren’t required when you go with this method.
Do you have any tips on how you set up SMTP on your WordPress site? Share them in the comments below.


